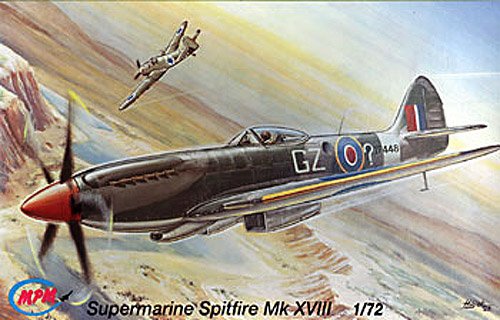
MPM 1/72 Spitfire 18
|
KIT # |
? |
|
PRICE: |
€ 7.00 |
|
DECALS: |
One aircraft |
|
REVIEWER: |
|
|
NOTES: |
Kitbashed with Fujimi Spit XIV |
|
HISTORY |
The Spitfire XVIII appeared just too late for use in the Second World War, with the first delivered to the RAF in May 1945. As a result, only about 500 Mk.XVIIIs were produced. The majority of those that saw operational service were delivered to two squadrons in the Middle East (32 and 208 Squadrons) and two squadrons in the Far East (28 and 60 Squadrons). The Spitfires of 32 and 208 Squadrons saw considerable action in the post-war years in the Middle East. Beginning in 1949 in Malaya, 28 and 60 Squadrons flew combat operations against communist terrorists in the colony, with the last operational Spitfire combat strike by a 60 Squadron aircraft occurring in January 1951. The Mk.XVIII had to be handled carefully by its pilot on takeoff, as was common with all Griffon-powered Spitfires with the 5-blade prop. Even with full rudder applied, it was not possible to hold the aircraft straight with full power applied. Once airborne, the automatic engine control made aerobatics easy, and the Spitfire XVIII was viceless in flight.
|
THE KIT |
The kit is MPM's Spitfire MkXVIII. For me, a Spit freak, it was a pleasant surprise finding it in the toy store near my home. The price was fair, just over 7 EUR. After opening the box, I found out 32 parts, typical of limited-run kits, molded in hard light gray plastic with rather crude sprues, thick gates, and much, much flash, particularly around the smaller parts. The model features finely engraved panel lines, vacform canopy and fret of photoetch parts. There are no locating pins. I expected something like this, since this is one of the earlier MPM's offerings. Fortunately, I had a Fujimi MkXIV ready to be sacrificed, and it was time to start working.
|
CONSTRUCTION |
The
instruction sheet shows two exploded diagrams, and six drawings for
cockpit, landing gear and prop assembly. After examining the parts, it
was clear that the model requires much work. I used the fuselage and the
wings from the MPM kit, the rest came from Fujimi kit. Kit interior is
mostly photoeched, so I decided to use seat, and control column from
spare box (can't remember from which model they came from), since they
look more realistic to me, and used the rest of
 photoeched kit's
interior. After completing the interior, I painted it with Model
Master's Interior Green enamel, washed with pastels and drybrushed with a
bit of silver. I also added masking tape seat belts, which were painted
Humbrol Sand. Strange, there are no seat belts in kit's photoeched set,
and that's a shame. After installing the cockpit in fuselage, the
fuselage halves were glued together, and set aside. The overall shape of
the fuselage is OK, it certainly looks like a Mk.XVIII, it has the right
nose shape, and the enlarged rudder. The wings are OK in shape, but they
needed MUCH thinning, so I had to file about 1mm off each wing half to
make them thin enough to fit to the fuselage. The trailing edge could do
with some more thinning, but I'm satisfied with the result as it is. The
model lacks the distinctive gull-wing shape, so I cut off the lower
section of the Fujimi wings and glued it to MPM fuselage. I also had to
box the wheel wells with sheet styrene, and place the photoeched top
inside. It looks nice after painting and weathering. At the same time, i
drilled out the camera ports in the fuselage, and used clear acetate
sheet to make the clear covers for cameras. The tailplanes came from
Fujimi's kit, since the MPM ones are way too thick, and have very soft
detail that would probably disappear under a coat of paint. Exhausts, gun
barrels, tail wheel, main landing gear and prop assembly came from
Fujimi's kit, since they look much better than original ones. I used the
kit's vacform canopy, which is excellent, I dipped it in the Future and
set aside to dry. I masked it with Tamiya masking tape and attached it to
the fuselage using white glue.
photoeched kit's
interior. After completing the interior, I painted it with Model
Master's Interior Green enamel, washed with pastels and drybrushed with a
bit of silver. I also added masking tape seat belts, which were painted
Humbrol Sand. Strange, there are no seat belts in kit's photoeched set,
and that's a shame. After installing the cockpit in fuselage, the
fuselage halves were glued together, and set aside. The overall shape of
the fuselage is OK, it certainly looks like a Mk.XVIII, it has the right
nose shape, and the enlarged rudder. The wings are OK in shape, but they
needed MUCH thinning, so I had to file about 1mm off each wing half to
make them thin enough to fit to the fuselage. The trailing edge could do
with some more thinning, but I'm satisfied with the result as it is. The
model lacks the distinctive gull-wing shape, so I cut off the lower
section of the Fujimi wings and glued it to MPM fuselage. I also had to
box the wheel wells with sheet styrene, and place the photoeched top
inside. It looks nice after painting and weathering. At the same time, i
drilled out the camera ports in the fuselage, and used clear acetate
sheet to make the clear covers for cameras. The tailplanes came from
Fujimi's kit, since the MPM ones are way too thick, and have very soft
detail that would probably disappear under a coat of paint. Exhausts, gun
barrels, tail wheel, main landing gear and prop assembly came from
Fujimi's kit, since they look much better than original ones. I used the
kit's vacform canopy, which is excellent, I dipped it in the Future and
set aside to dry. I masked it with Tamiya masking tape and attached it to
the fuselage using white glue.
|
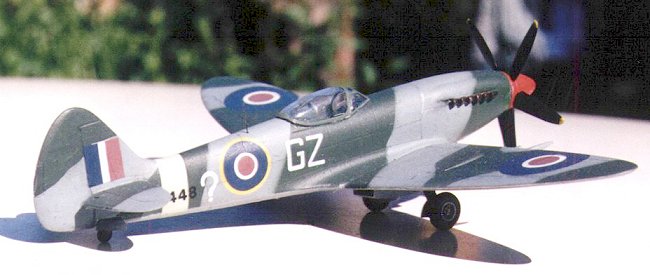
CAMOUFLAGE & MARKINGS |
After gluing the main
parts together, the model was primed using Model Master RAF Medium Sea
Grey enamel. Next, I masked the upper - lower colour demarcation line and
sprayed all the upper surfaces with Ocean Grey. The masks, made of paper
and masking tape, were attached to the Ocean Grey surface and Dark Green
was then sprayed. Next I masked
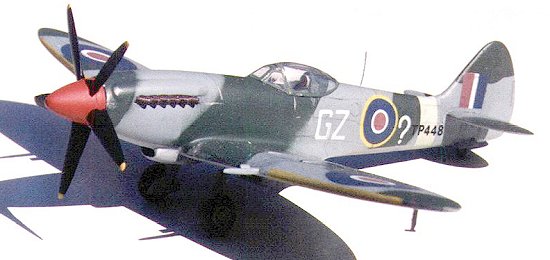 the leading edges for
the yellow and sprayed these and the propeller blades. The spinner was
sprayed Insignia Red prior to assembly. The whole finish was then sealed
with Humbrol Gloss Cote and I was ready to put the decals on. I've chosen
one of three options included, the GZ-? of 32. squadron, RAF. The decals
are usual Propagteam quality, very thin and well printed, but slightly
off register. They reacted well to Gunze Mr. MARK SOFTER, and settled
without any trace of silvering. Decals were sealed with another coat of
Gloss Cote, and then washed and weathered with oils and sealed with
Humbrol Matt Cote. The paint chipping was done using aluminum paint. I
added some cordite burns from the shell ejector chutes with black pastel
chalk. After that, the main landing gear, tail wheel and pitot tube were
attached. The antenna was made from stretched sprue. And that's it - the
model was complete.
the leading edges for
the yellow and sprayed these and the propeller blades. The spinner was
sprayed Insignia Red prior to assembly. The whole finish was then sealed
with Humbrol Gloss Cote and I was ready to put the decals on. I've chosen
one of three options included, the GZ-? of 32. squadron, RAF. The decals
are usual Propagteam quality, very thin and well printed, but slightly
off register. They reacted well to Gunze Mr. MARK SOFTER, and settled
without any trace of silvering. Decals were sealed with another coat of
Gloss Cote, and then washed and weathered with oils and sealed with
Humbrol Matt Cote. The paint chipping was done using aluminum paint. I
added some cordite burns from the shell ejector chutes with black pastel
chalk. After that, the main landing gear, tail wheel and pitot tube were
attached. The antenna was made from stretched sprue. And that's it - the
model was complete.
|
CONCLUSIONS |
The model was fun to build. It requires much work, but I think it's worth the effort. The fuselage is more accurate then Fujimi’s, but all the other parts are not so good. So, if you want to do a Mk.XVIII and have a Fujimi’s Mk.XIV to sacrifice, give it a go. I wouldn't recommend this kit to a beginner, but if you have a few short run kits under your belt, I suggest you try.
May 2003
Copyright ModelingMadness.com.
If you would like your product reviewed fairly and fairly quickly, please contact the editor or see other details in the Note to Contributors.