Heller 1/72 Skyraider
| KIT #: | 79840 |
| PRICE: | $4€ (Currently $5.60 at today's exchange rate) |
| DECALS: | One option |
| REVIEWER: | Gordon Zammit |
| NOTES: | Reboxed Airfix kit. Version not stated on box & instructions. |
| HISTORY |
The Skyraider is one of those aircraft which seemed to be designed at the wrong time due to the introduction of the jet engine in the closing days of WW2. Nobody would have imagined the success it would eventually achieve and the long lifetime it remained in active service. No need to say more, as this is an aircraft which is well documented both on printed material and also on-line.
| THE KIT |
There is another review here on MM by
Mark Fordham, but the more the merrier.
This kit mould is
as old as I am and some may wonder why I chose to build it knowing that there is
a MUCH better choice in the form of the Hasegawa kit! I originally bought it to
take the decals from it to make a gloss sea blue Skyraider instead of buying a
decal sheet. Heller does not mention any information about the version of this
kit and is 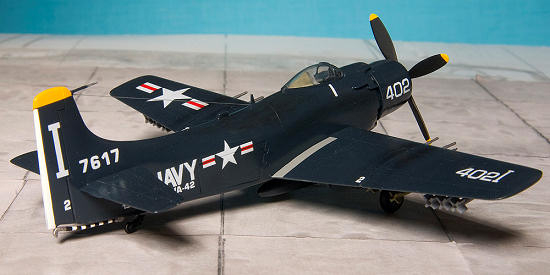 just
a “Skyraider” according to the box and instructions (Which are quite unique even
to a Heller kit in the way they are presented). Since it has four 20mm guns it
should be an AD-4 or later, but it does not have the armour around the cockpit
area.
just
a “Skyraider” according to the box and instructions (Which are quite unique even
to a Heller kit in the way they are presented). Since it has four 20mm guns it
should be an AD-4 or later, but it does not have the armour around the cockpit
area.
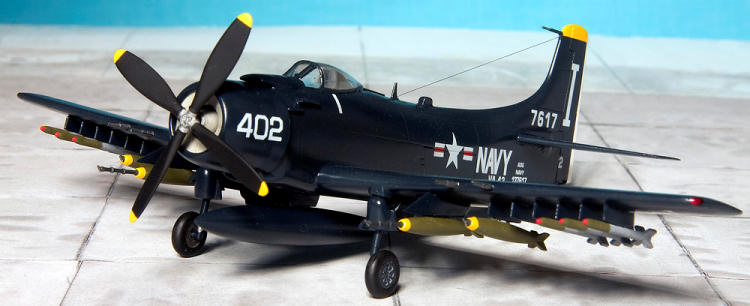
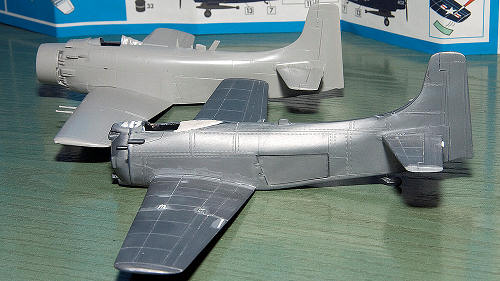
Looking at references in Squadron books, it seems that although the AD-6 did not enter service until the Korean conflict was over, there were quite a few AD-6’s in service in sea blue in 1955-1956. Upon checking the kits dimensions and shape with that of the Hasegawa kit, I found that it was very close in most aspects. The most obvious differences are the canopy position and the canted tailfin. It also lacks detail and is covered with 1 (scale) inch rivets which is expected from a kit more than 40 years old. But the sea blue scheme would not reveal much surface detail and I decide to build it along a Hasegawa A-1H and compare the differences as I go along.
| CONSTRUCTION |
First step was to
sand down all the rivets and raised panel lines to get a smooth surface. This
was done on all the major parts, and the panel lines were rescribed using photos
of the real aircraft and the Hasegawa kit. It was the first time for me to
rescribe a whole model and was another reason to build this one. Scribing the
flying surfaces was quite easy but the fuselage was a little
 more
challenging. After I was satisfied with the result (which is far from perfect by
the way!), I tried to decide what I was going to modify or correct. The tail fin
was first place as when viewed from certain angles it really stands out.
Straightening this was just cutting off some plastic from both halves and dry
fitting while twisting both parts to get a straight fin. I then glued the halves
together holding them with clamps in the straight position and left it to dry.
more
challenging. After I was satisfied with the result (which is far from perfect by
the way!), I tried to decide what I was going to modify or correct. The tail fin
was first place as when viewed from certain angles it really stands out.
Straightening this was just cutting off some plastic from both halves and dry
fitting while twisting both parts to get a straight fin. I then glued the halves
together holding them with clamps in the straight position and left it to dry.
I had not built
the cockpit area before as I still wasn’t sure if would correct this or leave it
as it was, but eventually decided to go on and move the cockpit forward by about
8mm to get it in line with the Hasegawa’s kit position. To move the cockpit
forward, I cut the shape of the canopy on the forward part of the glued halves,
and then built up the area left blank with plastic sheets and sprue bits. After
drying, a lot of sanding and filling got a reasonable shape for the cockpit
area. Inside the cockpit I scratch built some detail and modified the seat.
The undercarriage
is very simplified and the bays are non existent. I removed the rearwards
locating points and sanded the area smooth after closing the bays with sheet
styrene, which was a mistake as I should have done that while the wings were
still apart. I added the spar which runs through the bay and added some ribbing
detail.
 Adding the
speed brakes in the closed position require adding some shims in the bay to get
a flush fit, and after drying all was sanded in place to get a better fit. The
tailplanes are also wrong in their outer shape. I cut off about 3mm from each
and glued some plastic with excess area. Later these were sanded down to the
correct shape. I also added the small trim tabs on the elevators.
Adding the
speed brakes in the closed position require adding some shims in the bay to get
a flush fit, and after drying all was sanded in place to get a better fit. The
tailplanes are also wrong in their outer shape. I cut off about 3mm from each
and glued some plastic with excess area. Later these were sanded down to the
correct shape. I also added the small trim tabs on the elevators.
The cowling
covering the radial engine when it is shut down is not included in the Heller
kit. It is included in the Hasegawa kit, and using this, I made one from sheet
Evergreen styrene by cutting a circle, removing an inner circle where the
propeller comes through, then scribing it into sectors and removing on of the
sectors, then gluing it back together to get a cone shape.
The undercarriage
was modified to get it closer to the arrangement of the real aircraft and that
of the Hasegawa kit which seems to be quite accurate. I added the small fences
on the wings in between the flap and ailerons on the upper wing surfaces from
sheet styrene.
Another correction
I made which I am not sure that I got right is the angle of the main pylons on
the wings, those two that usually carried extra fuel tanks. I am not sure if the
angle is correct as they are still somewhat pointing a little downwards, but
they are 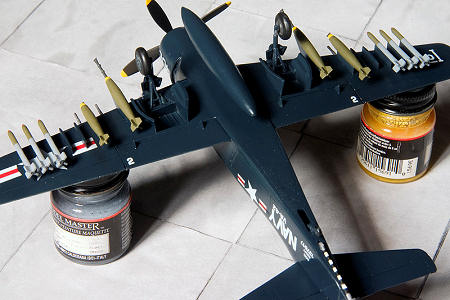 surely
much better than as supplied. I also tried to make a better looking tail hook by
taking the ends of the kit part and replacing the length with a smaller diameter
piece of Evergreen plastic rod, and sanding the whole piece smoothly. Although
not 100% accurate, especially at the mounting position, it is much better than
the standard kit part. Another correction which I made was to move the outer
20mm cannons slightly inboard as they seem to be incorrectly located by the kit.
surely
much better than as supplied. I also tried to make a better looking tail hook by
taking the ends of the kit part and replacing the length with a smaller diameter
piece of Evergreen plastic rod, and sanding the whole piece smoothly. Although
not 100% accurate, especially at the mounting position, it is much better than
the standard kit part. Another correction which I made was to move the outer
20mm cannons slightly inboard as they seem to be incorrectly located by the kit.
Surprisingly, the
wheel hub detail is very good and also seems correct for the Navy aircraft of
the period.
The fuel tanks are completely wrong, so they went to the spares box, and a single tank came from the Hasegawa kit. Armament came from the Hasegawa Weapons set and from the spares box. I think the rockets came with the Matchbox Panther and aren’t correct in shape, but I wasn’t going to “waste” more Hasegawa armament on this kit.
| COLORS & MARKINGS |
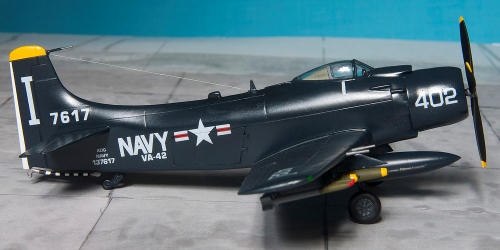 These Gloss
sea blue aircraft must be the easiest colour scheme for the modeler. Even the
wheel bays and landing gear are in the same colour so it’s a very easy job. This
kit was also the first time for me to use Klear (Future) which is not available
locally (in
These Gloss
sea blue aircraft must be the easiest colour scheme for the modeler. Even the
wheel bays and landing gear are in the same colour so it’s a very easy job. This
kit was also the first time for me to use Klear (Future) which is not available
locally (in
| CONCLUSIONS |
| REFERENCES |
Squadron/Signal
5527: A-1 Skyraider Walkaround.
Squadron/Signal
1060: A-1 Skyraider In Action.
The Complete
Encyclopedia of Aircraft
Other sources on the internet through search engines.
July 2009
If you would like your product reviewed fairly and quickly, please contact me or see other details in the Note to Contributors.