RPM 1/35 T-60 Light Tank
| KIT #: | 35044 |
| PRICE: | $25.00 MSRP |
| DECALS: | Six options |
| REVIEWER: | Bill Koppos |
| NOTES: | Ex-Aeroplast w/ Aber photo etch |
| HISTORY |
 the armament from a heavy and a light machine gun
to the 20mm Shvak (yes our friend the aircraft cannon) with a co-axial MG. This
whole engineering feat was accomplished in 15 days of August 1941, making
comrade Stalin very happy. It's amazing what the pressure of having your country
overrun by a horrendous invader can do, the need for a fast light tank to fill
out the armored brigades being seen as high priority.
the armament from a heavy and a light machine gun
to the 20mm Shvak (yes our friend the aircraft cannon) with a co-axial MG. This
whole engineering feat was accomplished in 15 days of August 1941, making
comrade Stalin very happy. It's amazing what the pressure of having your country
overrun by a horrendous invader can do, the need for a fast light tank to fill
out the armored brigades being seen as high priority.| THE KIT |
 I win! I've always liked the T-60 but decent models of it were just
NOT around, I tried doing something with the ancient Zvezda but gave that one to
my friend's grandson to slap together. (Flash to the future). I am perusing the
shelves of my LHS, continuing to wear out his floors, when in the deep recesses
of the shelf I spied a T-60 kit. Hmmm typical Eastern-European looking box,
1/35th scale, never seen this one. Open the box, hey looks decent! Any decals?
Yep under the plans-surprise! A large photo-etch set-fenders, tool boxes, air
filters, and what turned out to be the applique armor for the turret upgrade.
Wow. Now I'm not very good with photo-etch, but I do like T-60's so I'll endure.
How much? $25. You're going home with me, kid.
I win! I've always liked the T-60 but decent models of it were just
NOT around, I tried doing something with the ancient Zvezda but gave that one to
my friend's grandson to slap together. (Flash to the future). I am perusing the
shelves of my LHS, continuing to wear out his floors, when in the deep recesses
of the shelf I spied a T-60 kit. Hmmm typical Eastern-European looking box,
1/35th scale, never seen this one. Open the box, hey looks decent! Any decals?
Yep under the plans-surprise! A large photo-etch set-fenders, tool boxes, air
filters, and what turned out to be the applique armor for the turret upgrade.
Wow. Now I'm not very good with photo-etch, but I do like T-60's so I'll endure.
How much? $25. You're going home with me, kid. | CONSTRUCTION |
 and
they will be. The main hull parts fit very well, I used no filler at all on this
model. Get all the wheels on and lined up and let them dry overnight, we're gonna need them nice and steady for the track job tomorrow.
and
they will be. The main hull parts fit very well, I used no filler at all on this
model. Get all the wheels on and lined up and let them dry overnight, we're gonna need them nice and steady for the track job tomorrow.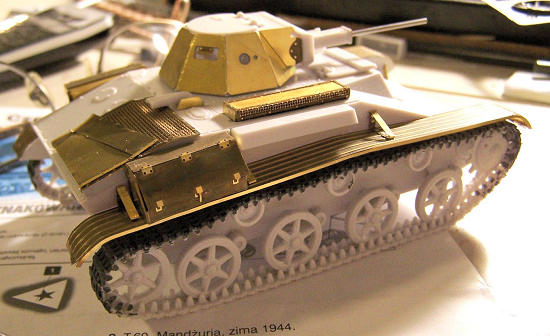 of the single pieces showed me I had no
extra to make up a gap of about that size. If I used another single I would be
short Two on the other side. Looking around I found some leftover track links
from the Italeri L-60 Italian light tank. These looked close enough and did fill
in my gap. The fender and some "mudding" will hide the rest. Now we get to do it
all again on the other side! When all was completely dry I took a file and
smoothed out any rough spots at the joins and bends so nothing is sticking out
where it don't belong. OK that was the easy part, on to the tricky bit.
of the single pieces showed me I had no
extra to make up a gap of about that size. If I used another single I would be
short Two on the other side. Looking around I found some leftover track links
from the Italeri L-60 Italian light tank. These looked close enough and did fill
in my gap. The fender and some "mudding" will hide the rest. Now we get to do it
all again on the other side! When all was completely dry I took a file and
smoothed out any rough spots at the joins and bends so nothing is sticking out
where it don't belong. OK that was the easy part, on to the tricky bit.| COLORS & MARKINGS |
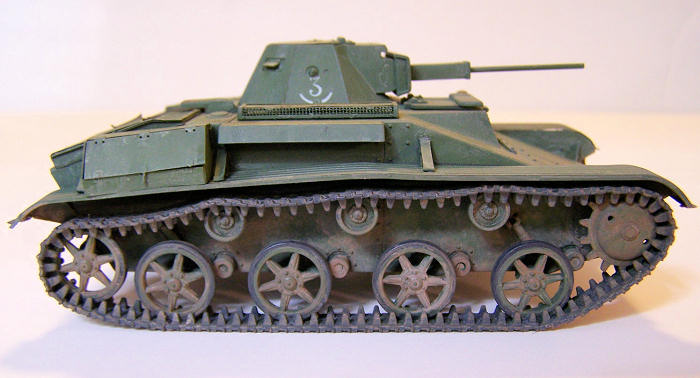
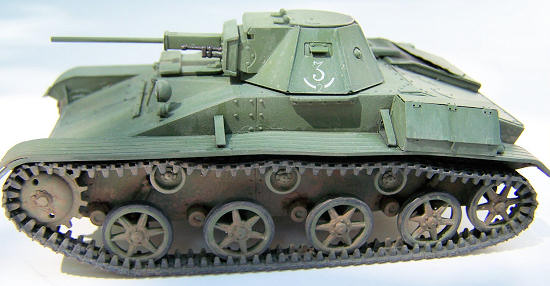 What color should we paint our Russian tank? It's a tough one
but I decided on Model Master Russian Armor Green. The usual Koppos armor
painting procedure followed, flat black overall first, then the Armor Green,
then lighten the green with some yellow, and spray the center of panels and open
areas for contrast. The turret was glosscoated with Testor's Metallizer Sealer
as this was the only area to get decals. I chose a vehicle pictured in a
reference book that had spoked wheels and some sort of regimental mark on the
turret in three places. The decals did not look terribly promising but worked
out just fine. Another glosscoat sealed them in.
What color should we paint our Russian tank? It's a tough one
but I decided on Model Master Russian Armor Green. The usual Koppos armor
painting procedure followed, flat black overall first, then the Armor Green,
then lighten the green with some yellow, and spray the center of panels and open
areas for contrast. The turret was glosscoated with Testor's Metallizer Sealer
as this was the only area to get decals. I chose a vehicle pictured in a
reference book that had spoked wheels and some sort of regimental mark on the
turret in three places. The decals did not look terribly promising but worked
out just fine. Another glosscoat sealed them in.| FINAL CONSTRUCTION |
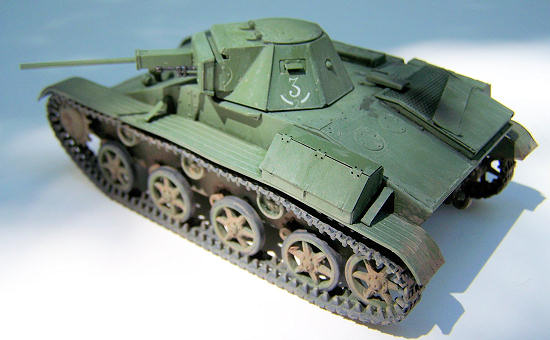
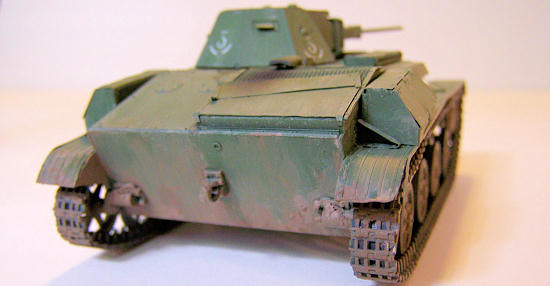 I like Tamiya Weathering Sticks to dirty up my toys. Just mix with water
and slop it on. "Light Earth" and "Mud" were used, Light earth first. I
concentrated mostly on the unders, and the tracks, spreading the muck around
with a brush. Then a very diluted mix of "Sand" was spread over the top areas,
for a dusting. Maybe someday I'll mess with these "filters" the armor experts
use, but for now I'm keeping it simple. Finally a flatcoat sealed up the job.
I like Tamiya Weathering Sticks to dirty up my toys. Just mix with water
and slop it on. "Light Earth" and "Mud" were used, Light earth first. I
concentrated mostly on the unders, and the tracks, spreading the muck around
with a brush. Then a very diluted mix of "Sand" was spread over the top areas,
for a dusting. Maybe someday I'll mess with these "filters" the armor experts
use, but for now I'm keeping it simple. Finally a flatcoat sealed up the job. | CONCLUSIONS |
| REFERENCES |
July 2010
If you would like your product reviewed fairly and quickly, please contact me or see other details in the Note to Contributors.