Monogram 1/48 Hawker Harrier
|
KIT # |
5420 |
|
PRICE: |
$ out of production |
|
DECALS: |
See review |
|
REVIEWER: |
Hank Gruben |
|
NOTES: |
Aztec #48-016 'Early Harriers' |
|
HISTORY |
 This kit is an
old, trusty monogram classic. It dates back to 1981 and was most recently
released as late as 1999. The kit comes with raised panel lines, detailed
(sort of) cockpit, excellent intake detail, a decent pilot figure and
underwing stores.
This kit is an
old, trusty monogram classic. It dates back to 1981 and was most recently
released as late as 1999. The kit comes with raised panel lines, detailed
(sort of) cockpit, excellent intake detail, a decent pilot figure and
underwing stores.
Like all Monogram kits of this vintage, it had awesome detail for the time but fit like slabs of plastic that went through a blender. The clear pieces are remarkably clear with no distortions and reasonably thin. The stores give you Aden cannons, early sidewinders and Rockeye high drag bombs. Conveniently, colour details are on each construction step.
|
THE KIT |
On first glance, the kit is neat and orderly in presentation, the sprue attachments are small and in concealable places. There are some sinkholes and injection pin marks but nothing too terrible. The decals are good with stencil data and markings for either a British GR.1 or an American AV-8A. The Instructions are broken down into 32 steps with the last part being a four view painting guide.
|
CONSTRUCTION |
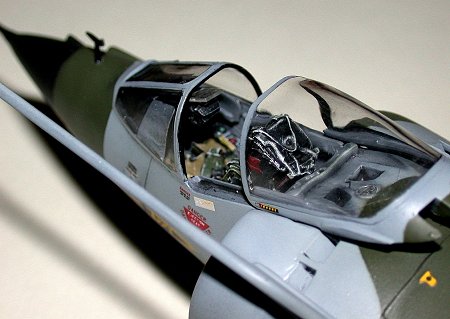
Construction starts by carefully cutting some support
sprues from the front of the huge intakes. The cockpit came next. This is
small and close fitting but I managed to add a throttle quadrant and a
few details. You really only need to add colour
 and drybrush as the
raised detail is well defined. The only real after market product I used
was a spares box ejection seat. You would be best to paint some things
before gluing the fuselage halves together as the intake fan is VERY
visible and loots good when painted.
and drybrush as the
raised detail is well defined. The only real after market product I used
was a spares box ejection seat. You would be best to paint some things
before gluing the fuselage halves together as the intake fan is VERY
visible and loots good when painted.
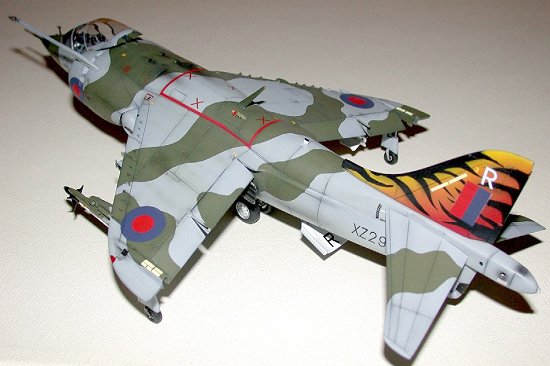
The intake fairings come with drooped “extra air” door openings but no doors for them. I built the little doors out of sheet styrene. I rescribed the panel lines and added some etched bits to make the vortex generators. I have a great way to make wing fences… First, cut off the overly thick molded-on fences and sand the wings to finished perfection. Carefully use a thin saw and cut a channel where the wing fence was and then place thin sheet plastic into the groove. Next, add thin cement and let sit overnight. The next day, trim the sheet plastic to shape and there you go! New, thin, scale, wing fences.
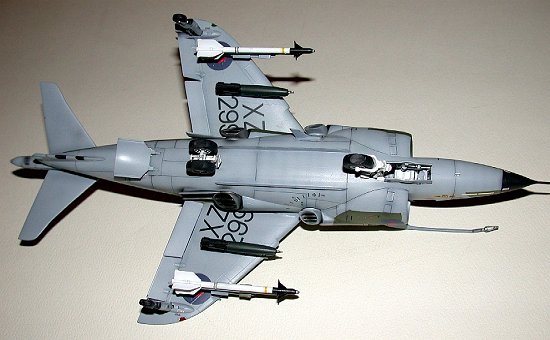
Construction continues with landing gear, wings and small stuff that loves to get lost in the carpet. The gear should be left until after finished painting as you will have to fiddle with it to get all five wheels to touch the ground… I cheated by flattening the wheels (use a baking sheet covered with ¼ inch of water, bring to a boil and gently push the placed landing , fitted to the model on it to ‘weight’ the wheels). All the little bits have locating holes except for the refueling probe… This is the only confusing part. The stores are the only thing left and they look convincing after cleaning and painting.
|
COLORS AND MARKINGS |
All colour used were from the Vallejo paint line. This is truly a great paint and is fully airbrushable when cut with isopropyl alcohol. Unlike other acrylic paints, this one does not lose opacity when thinned down… I found that painting light over dark was effortless and was fully maskable after only a half hour’s drying time.
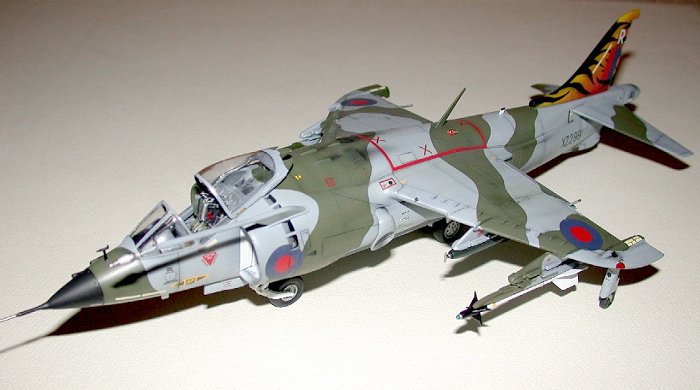
 I have a
colour newspaper picture of a tiger-tailed Gr.1 that dates back to the
early eighties as the inspiration for my scheme. Try as I might, I was
only able to find two other black and white references from a Japanese
publication (dating back to the eighties as well) and thus, had enough to
figure out the markings and colours for this special scheme.
I have a
colour newspaper picture of a tiger-tailed Gr.1 that dates back to the
early eighties as the inspiration for my scheme. Try as I might, I was
only able to find two other black and white references from a Japanese
publication (dating back to the eighties as well) and thus, had enough to
figure out the markings and colours for this special scheme.
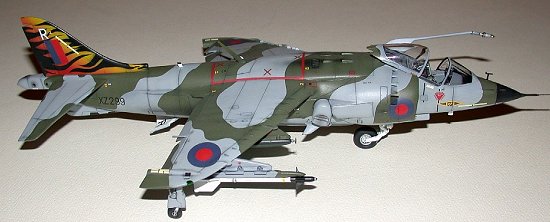
Colours are Dark green FS34079, Dark grey FS36173 and Gull grey 36440. All these colours were faded with a bit of white for age/scale. The tiger tail was something else entirely. First, I painted the tail black. When that was dry, I cut tiger markings from Tamiya tape and placed them by eye. Next, I painted the yellow and then tinted it with orange to get the smooth colour blend. As I said above, Vallejo paints cover magnificently so the yellow looked yellow even on black.
The decals are from Aztec decals of Mexico. For a small time decal maker, these are true gems. Thin but tough, the colours of everything looked right on the money and they disappeared after a spot of microsol/set. No wrinkling, no silvering, no problems. 10 out of 10.
|
CONCLUSIONS |
This is the only real choice for a 1/48 Gr.1 so if you want one, prepare to work it through. A good model can be built by the moderately skilled modeler providing you haven’t been spoiled by building all those state of the art ‘Tamiya-hasa-trumpeter’ kits. Seriously think of getting better decals as the kits choices are ‘iffy’ at best for accuracy.
|
REFERENCES |
 -As I said, I had one
colour picture from 1983-ish, summer, the Thunder Bay
newspaper ‘The Chronicle Journal”
-As I said, I had one
colour picture from 1983-ish, summer, the Thunder Bay
newspaper ‘The Chronicle Journal”
- The encyclopedia of British Military Aircraft, Chaz Bowyer, Crescent Publishing
- Various Scale Aircraft Modeling magazines from the past two years.
Original Purchase of this kit from My favourite hobby shop.
Copyright ModelingMadness.com. All rights reserved. No reproduction in part or in whole without express permission.
If you would like your product reviewed fairly and fairly quickly, please contact the editor or see other details in the Note to Contributors.