
| KIT #: | ? |
| PRICE: | £14 |
| DECALS: | Six options |
| REVIEWER: | Carmel J. Attard |
| NOTES: |
| HISTORY |
The Aerospatiale SE313 Alouette II with
360HP Turbomeca Artouste II C shaft-turbine, first flew on
| THE KIT |
 achine shown on the kit box art cover then
one may find it easier to paint the square fuel tank situated aft of
cockpit, at an early stage before this is fitted in place while the rest of
the kit is dark yellowish- green. Besides there are differences in that the
tail fins attached to the stabilizers are not carried by all types offered
and may have to be left out.
achine shown on the kit box art cover then
one may find it easier to paint the square fuel tank situated aft of
cockpit, at an early stage before this is fitted in place while the rest of
the kit is dark yellowish- green. Besides there are differences in that the
tail fins attached to the stabilizers are not carried by all types offered
and may have to be left out. | CONSTRUCTION |
 The first 11 stages of construction are
devoted to the assembly of the cockpit interior as well as paintwork detail
of parts. I continued to follow up to stage 18 after which I went on to
stage 22-33, which deals with the assembly of the main fuselage structure,
fuel tank, skids, tail stabilizers, and all the parts that go with them. I
have moved from stage 18-22 because the stages in between, deals with the
clear plastic parts which by themselves offered a challenge to manage these
later without ever thinking of the possibility of spoiling the crystal clear
perspex.
The first 11 stages of construction are
devoted to the assembly of the cockpit interior as well as paintwork detail
of parts. I continued to follow up to stage 18 after which I went on to
stage 22-33, which deals with the assembly of the main fuselage structure,
fuel tank, skids, tail stabilizers, and all the parts that go with them. I
have moved from stage 18-22 because the stages in between, deals with the
clear plastic parts which by themselves offered a challenge to manage these
later without ever thinking of the possibility of spoiling the crystal clear
perspex.
At one stage there are three ‘L’ shaped vertical control links that needs to be fitted at the rear of the cabin and adjacent to the square fuel tank and leads to the roof. The horizontal part of these links is intended to go inside the floor space of the cabin. This I decided to cut about ½” from the front end as at an early stage I added a flat metal piece of 1”x11/4”x1/4” which I reckoned it will keep the model in its proper sit format at a later stage when placed on skids. Cutting the ½” off the end of the links ensured that it will not foul with the metal weight further inside the nose floor.
Upon completing stage 51, I returned back
to the stage dealing with the cockpit transparency assembly. This consists
of fitting the five nose clear parts. The front clear paneling was fitted in
place first. These were placed gently in position after first applying
intermittent drops of Krystal Klear. In doing so this was a preliminary fit
before applying liquid cement after this has set. In doing so I avoided any
risk of spoiling the clear parts with excess glue while the panel was held
firmly in its place. The next step was to put the side doors in position.
This was not a straight forward job as these were slightly oversize and
required the removal of just over 1/16” from the rear edge of the door to
make them fit. The excess plastic was removed by scraping along the edge
with a sharp Exacto blade until the desired fit was achieved. Sanding along
the edge with wet and dry followed this and the perfect fit
 was obtained.
Once more, Kristal Kleer allowed the parts to set secure in place, followed
by application of liquid cement. The clear roof part was then gently glued
on top of the assembled parts.
was obtained.
Once more, Kristal Kleer allowed the parts to set secure in place, followed
by application of liquid cement. The clear roof part was then gently glued
on top of the assembled parts.
The following were other observations made
as I went along with the assembly of the kit.
Part No 41 which is a zig-zag shaped frame piece had the first slanting channel missing which I added from a piece of stretch sprue of similar thickness and length made from same kit runner. Part No 50, which is a ‘V’ shaped tail support needed to be pressed narrower at the open end in order to attach to the rear frame ends. The long thin channel kit parts on closer study contained mismatch, and this was easily removed by very careful scraping along with a sharp modeling knife. The Alouette II has two pointed antennae mounted under the lower fuselage. My kit only had one and I had to add the forward one made from plastic card. This was of same shape as the rear one but slightly shorter. These two antennae were joined with a wireless made out of thin metal wire. The central propeller bracket with integrally cast shaft, part 54, was found bent at 45 degrees to the vertical. Apparently this was bent when the plastic component was still hot while being ejected from the metal mould. I carefully cut this with a fine saw and repositioned and fixed the part vertically. The disc shaped engine part No84 needs to have the front part of the shaft to be filed down to a smaller diameter or it will not fit inside assembly 64-65. For ease of stowage on the shelf alongside other scale models the side-mounted pylons were not fixed with the model.
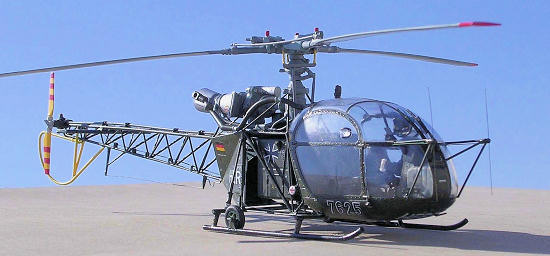
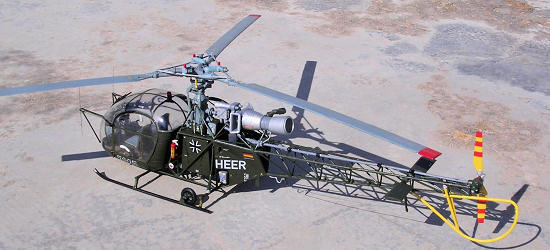
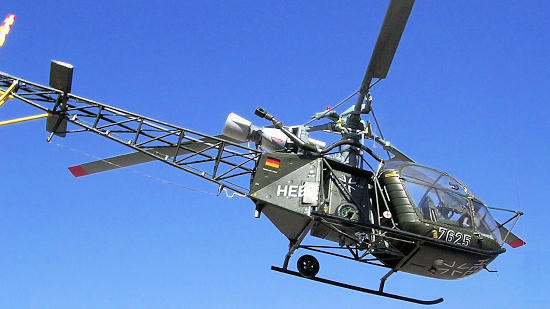
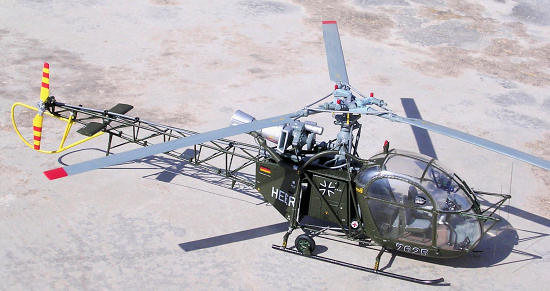
| COLORS & MARKINGS |
 green one mentioned earlier and which belongs to Heereflieger Waffenschule, Buckeburg, Germany, all the remaining schemes are
in overall green finish and the only variation being the title HEER which
can be in bold black or white. The registration is also either in black
numerals outlined white or in white letters and numerals. These all come
from German bases circa 1962-63 eras. Another minor variation, which must
not be overlooked, is that, two out of the six Alouettes carry the vertical
oval shaped tail fins mounted at the end of the tail stabilizers (part
number 131 & 132) indicated at stage 6 of the instructions.
green one mentioned earlier and which belongs to Heereflieger Waffenschule, Buckeburg, Germany, all the remaining schemes are
in overall green finish and the only variation being the title HEER which
can be in bold black or white. The registration is also either in black
numerals outlined white or in white letters and numerals. These all come
from German bases circa 1962-63 eras. Another minor variation, which must
not be overlooked, is that, two out of the six Alouettes carry the vertical
oval shaped tail fins mounted at the end of the tail stabilizers (part
number 131 & 132) indicated at stage 6 of the instructions.At times the colour chart may be confusing. For instance if one desires to do the one serialled 7588, the colour chart shows the tail stabilizer as orange while the box art is shown as yellow. Also the box art does not show the word HEER under the nose although it is indicated on the instruction views. For painting I used Tamiya XF-62 Olive Drab mixed with a few drops of yellowXF-3 in order to get closer to the type of green used by the German Army and which Revell refers to as yellow olive.
| CONCLUSIONS |
 In spite of being not as straightforward to
build as many kits, I enjoyed making this Alouette. Adding the extra weight
under the cabin floor really helped to produce the characteristic sit of the
real Alouette helicopter. This kit would be most welcome to German
rotorcraft enthusiasts.
In spite of being not as straightforward to
build as many kits, I enjoyed making this Alouette. Adding the extra weight
under the cabin floor really helped to produce the characteristic sit of the
real Alouette helicopter. This kit would be most welcome to German
rotorcraft enthusiasts.
July 2009
Copyright ModelingMadness.com
If you would like your product reviewed fairly and fairly quickly, please contact the editor or see other details in the Note to Contributors.