Fujimi 1/72 A-4C/E Skyhawk
| KIT #: | F-26 & F-24 |
| PRICE: | $ |
| DECALS: | Four options in each kit |
| REVIEWER: | William Alcott |
| NOTES: | You can never have enough Fujimi Skyhawks! |
| HISTORY |
The A-4C and E/F were the most common Skyhawk variants during the Vietnam War. Compared to the earlier A-4B, the A-4C introduced a limited all-weather capability, while the A-4E added additional avionics in an extended nose (and later in a dorsal ‘hump’), as well as an additional pair of under wing pylons (for a total of 5).
| THE KIT |
This review is intended to complement my A-4B review (q.v.). Most of the same general comments apply to these kits. The A-4C kit is largely identical to the A-4B, with the exception of the forward fuselage halves. The A-4E/F kit features a new forward fuselage, new intakes, and an optional avionics hump.
| CONSTRUCTION |
 I
followed the same construction process as for the A-4B.
I made a couple of additional enhancements compared to that build:
I
followed the same construction process as for the A-4B.
I made a couple of additional enhancements compared to that build:
-
I
added the retractable landing light to the inside of the starboard main
landing gear door, using an MV lens.
-
I
carved away the moulded-in wing tip position lights and the approach light
in the port wing, and replaced them with chunks of clear sprue which I
sanded to shape and polished.
For the approach light, I drilled three tiny holes in the inside face of the
light. Note that the large
position lights on the wing tips are not coloured, unlike the smaller
navigation lights.
-
I
added sway braces to all the pylons, using scraps of plastic.
Like
the A-4B, the A-4C nose is moulded with the rain removal fairing in place,
whereas it should have a windscreen wiper.
I removed the fairing and scratchbuilt the wiper and arm from sprue
and thin plastic sheet. The
A-4C should feature the radar alt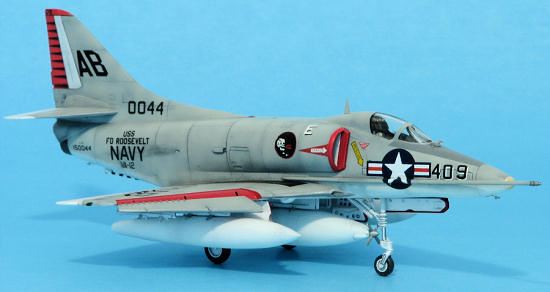 imeter fairing under the port wingtip –
this is included in the A-4E kit as part 89.
I used the A-4E part as a reference and carved a duplicate from
plastic sheet. The A-4C I chose
to model was an early version, without any radar warning aerials.
I fitted 1000-lb Mk. 83 bombs from a Hasegawa weapons set to the
outboard pylons, and used one of the kit drop tanks on the centre-line
station.
imeter fairing under the port wingtip –
this is included in the A-4E kit as part 89.
I used the A-4E part as a reference and carved a duplicate from
plastic sheet. The A-4C I chose
to model was an early version, without any radar warning aerials.
I fitted 1000-lb Mk. 83 bombs from a Hasegawa weapons set to the
outboard pylons, and used one of the kit drop tanks on the centre-line
station.
For the A-4E, be sure to use the early style nose gear strut (part 8). Part 91 depicts the later strut with nosewheel steering, introduced with the A-4F. The A-4E I modeled did not feature the avionics hump, but did carry five RWR aerials under the nose and aft fuselage. I fitted a D-704 buddy refueling pod to the centre-line station (from the Fujimi KA-6D kit), and a pair of drop tanks to the inboard wing stations. I modified the kit wing tanks (which have tail fins) to the earlier style, with a rounded aft section, like the centre-line pod provided in the kit.
| COLORS & MARKINGS |
Like
my A-4B, I found most of my reference material for these builds at the A-4
Skyhawk Association website (www.a4skyhawk.org).
 For
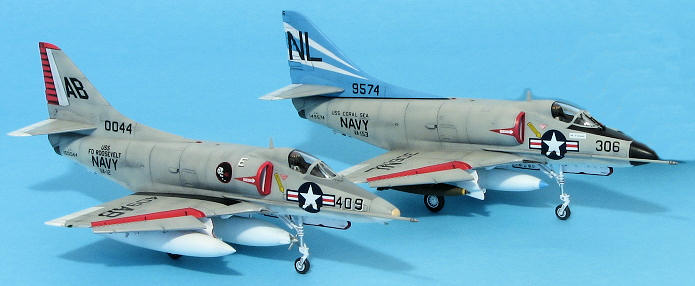
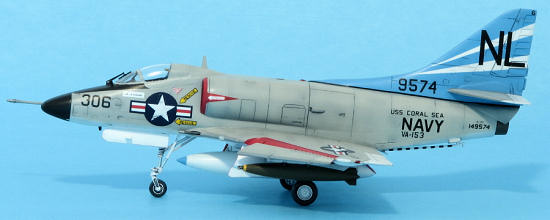
the A-4B, I modeled an aircraft from VA-153 “Blue Tail Flies” aboard USS
For
the A-4B, I modeled an aircraft from VA-153 “Blue Tail Flies” aboard USS
For
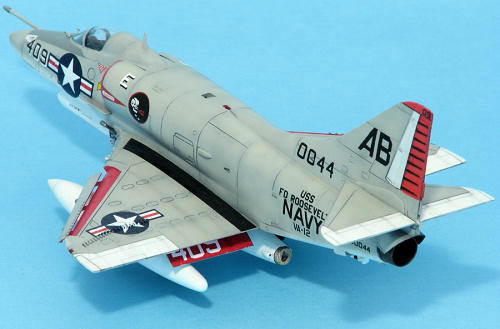
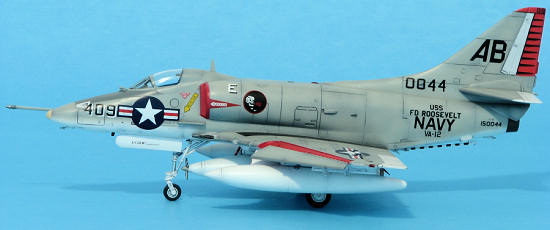
the A-4E, I modeled an aircraft from VA-12 “Flying Ubangis” aboard USS
Franklin D. Roosevelt, during that carrier’s one and only 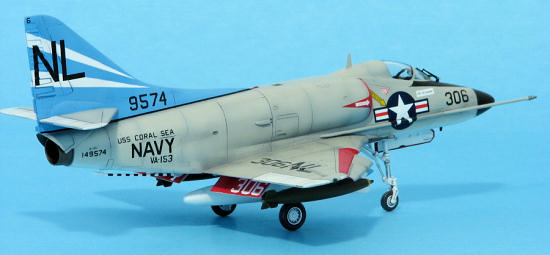 t.
The ‘Kiss of Death’ markings actually come from the A-4C kit.
Note that the skull faces to the right on both sides of the aircraft
– the
t.
The ‘Kiss of Death’ markings actually come from the A-4C kit.
Note that the skull faces to the right on both sides of the aircraft
– the
For the AB tail code, I enlarged a 1/72 scale drawing of the A-4 tail to 200%, then carefully drew the tailcode on the enlargement. I then reduced the drawing back to 1/72, and taped it to black decal film. I carefully trimmed the code letters from the decal sheet – tedious, but reasonably successful in this case. The nose modex required black numbers, shadowed in white – trying to find two sets of identical style and size had me combing the spare decal box!
| CONCLUSIONS |
These
were my 4th and 5th Fujimi Skyhawks, and I’ve still
got a TA-4F and another A-4C in the stash.
These kits are a blast to build – the multi-part fuselage makes
assembly a little tricky, but the end result looks great.
| REFERENCES |
A-4
Skyhawk, Detail & Scale Vol. 32, Bert Kinzey
roduct reviewed fairly and quickly, please contact me or see other details in the Note to Contributors.