 '
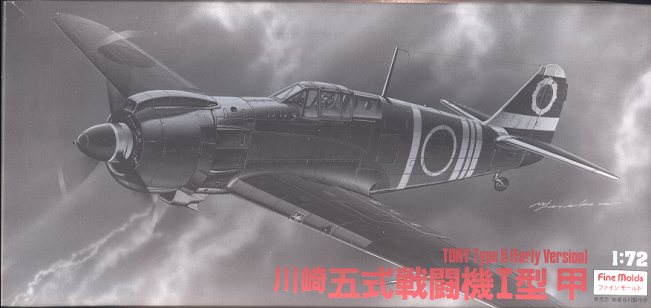
'Fine Molds 1/72 Ki-100
|
KIT # |
FP 3 |
|
PRICE: |
@$25.00 |
|
DECALS: |
Three aircraft |
|
REVIEW : |
|
|
NOTES: |
Includes white metal parts |
'
|
HISTORY & THE KIT |
To see all that you get when you pop open the box, go to this preview.
|
CONSTRUCTION |
While this was going on, the wing and drop tanks were assembled.
The wing is straight from the 1/72 Hasegawa Ki-61 kit, and while not exactly a
new model, is very nice. In fact, there is a distinct difference in the quality
of the engraving between the Hasegawa wing and the rest of the Fine Molds kit,
with the Hasegawa bits being crisper.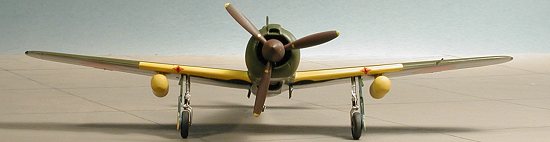 As with all good kits, the first step is to assemble the
interior. On this kit it consists of a floor with some detail on it and a white
metal seat and control stick. No plastic seat and control column are provided.
The hole for the control is too large so you need to be careful. These were then
painted in a khaki color, along with the inside of the fuselage. When dry, the
seat cushion was painted a dark green, with white belts. Black was used for the
instrument panel and some of the boxes on the side. There is a decal that goes
over the instrument panel. It is more than adequate in this scale.
As with all good kits, the first step is to assemble the
interior. On this kit it consists of a floor with some detail on it and a white
metal seat and control stick. No plastic seat and control column are provided.
The hole for the control is too large so you need to be careful. These were then
painted in a khaki color, along with the inside of the fuselage. When dry, the
seat cushion was painted a dark green, with white belts. Black was used for the
instrument panel and some of the boxes on the side. There is a decal that goes
over the instrument panel. It is more than adequate in this scale.
 Once the interior had dried
and been dry brushed, it was glued into the fuselage half. The instrument panel
was also glued in at this time and the fuselage halves glued together. It was
here that I ran into the first of many fit problems. Getting the instrument
panel and interior properly aligned in the fuselage was challenge as I had
to move the interior around a bit to get it square. Looking at the glued
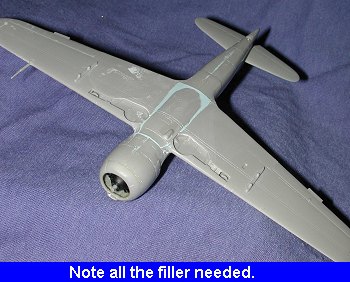
together fuselage, I noticed that one fin half was taller than the other. It
seems that the right side was short shot or just a different profile. There was
a lot of flash on the fuselage halves that needed to be cleaned up as well. I
liberally applied filler to the fin to fill in the missing top section an also
applied it to the fuselage seam. After a couple of applications and sanding, it
was time for the wing, which had previously been glued together.
Once the interior had dried
and been dry brushed, it was glued into the fuselage half. The instrument panel
was also glued in at this time and the fuselage halves glued together. It was
here that I ran into the first of many fit problems. Getting the instrument
panel and interior properly aligned in the fuselage was challenge as I had
to move the interior around a bit to get it square. Looking at the glued
together fuselage, I noticed that one fin half was taller than the other. It
seems that the right side was short shot or just a different profile. There was
a lot of flash on the fuselage halves that needed to be cleaned up as well. I
liberally applied filler to the fin to fill in the missing top section an also
applied it to the fuselage seam. After a couple of applications and sanding, it
was time for the wing, which had previously been glued together.
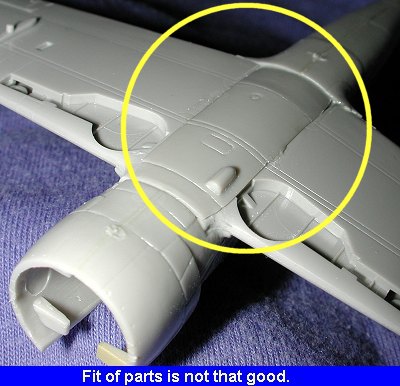
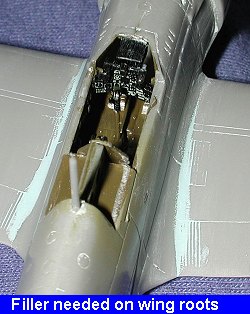
The wing was glued to the fuselage and let dry. Then the plate that goes over the lower section of the fuselage/wing area was glued in. Fit here was less than perfect. It was not only too shallow, but to small as there were gaps everywhere. This meant another round of filler and sanding to get this part to conform to the surrounding fuselage. I also had to fill in the upper wing root as the fuselage root area was larger than that of the wing. A lot of detail is being lost while doing this, but there is really no choice if you want things to look OK when the kit is done. So much for the thought that this wouldn't be a difficult build!
 As I was filling and sanding, The upper nose section was
glued in. This has no firm seating area so you much be careful to get a good
fit. The engine was painted black and drybrushed to bring out details. The prop
shaft was glued in from the back and the assembly glued onto the stubs in the
nose. Then the nose ring was glued in place. This part is a bit too large,
however that isn't so much a problem. It was pushed in place until glue oozed
out from the edges and left to dry. Then it was sanded down to fit the
surrounding areas.
As I was filling and sanding, The upper nose section was
glued in. This has no firm seating area so you much be careful to get a good
fit. The engine was painted black and drybrushed to bring out details. The prop
shaft was glued in from the back and the assembly glued onto the stubs in the
nose. Then the nose ring was glued in place. This part is a bit too large,
however that isn't so much a problem. It was pushed in place until glue oozed
out from the edges and left to dry. Then it was sanded down to fit the
surrounding areas.
Next parts to install are the tailplanes. One side has way too much slop, but fits ok. The other has a tab that is too small so it was cut off and butt glued (no, I didn't get them reversed). Naturally, you will find out the they are not only at that same vertical level, but are off fore and aft from each other as well. You knew this was coming, didn't you? By butt gluing the one side, you can take care of most of this mismatch, but it still won't be perfect.
I then went back and touched up the cockpit section before gluing on the canopy. Once the canopy was glued on, it was masked using Tamiya tape. Then the underside oil cooler was installed, the engine stuffed with tissue and it was time to do some painting.
|
PAINT & DECALS |
First thing was to paint the wing leading edges gloss white.
When dry, a yellow was painted over the top. I used Testors Model Master enamels
for this. This gives us our yellow wing leading edge IFF stripes. These were
then masked off and the underside of the aircraft was painted gloss white. This
will provide a smooth surface for the metal finish and also fill in some of the
scratches that are inevitable after all the sanding I did.
After
doing that not just once, but TWICE (!), the third time I sprayed some Future
over the white paint and then did the deal with the Alclad II. No problems this
time around. One sometimes has to learn the hard way!
Once the paint had properly dried, the
masking was removed from the underside and the kit was given a coat of clear
acrylic gloss (actually Future), in preparation for the decals.
Before
attaching the decals, I felt that I should have the kit on its landing gear. To
this end, I chose the metal gear over the plastic ones. The small problem with
this was that the metal gear are much thinner than the plastic ones so did not
fit the slots in the wheel wells. Lots of spare room! This was
semi-cured by using superglue and then hitting it with an accelerator.
Positioning of the gear is crucial as you only have a few seconds before the
glue hardens. Once that was done, the gear wells were painted aotake blue.
The Fine Molds
decals worked exceedingly well. They are crisply printed, in register and
opaque. They also reacted favorably to Solvaset and didn't permanently wrinkle
as has often happened with Japanese kit decals. Once the decals
had been applied, the kit was washed with clear water to remove any residue from
the Solvaset. Then it was back to the work bench to have some more things
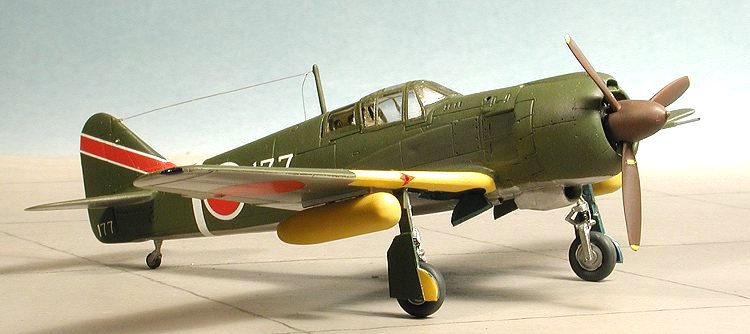
attached. FINAL BITS I now had a painted and decaled kit and it was time to attach
some of the last pieces. First, the gear doors had to be painted the
uppersurface color. Sounds weird, but that is what the directions said. Having
done that, the upper and lower sections were then glued together. The small
lower gear doors were then cut from the larger lower section and glued in place
with superglue. Then the wheels were glued onto the gear struts, again, using
superglue. Finally the gear doors themselves were glued in place.
Now
that I had a pretty complete aircraft, it was given a flat coat using my usual
formula of Tamiya flat base and Future. Then the pastels made their appearance
and the normal exhaust stains were added to the plane. Actually, the plane would have been in pretty good shape since they weren't subjected to the
high temp and humidity that were so prevalent in the tropics and they were
pretty new. Several people have commented that the Japanese
made poor paint and that is why so many of their planes looked so ratty.
Actually, it was more a case that Japanese planes stayed in an operational area
for much longer than Allied birds (which were routinely rotated to rear
areas for overhaul), so suffered more from the environment. Aircraft in the home
islands were usually in pretty good shape. Of course on the other hand, at
times planes were painted over the existing bare metal with no primer used
underneath. Primers will generally
Once the pastels had been added, there were only a few
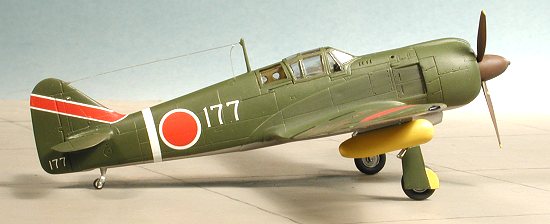
other things to do. One was to add a radio antenna using streched sprue. I like
the clear stuff as it is a lot stiffer than regular plastic. It also doesn't
need painted. Radio wires were near invisible anyway! The masking was then taken
off the canopy. Came of cleanly with no leaks thanks to the Tamiya tape (and not
painting on heavy coats). The last things to do were to paint the wing tip
lights (red on left and blue on right), then press on the lovely yellow drop
tanks,and Ta-Daaaaa! A finished Ki-100. For those of you concerned about the IFF
stripe and drop tank colors, these could be orange or yellow, or any color
inbetween. I assume the tanks were so brightly painted as to make them easy to
find after they were dropped for reuse. 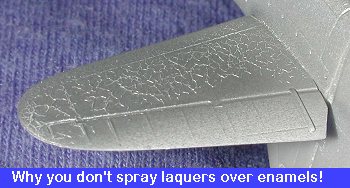 Once the gloss white was dry, I got
out my metal color. I have been using Alclad II as I really like it. The
instructions state that it has to be applied on an acrylic undercoat, but
feeling brave, I figured that a dry enamel wouldn't cause any real problems.
Well, I almost got away with it, but not quite. Generally, if you just mist on
the coats, you don't have to worry about any interaction. Naturally, I got a
spot or two where is was more than a mist! As you can see from the image to the
right, it is a mess. No choice but to sand it down and repaint.
Once the gloss white was dry, I got
out my metal color. I have been using Alclad II as I really like it. The
instructions state that it has to be applied on an acrylic undercoat, but
feeling brave, I figured that a dry enamel wouldn't cause any real problems.
Well, I almost got away with it, but not quite. Generally, if you just mist on
the coats, you don't have to worry about any interaction. Naturally, I got a
spot or two where is was more than a mist! As you can see from the image to the
right, it is a mess. No choice but to sand it down and repaint.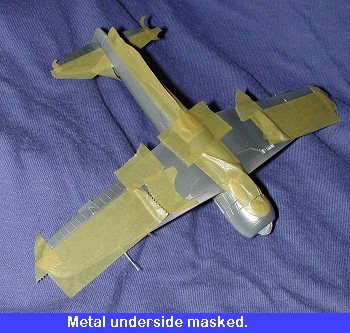 Anyway, after that little fiasco was
finished, the metallic underside was masked except for the control surfaces.
These were fabric and will be painted a greenish grey color. The upper surface
of the kit was then painted an overall Kawasaki Army Green using Aeromaster colors. Gosh,
I'll be sad when they are gone! I can only hope that Polly Scale will produce
some WWII Japanese colors.
Anyway, after that little fiasco was
finished, the metallic underside was masked except for the control surfaces.
These were fabric and will be painted a greenish grey color. The upper surface
of the kit was then painted an overall Kawasaki Army Green using Aeromaster colors. Gosh,
I'll be sad when they are gone! I can only hope that Polly Scale will produce
some WWII Japanese colors.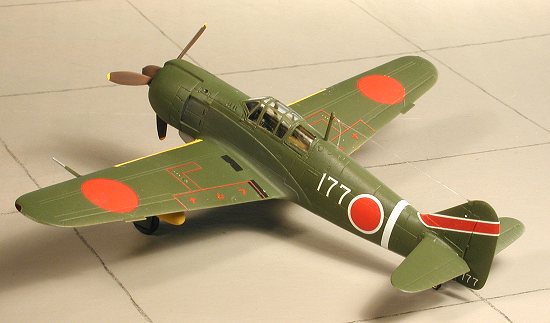 Aftermarket
decals are very difficult to find for the 1/72 Ki-100. I only know of a single
tail marking on a very old Microscale sheet. Fortunately, Fine Molds offers
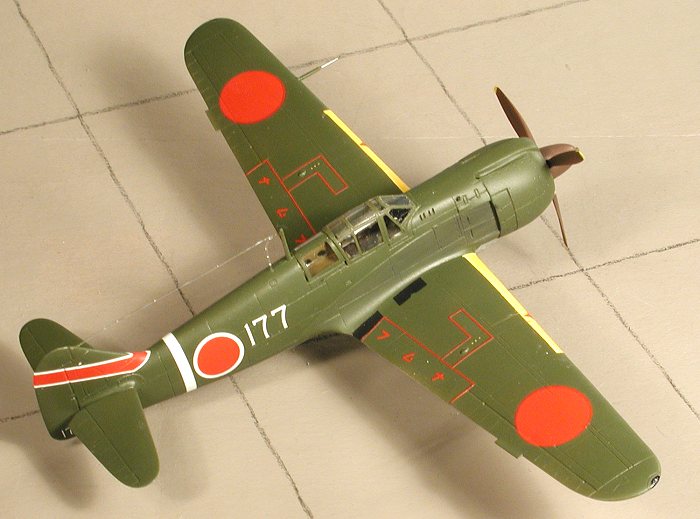
three very interesting schemes in the kit decals. I chose one from the XXXX
Sentai. It is a rather typical aircraft with just a unit marking on the tail and
a number hand-painted on the fuselage and tail.
Aftermarket
decals are very difficult to find for the 1/72 Ki-100. I only know of a single
tail marking on a very old Microscale sheet. Fortunately, Fine Molds offers
three very interesting schemes in the kit decals. I chose one from the XXXX
Sentai. It is a rather typical aircraft with just a unit marking on the tail and
a number hand-painted on the fuselage and tail.
 Next,
the propeller, which had been painted 'propeller color', a dark brown, had the
tips painted yellow and was then slipped over the shaft that was jutting from
the engine. This is one of the few instances of a Japanese prop having yellow
tips as they usually have a yellow stripe about 1/5 way down from the tip.
Next,
the propeller, which had been painted 'propeller color', a dark brown, had the
tips painted yellow and was then slipped over the shaft that was jutting from
the engine. This is one of the few instances of a Japanese prop having yellow
tips as they usually have a yellow stripe about 1/5 way down from the tip. slightly etch the metal and so offer a good
grip to it and won't flake off. Paints added to the primer will then stay on the
plane.
slightly etch the metal and so offer a good
grip to it and won't flake off. Paints added to the primer will then stay on the
plane.
|
CONCLUSIONS |
Well, I was expecting an easy build and didn't get it. I had
forgotten all those reviews I had read when this kit first appeared about how
ill-fitting it was. Actually, it isn't as horrible as several other kits on the
market, but it isn't a breeze. Modeling skills are definitely needed for this
one. The benefit is a really good looking late war Japanese fighter. A TON
better than the really terrible Aoshima kit of this plane which was all you had
in this scale beforehand. Several will blanche at the price of
this kit as well. You really don't get much for your $25 or so. I do recommend
getting one on sale or second hand as I did. Not recommended for beginners or
those seeking an easy build. Real modelers will like it. :o)
REFERENCES Japanese Aircraft of the Pacific War by Rene J Francillon, Putnam,
1979 April, 2001 Copyright ModelingMadness.com. All rights reserved. No reproduction in part or in whole without express permission from the editor. Review copy courtesy of me and my wallet! If you would like your product
reviewed fairly and quickly, please contact the editor or see other details in the Note to
Contributors. Back to Reviews Page 2023