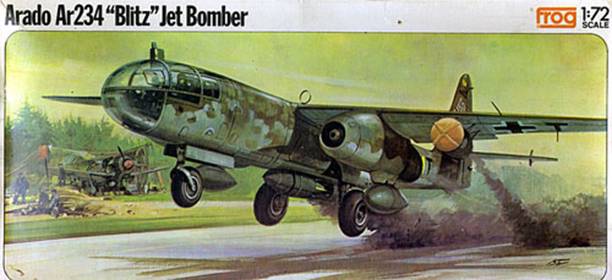
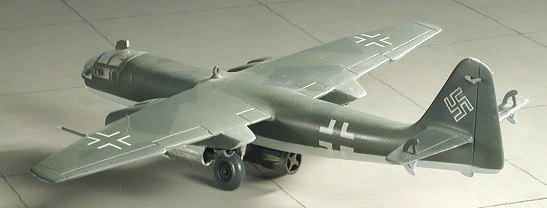
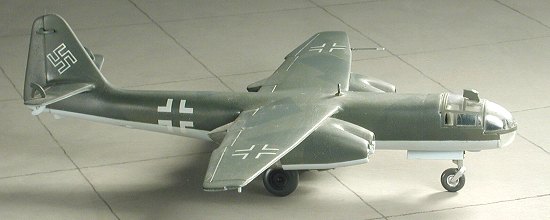
Frog 1/72 Ar-234C 'Blitz'
|
KIT # |
F 417 |
|
PRICE: |
$ OOP - reboxed by Revell AG |
|
DECALS: |
Two options |
|
REVIEWER: |
Scott Van Aken |
|
NOTES: |
|
HISTORY |

The Arado 234 was Germany and the world's first operational jet bomber. Originally operating off skids to save on weight, it was found to be a less than perfect method of landing as wet grass would make for a huge landing run and could end in disaster. The aircraft was then fitted with standard wheels and was relatively successful in the bomber role and very successful as a high speed reconnaissance aircraft. Unfortunately for the Germans, it was a case of too little, too late and while the aircraft was developed into a four engine jet aircraft (the world's first), that one had no opportunity to get out of the testing phase, even though several had been built.
|
THE KIT |
 One thing you can say about Frog kits is that they
were easy to build and relatively accurate. When Frog went out of
business in 1976, most of their molds were bought up by the Soviets and
released under the Novo label (among many others). However, the Soviets
didn't want any 'stinking Nazi aircraft' so Revell AG ended up with those
and released all the German aircraft kits under the Revell banner. When
Revell bought Matchbox, the old Frog kits were to be found in Matchbox
boxes, much to the chagrin of some unsuspecting buyers.
One thing you can say about Frog kits is that they
were easy to build and relatively accurate. When Frog went out of
business in 1976, most of their molds were bought up by the Soviets and
released under the Novo label (among many others). However, the Soviets
didn't want any 'stinking Nazi aircraft' so Revell AG ended up with those
and released all the German aircraft kits under the Revell banner. When
Revell bought Matchbox, the old Frog kits were to be found in Matchbox
boxes, much to the chagrin of some unsuspecting buyers.
While they are not horrible kits, they are definitely not modern and are lacking in the niceties and detailing that we have come to expect from a modern injected plastic kit. Cockpits and wheel wells are barren; details are usually grossly over-scale. However, in their favor is that there were usually few parts; unlike some of the incredibly fiddly kits of today, fit was generally quite good and often they provided options. Oh yes, they did kits that no one else would touch. It isn't until quite recently that we've had another Vengeance, or Maryland and no one does an injected Wyvern.
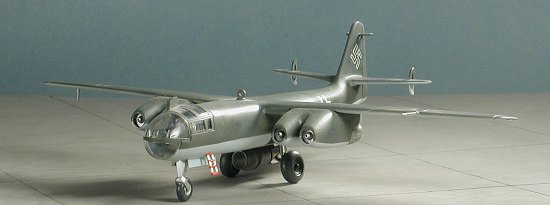 The Arado
kit, if memory serves, could be built as either a two engine Ar-234B or a
four engine Ar-234C (though the prototype). I'm thinking that it may have
also had a V-1 on a trapeze in a Mistel arrangement, but since I don't
remember what happened to that V-1, I could be mistaken in this regard.
Thanks to those who have e-mailed me and verified that it came with the
V-1 and also some JATO packs for under the wing. Appreciate it.
The Arado
kit, if memory serves, could be built as either a two engine Ar-234B or a
four engine Ar-234C (though the prototype). I'm thinking that it may have
also had a V-1 on a trapeze in a Mistel arrangement, but since I don't
remember what happened to that V-1, I could be mistaken in this regard.
Thanks to those who have e-mailed me and verified that it came with the
V-1 and also some JATO packs for under the wing. Appreciate it.
Now you'll have to forgive any memory lapses as the review kit was built quite some time ago, in 1983, and as a result is incorrect in some aspects. However, though it is old, it still looks very much like a 234 and has held up quite well over the years.
|
CONSTRUCTION |
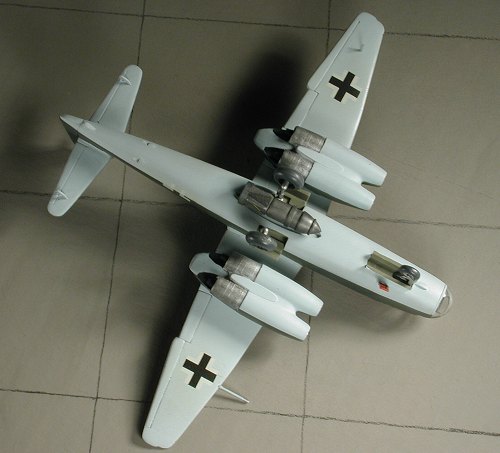 Thanks to the rather simple engineering of the kit,
construction went quite quickly and with minimal fuss. The builder has to
make a decision as to which engines to use, but it does not have to
happen until late in the build as the wings are designed to take either
engine type. The under-wings are flat and have mounting holes for the
engines of choice.
Thanks to the rather simple engineering of the kit,
construction went quite quickly and with minimal fuss. The builder has to
make a decision as to which engines to use, but it does not have to
happen until late in the build as the wings are designed to take either
engine type. The under-wings are flat and have mounting holes for the
engines of choice.
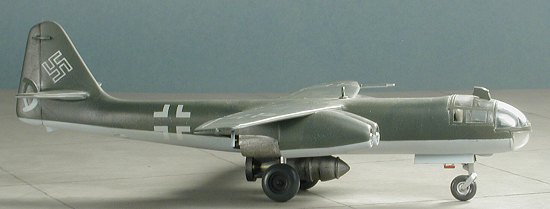
Early in construction one has to decide on which cockpit to use. Knowing that this would be a tail sitter, I put considerable weight into the forward section of the fuselage. I then glued the halves together and when dry, glued on the appropriate cockpit section. This cockpit has a seat in it. No control stick, no side consoles, no rudder pedals. An instrument panel is glued to the single piece nose clear bit. The other clear piece fits atop the cockpit section. A very straightforward method. Of course, the bits are a tad too large, but nothing major and at the time, I wasn't too concerned and left it as it. With the fuselage done, and that includes any puttying needed, the wings were glued in place along with the horizontal stabilizers. These were both filled and sanded as needed.
I then built up the engine pods. These are top/bottom constructs in which you trap the compressor inlets and the exhaust bits. This was followed by more filler and sanding. On this kit, by the time I got finished sanding, there was little left of the minimal raised detail so I sanded it all off, leaving me with a very slick airframe. I glued on the DF loop atop the fuselage and the pitot tube in the wing. The engines still had not yet been attached, but that is because they needed painting first, or I'd never get to the inside of them.
|
COLORS & MARKINGS |
After masking the clear bits with Scotch tape (my masking material of choice at the time), I dutifully painted the underside in RLM 65. Yep. It was a bomber and so it got the bomber colors. RLM 65 on the bottom and a splinter scheme of RLM 70/71 on the top. I used Gunze acrylics for all this as I was totally hooked on Gunze paints at the time. This was because I masked everything and it is a good paint. Once the airframe and engines were painted, I attached the engines and then proceeded to fill and sand the seams. Then the areas were repainted. No gloss coat was applied as I didn't do things like that back then.
|
FINAL CONSTRUCTION |
Then I went back with my trusty brush and painted all those bits I'd attached. Just before attaching the periscope, I removed the tape and cleaned up any problem areas. The last thing I did was add the decals. These are just the very basics of insignia as there were no unit markings provided for the C version. The decals worked quite well on the semi-gloss Gunze, providing no silvering. Unfortunately, they are also a bit transparent. I was using setting solution and used the Microscale system to help prevent that silvering. Last thing painted were the exhaust areas using Metallizer and flat black. The bomb was just pushed into place and the kit was done.
|
CONCLUSIONS |
 Now I have to admit that there are probably many things
inaccurate about this kit, but in 1985, I did what I thought was a pretty
nice job of it. It was easy to build, looked totally cool, and is still a
favorite of mine. Thanks to its sturdy construction, it has survived
several moves, losing little more than the pitot tube and a rudder hinge in
the process. I know that most who are serious about their kits will go for
the Dragon kit or the Revell boxing of the Dragon kit rather than search
out the old Frog version. However, if you have a youngster who is getting
to be interested in kits or are looking for a really pleasant build, then
this one would be a good choice.
Now I have to admit that there are probably many things
inaccurate about this kit, but in 1985, I did what I thought was a pretty
nice job of it. It was easy to build, looked totally cool, and is still a
favorite of mine. Thanks to its sturdy construction, it has survived
several moves, losing little more than the pitot tube and a rudder hinge in
the process. I know that most who are serious about their kits will go for
the Dragon kit or the Revell boxing of the Dragon kit rather than search
out the old Frog version. However, if you have a youngster who is getting
to be interested in kits or are looking for a really pleasant build, then
this one would be a good choice.
June 2004
#276 in the series
If you would like your product reviewed fairly and quickly , please contact me or see other details in the Note to Contributors.