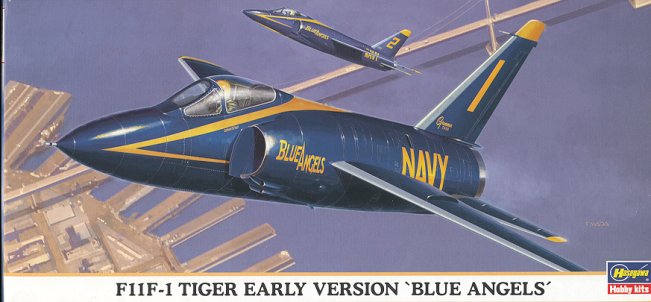
Hasegawa 1/72 F11F-1 'Early Version'
| KIT # | 00170 |
| PRICE: | $ |
| DECALS: | Any Blue Angels bird |
| REVIEW : | |
| NOTES: | resin nose |
| HISTORY & THE KIT |
For a brief history and a peek at what comes in the box,
| CONSTRUCTION |
 Basically, this isgoing to be a quicker than normal build. The main reason is the ease of painting and the number of parts that are NOT going to be used. Basically, you can assign all the pylons, drop tanks and missiles to the spares box or the trash. You can also toss the ejector bulges that go behind the guns as the early Tiger
didn't carry these.
Basically, this isgoing to be a quicker than normal build. The main reason is the ease of painting and the number of parts that are NOT going to be used. Basically, you can assign all the pylons, drop tanks and missiles to the spares box or the trash. You can also toss the ejector bulges that go behind the guns as the early Tiger
didn't carry these.
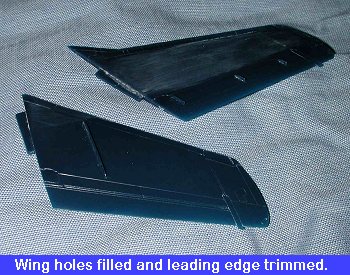
The first steps are to fill the holes in the underside of the wings. I used the superglue and accelerator method, which works quite well for flat surfaces like this. Just make sure that you start sanding about 5-10minutes after applying the accelerator or the superglue may become too hard. While we have the wings, the leading edge extensions need to be removed as well. These were added on when the nose was lengthened. A short session with a razorsaw and sandpaper is all that is needed.
Next step is to build the interior. I left mine stock,
painting the inside dark grey with black console tops. The kit decals were then
applied and the assembly 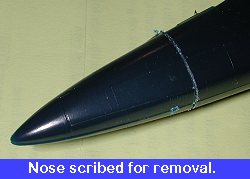 glued into
the interior when the paint and decals had dries. Next the fuselage was glued
together. Now it was time to add the resin nose. Some of you may want to remove
the kit nose before gluing together the fuselage and that is fine. I just chose
to do it this way. There is a panel line that runs just even with the front of
the windscreen that is the guide. This was first scribed a few times to make
sure that I wouldn't mess things up too badly.
glued into
the interior when the paint and decals had dries. Next the fuselage was glued
together. Now it was time to add the resin nose. Some of you may want to remove
the kit nose before gluing together the fuselage and that is fine. I just chose
to do it this way. There is a panel line that runs just even with the front of
the windscreen that is the guide. This was first scribed a few times to make
sure that I wouldn't mess things up too badly.
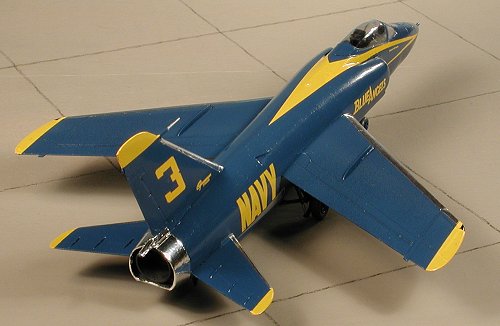
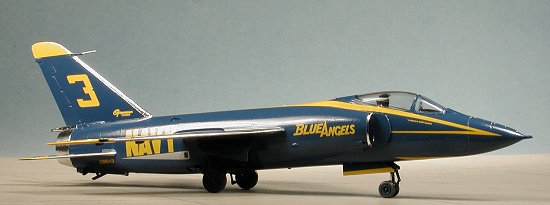
Taking my handy razor saw, the old nose was then cut off and
the new resin one glued in place using copious amounts of superglue. As you can
see, the shorter nose definitely looks different. If you feel that nose
weight is needed (which I didn't), putting it under the cockpit
before gluing
on the nose would be a good idea. With the nose on, the seams were sanded
This new nose may be a bit of a problem for some builders. Thetis because the detail on the nose is recessed whereas the kit has fine raised panel line detail. There are three options. You can rescribe the entire kit (way too much work for this kid), fill the nose lines with stretched sprue, or you can leave things as they are. I chose option 3. Frankly, with such a dark paintjob as is BA Blue, it won't jump out at you so should look OK.
| PAINT |
 After a bit
more research in Ginter's book on the F11F (read at a store!), it was obvious
that the intakes were not white, but blue like most of the rest of the plane.
This seemed like a good time to do some painting, even though more assembly was
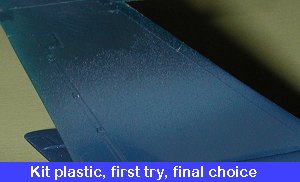
needed. I bought some Testors Blue Angel Blue in the Model Master line. It
looked too dark for my liking, so I mixed in some white and sprayed a test area
on the tail. Hmm. Too light. Mixed in some more blue and gave it another shot.
This one wasn't as dark as the plastic, but was darker than the first try,
appeasing mixture so I left it like that and painted a large part of the
airframe. Now I know that the Color Police are going to have a warrant out formy arrest on this one, but I'm taking the fifth (glug, glug) on this one. I
do know that BA blue is terribly dark, even darker than the kit plastic, but it
just doesn't look right to me on a 1/72 scale kit!
After a bit
more research in Ginter's book on the F11F (read at a store!), it was obvious
that the intakes were not white, but blue like most of the rest of the plane.
This seemed like a good time to do some painting, even though more assembly was
needed. I bought some Testors Blue Angel Blue in the Model Master line. It
looked too dark for my liking, so I mixed in some white and sprayed a test area
on the tail. Hmm. Too light. Mixed in some more blue and gave it another shot.
This one wasn't as dark as the plastic, but was darker than the first try,
appeasing mixture so I left it like that and painted a large part of the
airframe. Now I know that the Color Police are going to have a warrant out formy arrest on this one, but I'm taking the fifth (glug, glug) on this one. I
do know that BA blue is terribly dark, even darker than the kit plastic, but it
just doesn't look right to me on a 1/72 scale kit!
| THE SAGA CONTINUES |
 With that paint dry, the kit returned to the bench. At this
time the wings were glued in place as were the intakes. The intakes had the gun
ports drilled out, even though there are no guns in it. Fit of the intakes is fair, but does need filler. Some was needed on the wing join and a few other spots
as shown by the paint that was applied. Once all of that was done, the cockpit
area was freshened up and the windscreen/canopy glued on and masked.
With that paint dry, the kit returned to the bench. At this
time the wings were glued in place as were the intakes. The intakes had the gun
ports drilled out, even though there are no guns in it. Fit of the intakes is fair, but does need filler. Some was needed on the wing join and a few other spots
as shown by the paint that was applied. Once all of that was done, the cockpit
area was freshened up and the windscreen/canopy glued on and masked.
Before painting on the next batch of BA Blue, I figured I'd see what the decals were like. Didn't relish the idea of them not working and having to paint them on, but thought that if nothing else, I might end up having to paint the tips of the wings and tail. Taking one of the tail tip decals, I placed it in water and after a minute slid it on the tail. Fit was good, though the decals do have some rather extensive carrier film. They are also not as crisp as aftermarket decals, undoubtedly because they are double printed with white backings. Well, to no surprise, it did not conform too well, so with some anticipation of a disaster, I applied some Microscale setting solution. Nothing. OK, on to something stronger. In this case Solvaset. It was applied and left to work. Nothing. Now this was unusual. I still had one card to play and that was Champ. An application of that did finally cause the decal to succumb, though it needed some help when it came to folding over the fin tip.
 The rest of
the kit was sprayed and when dry, brought back to the work room to gaze longingly
at the beautifully orange peeled paint! Actually, it isn't that bad, but not
contest quality (gee, I say that about ALL my models).
The rest of
the kit was sprayed and when dry, brought back to the work room to gaze longingly
at the beautifully orange peeled paint! Actually, it isn't that bad, but not
contest quality (gee, I say that about ALL my models).
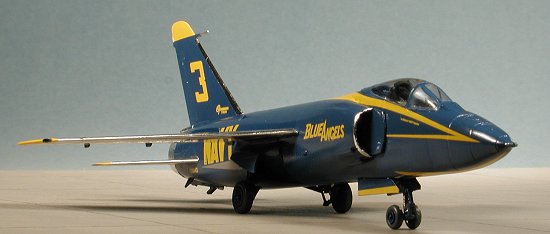
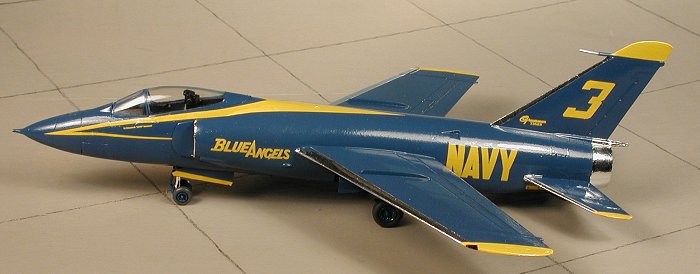
Being a Blue Angels plane, the leading edges and the exhaust cone were always highly polished as befits a plane of this stature. My two choices were to paint these areas with a metallizer of some sort or to use BareMetal Foil. I chose the foil method as it doesn't require any masking and is pretty easy to do. This isn't exactly a short term deal and it took a couple of days here and there to get it all done. The most difficult is the intake leading edge and I may have to redo one of them. After this was done, the landing gear was installed and the wheels painted and glued in place. Now it was standing on all its gear and starting to look like it would finally make it! I should mention at this time that the main landing gear is a rather complicated set up and getting everything to fit properly wasn't an easy job. It is best to glue all three of the various struts on at the same time to make sure you can get it all to line up properly. The gear doors were left off until after decaling wasdone.
| DECALS |
 Based on the success I had with the fin tip decal, I
figured that the whole operation would go pretty smoothly. I knew that Champ's
setting solution would work without terminal wrinkles and so started applying the
decals from the back to front. I do it in stages so that I always have a dry part
of the plane to hold onto. Decaling at one time was a one, perhaps two-day
operation. Not any more. You mess up the decals and all previous work is
overshadowed by the glitch. I was quite happy at how well the Champ worked on
the decals and had no real problems until the final decal (isn't it always like
that?).
Based on the success I had with the fin tip decal, I
figured that the whole operation would go pretty smoothly. I knew that Champ's
setting solution would work without terminal wrinkles and so started applying the
decals from the back to front. I do it in stages so that I always have a dry part
of the plane to hold onto. Decaling at one time was a one, perhaps two-day
operation. Not any more. You mess up the decals and all previous work is
overshadowed by the glitch. I was quite happy at how well the Champ worked on
the decals and had no real problems until the final decal (isn't it always like
that?).
The last decal to be applied was the large one
that covered the area aft of the cockpit, down the cockpit sides and onto the
nose. Frankly, as much as Hasegawa tried, it wasn't the exact shape it needed to be
to conform properly. In my attempts to get things aligned as they should, I
managed to mess up the left nose section. What it did was to break into several
small chunks as I tried to move it into position. Though damage control was
partially successful, it is obvious when you look at it that I had troubles. No
aftermarket for this baby as the later Tigers had a different scheme!
| THE LAST STEPS |
 Once the decals had all been applied and were dry, the
entire plane was wiped down with clean water to remove any setting solution. If
this stuff is left to dry, it can turn the carrier film an odd brown over time.
I have several kits that show this phenomenon and it does detract from the
model. Once it had dried, I thought about spraying on some Future over it to seal
the decals in and to add some gloss. However, I have not had the best of
luck spraying the current Future formula so decided to get out the wide brush andbrushed on a coat. No worries!
Once the decals had all been applied and were dry, the
entire plane was wiped down with clean water to remove any setting solution. If
this stuff is left to dry, it can turn the carrier film an odd brown over time.
I have several kits that show this phenomenon and it does detract from the
model. Once it had dried, I thought about spraying on some Future over it to seal
the decals in and to add some gloss. However, I have not had the best of
luck spraying the current Future formula so decided to get out the wide brush andbrushed on a coat. No worries!
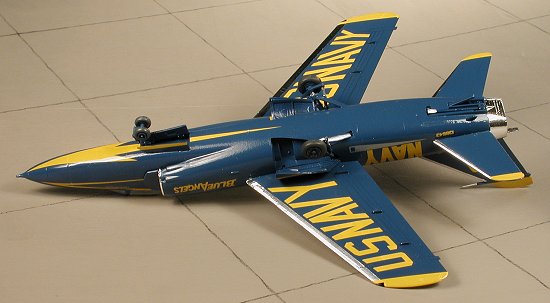
What I did was to glue on all the remaining pieces. Not much left, actually. Only the gear doors, fuel vent, and tail hook. The exhaust insides were painted with burnt iron (this area is not polished!). The wing tip lights were painted using Tamiya clear redand green.
| CONCLUSIONS |
 This kit was as much fun to build as the other two F11Fs that I have
done over the years. And that includes the one done in 1998 with the photo-etched cockpit. The addition of the resin nose is quite nice
and does allow a bit of a different model that what one normally sees. As I
mentioned earlier, there is a scheme on Superscale sheet
This kit was as much fun to build as the other two F11Fs that I have
done over the years. And that includes the one done in 1998 with the photo-etched cockpit. The addition of the resin nose is quite nice
and does allow a bit of a different model that what one normally sees. As I
mentioned earlier, there is a scheme on Superscale sheet
| REFERENCES |
F11F Tiger in Detail and Scale, by Bert Kinsey
F11F Tiger, by Steve Ginter
July 2001
Copyright ModelingMadness.com. All rights reserved. No reproduction in part or in whole without express permission from the editor.
If you would like your product reviewed fairly and fairly quickly, please contact the editor or see other details in the Note to Contributors.
Back to Reviews Page 2022