Hasegawa 1/72 A3D-1 Skywarrior
| KIT #: | 04041 |
| PRICE: | $39.95 MSRP when it was new in 1997 |
| DECALS: | Two Options |
| REVIEWER: | Scott Van Aken |
| NOTES: | IPMS 2002 Nationals decals, and QuickBoost resin used. |
| HISTORY |
 Prior to the initial operational capability of the U.S. Navy's Polaris-armed Fleet Ballistic Missile submarines, the A-3 was the Navy's critical element in the US nuclear deterrent. Squadrons were established in two Heavy Attack Wings (HATWINGs), with one wing established at NAS Whidbey Island, Washington while the other wing was initially established at NAS Jacksonville, Florida before relocating to NAS Sanford, Florida. The wing at NAS Whidbey Island would later transition to the EA-3 variant (Actually, this is incorrect. Most of the standard bomber A-3s were converted to either KA-3B tankers or EKA-3B electronic warfare jammer aircraft. At least two squadrons of EKA-3Bs (VAQ-130 the RAG outfit and VAQ-135) were based at Alameda, where your editor was first introduced to the type. EA-3Bs were basically SIGINT planes and not jammers. These were divided up between VQ-1 and VQ-2, both of which were based overseas. Ed), eventually forming the nucleus for the Navy's EA-6B Prowler community, while the wing at NAS Sanford would convert to the A3J Vigilante in the nuclear heavy attack mission, followed by conversion to the RA-5C and transition to the reconnaissance attack mission. The Vigilante wing would also continue to retain a small number of TA-3B aircraft for training Naval Flight Officers in the Vigilante's radar and navigation systems. The Skywarrior's strategic bombing role faded quickly after 1960, briefly replaced by the A3J Vigilante (later redesignated as the A-5A Vigilante) until 1964. Soon after that, the Navy abandoned the concept of carrier-based strategic nuclear weaponry with the success of the Polaris missile-equipped Fleet Ballistic Missile (FBM) submarine program and all A-5As were converted to the RA-5C Vigilante reconnaissance variant.
| THE KIT |
 Hard to believe that it has been 13 years since this kit was initially issued. Previous to then, there was only the old Allyn 1/48 kit (which was really a stand model), the odd scale Revell kit, and a fairly accurate Rareplane 1/72 vacuform kit. Really wanting an A-3, I eventually built the Rareplane kit as an EKA-3B. I figured that if Hasegawa released a kit, they'd do the EA-3 version as they tend to do US planes that have been based in Japan. However, they never have and all of the kits so far released have been variants on the base aircraft.
It is everything one expects from Hasegawa. Superb detailing, excellent instructions and colorful decal choices. True, the cockpit is a bit simple and uses decals for instrument panels, but in this scale, there is not much to see in there anyway. The kit has gone on to be released in several variants, including an NA-3B, 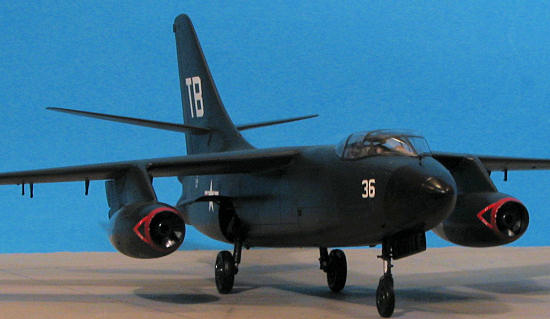 EKA-3B, KA-3B and an early A3D-2. What has not been done have been an EA-3B nor an RA-3B. This is probably because they'd need to tool a new fuselage for these planes and they don't want to spend the money. However, at one time, Cutting Edge did provide some bits for an RA-3B but finding anything like that will be difficult. Personally, I'm a bit bummed because I really want to do an EA-3B.
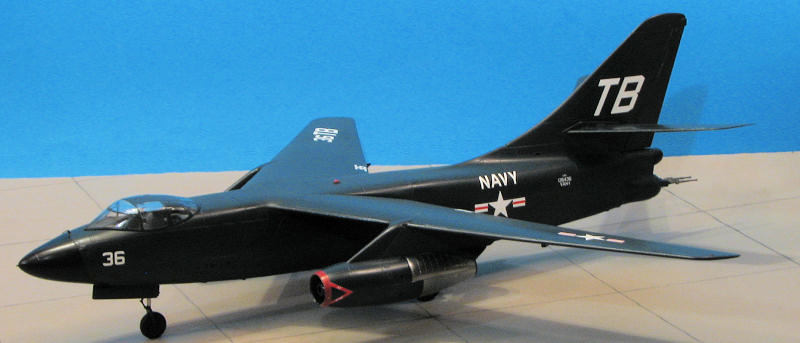
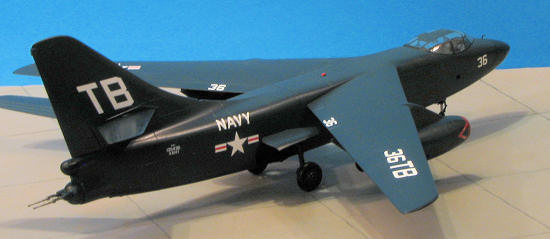
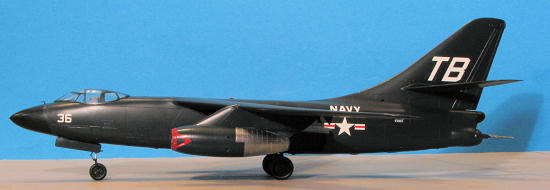
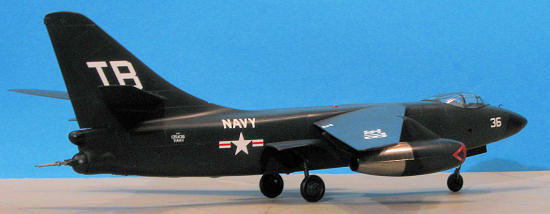
This kit is for the A-3Bs that were in the VAH squadrons in the late 1950s and early 1960s. What it doesn't have is an in-flight refueling probe that became so common on the plane in the mid 1960s. This and the lack of later antennas as well as the central canoe and tanker package do limit you to an early plane.
You get markings for two rather colorful planes. The first, as shown on the kit's box art, is for a VAH-11. It is in the standard light gull grey over white, a color that almost all A-3s wore. The other is a VAH-10 plane from the USS Constellation. The decal sheet also includes the upper wing walk areas, so you don't need to resort to painting them on.
| CONSTRUCTION |
Even though I have the rather rare boxing of the A3D-2, I haven't built it. It was when I discovered the Quickboost nose and tail replacement parts that I decided to go ahead and do one. The Quickboost parts are pretty much copies of the resin that came in the Hasegawa limited boxing, only in this case, the resin pour stub has been moved to the back of the parts. The guns are also 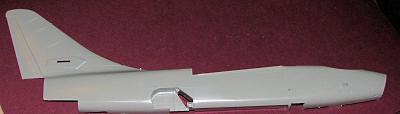 resin instead of Hasegawa's metal ones. The bene
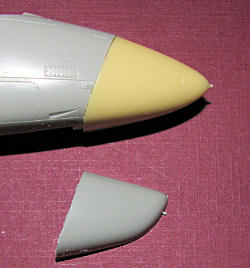 fit of the pour stubs as provided by Quickboost is that one can leave them on and use them to help make a good join to the plastic.
The first step, however, is to cut the kit's nose and tail sections away to make room for the resin replacements. The nose part pretty well fits as it is for the stub is far enough from the edge to do so. The tail, however, is much more shallow so a considerable amount of 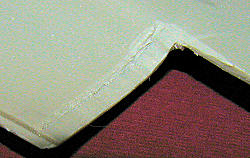 grinding is required on the fuselage half to get this part to fit. I guess I could have ground down the resin bit as well, but it would have been more messy. This resin tail adds weight to the rear so perhaps more weight will have to be added to the front. More so as one no longer has a hollow nose to fill.
With that out of the way, I glued together the wings and started on the cockpit. There are a myriad of decals for the main instrument panels and side consoles as well as the navigator's position. The cockpit interior is dark gull grey, though in some cases, I've b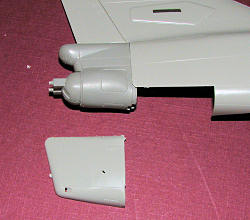 een in planes where the floor was black. Even in grey interiors, the entrance hatch on the floor (that is the oval with the hand and foot holds) might be black. The kit provides all the different seat shapes, which is quite nice. It also has the jump seat in the raised position on the rear bulkhead. This seat frequently had the bottom in silver, due to wear as much as anything. In fact, as planes got older, the cockpits got more and more worn and torn. However, this wasn't to be an old beater so I did little more than dry brushing once it was all in place. When done, it was glued into one fuselage half along with the nose gear well. These were then trapped in the two halves, which were taped together to allow them to dry in the pr
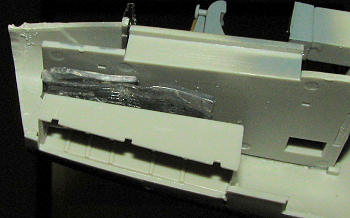 oper position.
Next step was to tape on the wings, stabs, resin nose and tail section to check to see if it needed nose weight. Holding the taped plane at the main gear attachment points, it seemed like it didn't need any. However, I squished some lead sheet and stuck it in between the nose well and cockpit just to be sure. I later put in a plasticard bulkhead behind the weight in case the super glue broke loose. Then the fuselage halves were glued together. Fit is fairly good, though there were some bits where I had to use super glue to get the best alignment without a step. I wasn't totally successful, but fortunately, there are not many complex engravings to replace.
With the seams sanded down on the fuselage. I started installing the lower inserts. It is good that Hasegawa did this as it makes it much cleaner looking and reduces seams. The fit of these inserts is good, though one does have to do a bit of sanding to even things up and super glue comes in handy to hold things in place. I used this substance on the rear of the bomb bay section to take care of the seam in the lower wheel well wall. With all the lower bits in place, I then added the gun tail resin piece. Though it looked great when test fitting in the separate halves, it wasn't as snug a fit with the fuselage together. I also had to trim a section from the tail hook well to get it to fit. Needless to say, this wasn't anything that couldn't be repaired by filler and after some work, it was all smoothed in place.
| COLORS & MARKINGS |
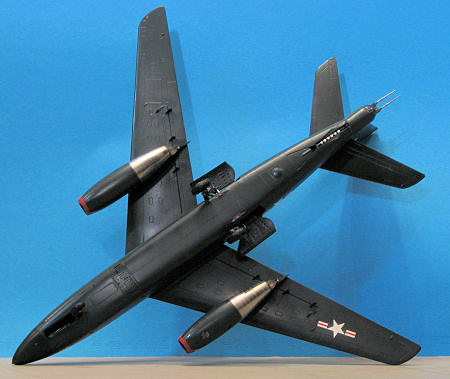
 At this time I did a touch of preliminary painting to be sure that there would be no surprises later on. This included painting the inside of the engine intakes and the intake cone with sea blue. Finding color photos of early Skywarriors wasn't easy and I only found one that hinted at things like engine intake and landing gear strut/well colors. The build went concurrently with painting as the kit was painted in stages. As I finished a subassembly, that was painted. One thing I did that wasn't sea blue were the aft sections of the engine nacelles. These were painted stainless steel and turned out very bright.
| FINAL CONSTRUCTION |
 All this intermediate painting slowed things down quite a bit as every time I painted something, I waited 48 hours to touch the part. With gloss paint this works out well as it ensures no unwanted finger marks or smudges. Even with lacquer thinner, gloss paint takes a long time to dry.
 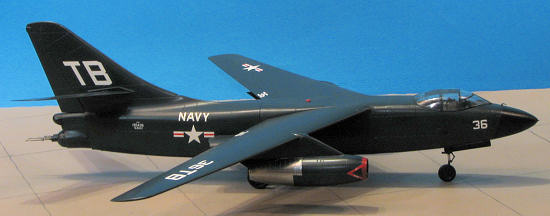 complete with the forward intake assembly. Fortunately, there are three A-3 options on the sheet, all with identical style warning markings so two were taken from another option.
 | CONCLUSIONS |
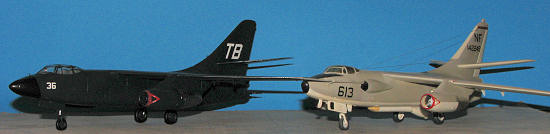 It was a nice exercise to back-date this kit to a -1 variant. I've always liked the version with the rear turret instead of the later duckbutt, something that was kept on the TA-3s and some trials aircraft until the end of their operational career in the 1990s. It wasn't as simple as I'd have liked, but it wasn't a chore either, a conversion that just about anyone who has wielded a razor saw can handle without any problems. It looks quite nice sitting next to my Rareplanes vacuformed kit. I wonder if it will take me 20 years to do another?
| REFERENCES |
http://en.wikipedia.org/wiki/A-3_Skywarrior
September 2010
If you would like your product reviewed fairly and fairly quickly, please contact the editor or see other details in the Note to Contributors.