Heller 1/72 Mirage 2000C
|
KIT # |
354 |
|
PRICE: |
$10.00 |
|
DECALS: |
One aircraft |
|
REVIEW : |
|
|
NOTES: |
|
|
BRIEF HISTORY |
 The Mirage 2000 was
developed in the late 1980s as a replacement for the superb Mirage III/V family
of interceptors and fighter-bombers produced by Dassault. It was invisioned that
this single airframe would be able to replace all of the different types of
aircraft in use by the French Air Force. Everything from nuclear bomber to
ground attack. What is amazing about this is that it has pretty well done quite
a bit of that. There are two seat Mirage 2000B trainers, single seat Mirage
2000C interceptors; the 2000D two seat ground attack aircraft and the 2000N two
seat nuclear capable fighter bombers. What's more, these aircraft are all under
a constant program of modification and upgrading to keep them as potent as
possible.
The Mirage 2000 was
developed in the late 1980s as a replacement for the superb Mirage III/V family
of interceptors and fighter-bombers produced by Dassault. It was invisioned that
this single airframe would be able to replace all of the different types of
aircraft in use by the French Air Force. Everything from nuclear bomber to
ground attack. What is amazing about this is that it has pretty well done quite
a bit of that. There are two seat Mirage 2000B trainers, single seat Mirage
2000C interceptors; the 2000D two seat ground attack aircraft and the 2000N two
seat nuclear capable fighter bombers. What's more, these aircraft are all under
a constant program of modification and upgrading to keep them as potent as
possible.
The Mirage 2000 has also enjoyed quite a bit of export success, finding itself in the forces of Greece, Peru, India and a number of other countries. To my knowledge, it is still in production and still a very potent fighter.
|
THE KIT |
 The Mirage 2000 has been kitted in
both 1/72 and 1/48 scales. In 1/48 by Monogram and ESCI and in 1/72 by Heller,
and I believe Italeri. The 1/48 kits are both of prototype aircraft and have not
been modified to production status. Heller, on the other hand, has upgraded
their kits so that all versions can be built.
The Mirage 2000 has been kitted in
both 1/72 and 1/48 scales. In 1/48 by Monogram and ESCI and in 1/72 by Heller,
and I believe Italeri. The 1/48 kits are both of prototype aircraft and have not
been modified to production status. Heller, on the other hand, has upgraded
their kits so that all versions can be built.
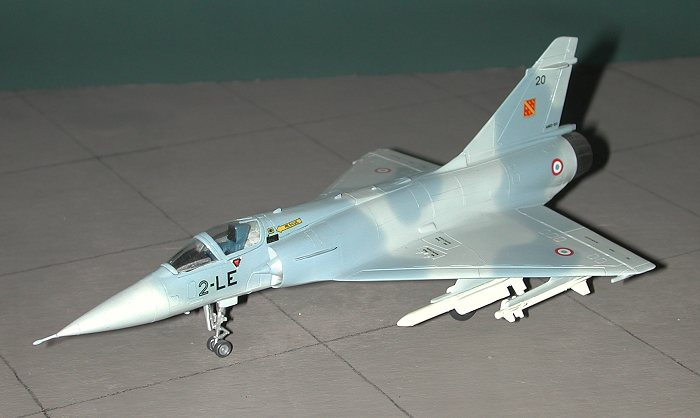
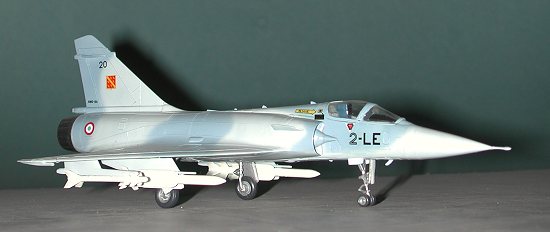
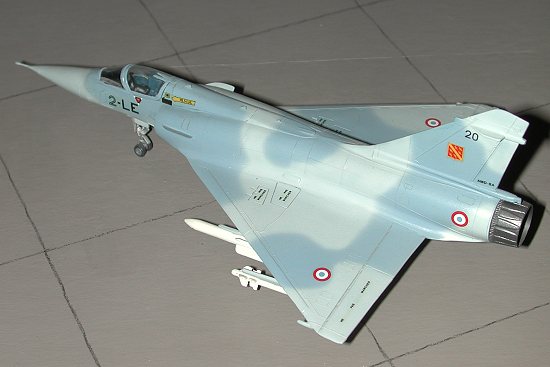
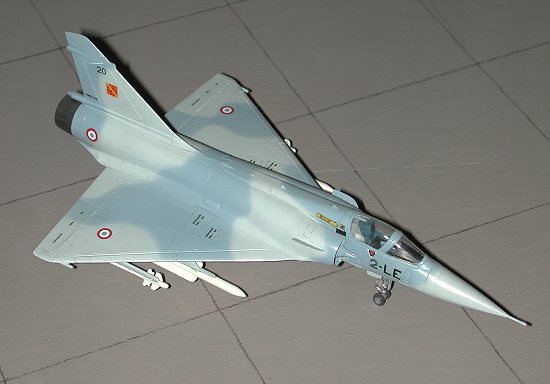
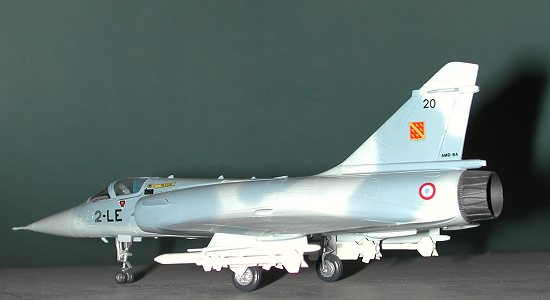
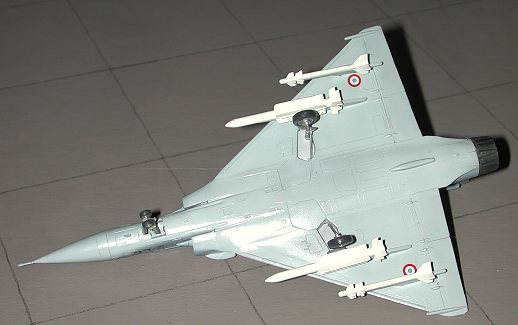
OK, now to the kit itself. It is a child of the mid-80s. This means basic cockpit, raised panel lines and minimal detail in things like wheel wells. The only option is for an open or closed canopy. The Mirage 2000C single seater comes with a pair of underwing missiles, both, I believe, by Matra, but perhaps a reader can give me more detailed info. (Ask and the info will come to you. Reader Burkhard Domke reports "...are meant to represent Matra R550 Magic IR short-range AAMs (the small ones) and Matra Super 530 SARH short/medium-range AAMs.") There are decals for a single aircraft. They are quite flat and have lots of carrier film.
Instructions are typical of the time with a large sheet having four construction steps. Colors are in a sort of code that requires an add in sheet to decode. Build enough Heller kits and you'll have them figured out! The construction steps are logical and sufficient to enable you to build the kit.
|
CONSTRUCTION |
 Now to the
meat of the review. If you have read the review I did of the Mirage
2000N a number of years ago, you can basically transfer all that data over
to this review. They are basically the same kit with a different fuselage.
Now to the
meat of the review. If you have read the review I did of the Mirage
2000N a number of years ago, you can basically transfer all that data over
to this review. They are basically the same kit with a different fuselage.
To give a brief rundown of trouble areas. This would be the wing/fuselage join and the intakes. The fit on both of these is not that good. The intakes themselves are especially poor and will need lots of filler and filing. Make sure that you paint the insides of the intakes white.
I also found the missiles to be uninspiring and basically just shapes. There didn't seem to be much in the way of detail on them and the instructions were not much help only stating that they were to be painted white.
What would really have helped on this kit was a decent reference library, but I don't have on on Mirages.
|
PAINT & DECALS |
 All of the early
Mirage 2000Cs were painted in a scheme of light and medium blue greys. The
instructions gave a number of colors that you had to mix to get what was needed,
but at the time this kit was built, there were no premixed colors available.
Since then, Xtracolor has produced the shades that are needed for this
kit.
All of the early
Mirage 2000Cs were painted in a scheme of light and medium blue greys. The
instructions gave a number of colors that you had to mix to get what was needed,
but at the time this kit was built, there were no premixed colors available.
Since then, Xtracolor has produced the shades that are needed for this
kit.
As there were no canopy supports, and a rather minimalist cockpit, this kit was built with the canopy closed. This was masked off and the lighter of the two blue-greys was painted on. Both of these colors were mixed using various Gunze acrylics. Once the aircraft was painted this first color, the second was sprayed on the upper and side surfaces of the model in the standard pattern. Some of the very early Mirage 2000Cs had a black radome, but I was using a slide that I had to do this kit with.
As I mentioned, the kit decals are not the best. Fortunately, I have a set of Carpena decals for unit badges, roundels, serials, and code letter/numbers. Only some of the data and warning decals were used from the kit. Once those were put on and dry, the wheel wells were painted silver and the exhaust cone painted in burnt metal.
The landing gear are very well done for the nose gear, but the main gear are just, well, too scale. They are quite flimsy and prone to breaking at the least prompting. Fitting of the gear doors, missiles and other small bits completed the kit. I should also mention at this point that I have also broken the nose probe a number of times as well. Replacing it with tubing wouldn't be such a bad idea.
|
CONCLUSIONS |
Once the kit is finished, it is really quite nice. The problems with the wings and intakes spoil what could have been a great kit. However, if one is prepared for these problems, it can be quickly finished. I would not suggest this for the beginner, but everyone else should have no real problems.
Copyright ModelingMadness.com. All rights reserved. No reproduction in part or in whole without express permission from the editor.
Review kit courtesy of me and my wallet!
If you would like your product reviewed fairly and fairly quickly, please contact the editor or see other details in the Note to Contributors.
Back to Reviews Page 2016