Airfix 1/48 Hawker Hurricane I (tropical)
| KIT #: | A05127 |
| PRICE: | $24.95 SRP |
| DECALS: | Two options |
| REVIEWER: | Tom Cleaver |
| HISTORY |
First appearing in 1935,
the Hawker Hurricane was the first modern monoplane fighter to equip the RAF,
and was one of only three RAF aircraft to operate in first‑line service from the
first day of the Second World War to the last. (The other two being the Spitfire
and the Swordfish)
 Though the
Spitfire gained the glory in the Battle of Britain, it was the tough Hurricane
that won the fight.
Three‑fifths of the squadrons of RAF's Fighter Command
were mounted on Sidney Camm's fighter that summer of 1940.
Though
outperformed by the Bf‑109E, the Hurricane had the
benefit of being “primitive” enough in its construction that shot‑down
Hurricanes could be quickly repaired and returned to service, which was the RAF
“secret” that really won the Battle of Britain - fully 60 percent of the
Hurricanes shot down over England that summer were repaired and returned to
operational use during the battle, a fact that Goering's Luftwaffe missed as
they confidently predicted that on September 15, 1940, there would be no RAF
fighters over London.
It was a scandal when reports came out that production
Hurricane I's could barely make 305 mph at 10,000 feet ‑ the height at which
most combat occurred ‑ and that the airplane could not be flown over 20,000
feet, the altitude from which the Messerschmitts dove out of the sun on their
targets.
Though the
Spitfire gained the glory in the Battle of Britain, it was the tough Hurricane
that won the fight.
Three‑fifths of the squadrons of RAF's Fighter Command
were mounted on Sidney Camm's fighter that summer of 1940.
Though
outperformed by the Bf‑109E, the Hurricane had the
benefit of being “primitive” enough in its construction that shot‑down
Hurricanes could be quickly repaired and returned to service, which was the RAF
“secret” that really won the Battle of Britain - fully 60 percent of the
Hurricanes shot down over England that summer were repaired and returned to
operational use during the battle, a fact that Goering's Luftwaffe missed as
they confidently predicted that on September 15, 1940, there would be no RAF
fighters over London.
It was a scandal when reports came out that production
Hurricane I's could barely make 305 mph at 10,000 feet ‑ the height at which
most combat occurred ‑ and that the airplane could not be flown over 20,000
feet, the altitude from which the Messerschmitts dove out of the sun on their
targets.
Following the
success of the Battle of Britain, the RAF could allow the Hurricane to be sent
to other theaters.
The defense of Malta had been so important that a
squadron had been diverted to that island at the height of the Battle of
Britain.
Now, in the fall of 1940 and early 1941, the Hurricane I, which was
outclassed by the new “Friedrich” version of the Bf-109 could be sent to Egypt,
where it outclassed the Italian C.20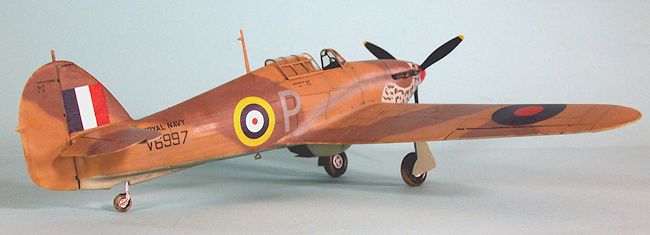 0
“Saetta”, the most modern Italian fighters, and was clearly superior to the
C.R.42 biplane.
By March, when the British were preparing to move into Greece to
bolster that country’s fight with the Italians, the Gloster Gladiators in the
squadrons sent had all been replaced by Hurricanes.
0
“Saetta”, the most modern Italian fighters, and was clearly superior to the
C.R.42 biplane.
By March, when the British were preparing to move into Greece to
bolster that country’s fight with the Italians, the Gloster Gladiators in the
squadrons sent had all been replaced by Hurricanes.
After diverting
squadrons to Greece, the RAF was short of fighters in Egypt.
The Fleet Air Arm squadrons 805 and 806 now found
themselves without a carrier from which to operate with the near destruction of
HMS Illustrious and that ship’s subsequent departure via the Suez Canal for
major repairs in the United States.
805 Squadron was issued the F4F-3 Wildcats that the
Greek Air Force had ordered, which were still in Egypt at the time Greece fell,
while 806 Squadron was issued Hurricane Is, with both squadrons operating as the
Naval Fighter Wing North Africa.
They took part in the fighting around Tobruk in the
summer of 1941, and other fighting in North Africa up to January 1942, when the
RAF was able to send sufficient squadrons to what was now known as the Desert
Air Force that the FAA squadrons were no longer needed.
Both were repatriated to the UK where they returned to
their naval roles.
| THE KIT |
 Hurricane Is
from Hasegawa and Italerei the way the sun outshines the moon.
Hurricane Is
from Hasegawa and Italerei the way the sun outshines the moon.
| CONSTRUCTION |
Construction is very
straightforward and is made much easier by the excellent new Airfix instruction
sheet, which provides a logical path of assembly that is clearly marked in each
illustrated panel.
Following the instructions is guaranteed to result in an
excellent model.
The only “glitch” I
found is that it is a good idea to clean up the main spars that form the basis
of the kit’s construction.
If you scrape them down on upper and lower sides, they
will fit inside the wing without
 problem.
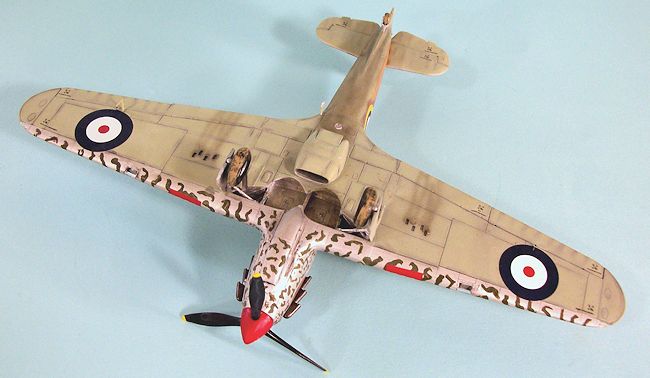
To modify the kit for the tropical version, a modeler
only has to assemble the two halves of the Vokes filter and glue that to the
lower fuselage nose part, then take a razor saw and cut out the central part of
the lower wing forward of the landing gear, following the two panel lines to
either side of the carb intake. I then glued the foward section to the lower
wing so I could work the joint from inside and outside to get it right.
I painted all the
cockpit parts before cutting them off the sprues, using Xtracrylix British
Grey-Green for the rear bulkhead and Tamiya Flat Aluminum for the rest of the
cockpit.
The instrument panel decal takes care of all the added detail needed.
I used home-made seat
belts made from used fabric Band Aids, with details drawn on them with a pen.
Theese “drape” perfectly.
One could do this with an unused Band-Aid, and the
sticky side would allow even easier attachment.
Proof that model parts can come from anywhere.
I also decided to use
the “closed” canopy part in the open position.
Test-fitting the parts, the “open” canopy part is a bit
big and sits a bit high.
The “closed” part can fit exactly where it should in the
slid-back option, and doesn’t look oversized.
By taking care in
assembly, I had no need of using any filler anywhere on the model.
Parts fit throughout is superb.
Once I attached the wing sub-assembly to the fuselage,
I glued the lower rear fuselage part in position, then attached the horizontal
stabilizers and posed the elevators and rudder in “dynamic” positions.
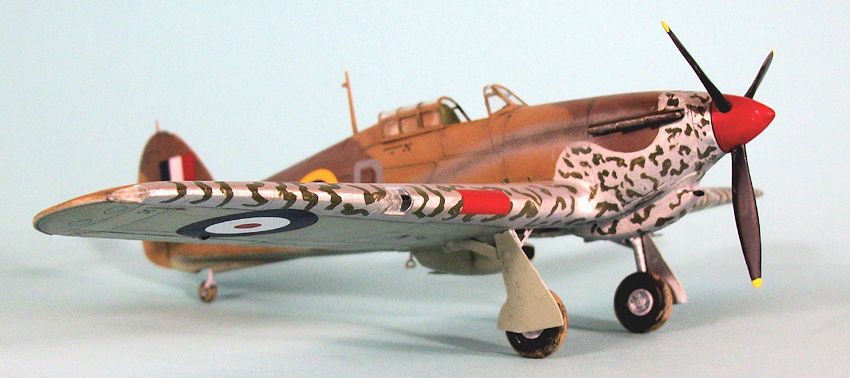
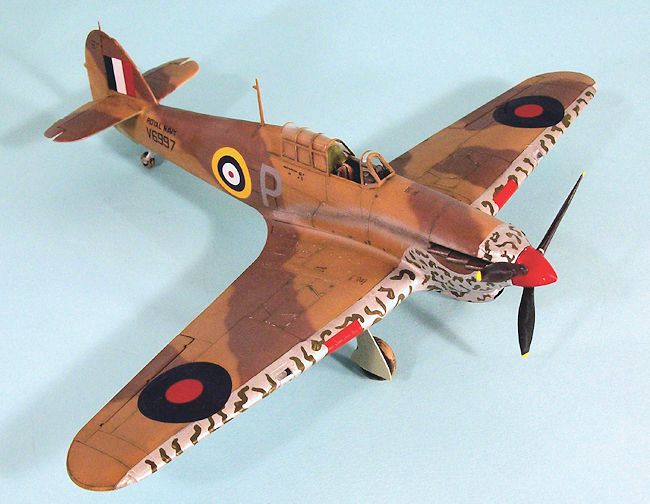
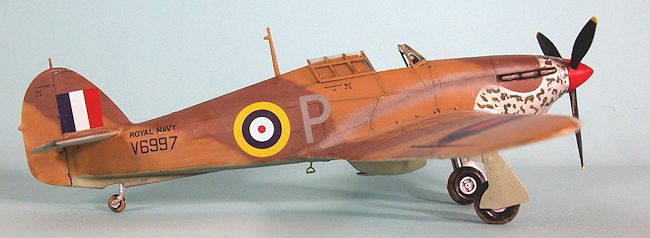
| COLORS & MARKINGS |
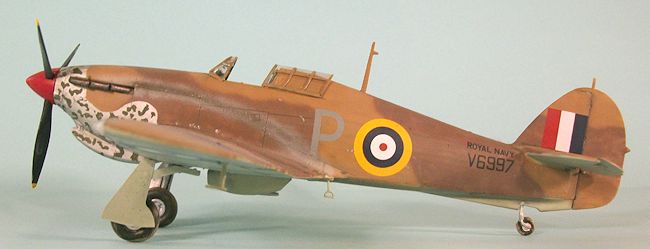 Hurricanes
that received the “desert” camouflage repaint used aluminum lacquer on the
leading edge and nose, which “glinted” in the bright desert sun and contributed
to difficulty in initial identification when entering combat, a few moments that
could make the difference between success and failure.
Photos clearly show that the Dark Green (or perhaps Dark
Earth) splotches and “spaghetti” were brush-painted.
Hurricanes
that received the “desert” camouflage repaint used aluminum lacquer on the
leading edge and nose, which “glinted” in the bright desert sun and contributed
to difficulty in initial identification when entering combat, a few moments that
could make the difference between success and failure.
Photos clearly show that the Dark Green (or perhaps Dark
Earth) splotches and “spaghetti” were brush-painted.
In making a model of an airplane repainted in the
field, I painted the lower surfaces Sky, and the upper surfaces Tamiya “Flat
Earth” - a good approximation of faded Dark Earth - and “light earth, which was
done with a mixture of Tamiya “Flat Earth” and “Desert Yellow.” This was all
done freehand to approximate an “in the field” repaint.
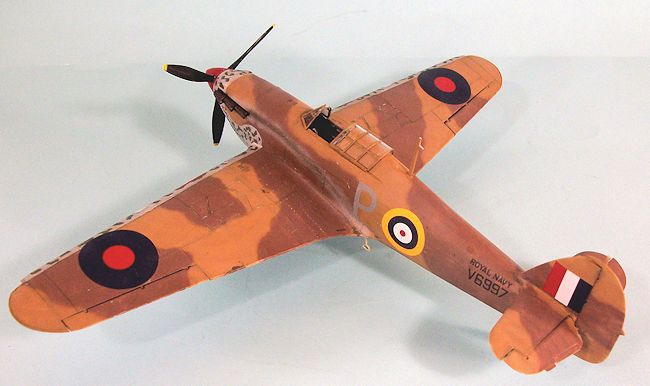
I used decals from
several old Aeromaster decal sheets for the national insignia, the serial number
and the “Royal Navy” marking.
I applied a coat of Xtracrylix flat finish to the
model, then attached the landing gear, deHavilland prop, and positioned the
canopy in the open position.
| CONCLUSIONS |
The kit is remarkably
easy to assemble and presents no problem.
The only item lacking in the kit are seatbelts, a
problem for which there are multiple easy solutions.
The kit decals are superb.
The price is
 so right
you’ll be able to afford more than one.
If you take care in assembly, you will not use putty or
filler anywhere.
so right
you’ll be able to afford more than one.
If you take care in assembly, you will not use putty or
filler anywhere.
These new Airfix kits
are a joy to build and result in excellent models.
Any modeler with the experience of doing a couple of
kits can take one of these and by following the instructions have a really nice
model of an important airplane to add to the collection.
Highly recommended for everyone.
Thanks to Hornby America for the review kit.
If you would like your product reviewed fairly and fairly quickly, please contact the editor or see other details in the Note to Contributors.