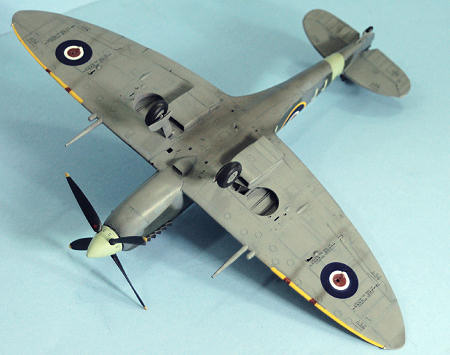
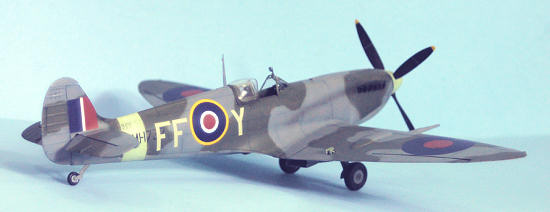
Tamiya 1/32 Spitfire IXc
| KIT #: | ? |
| PRICE: | 9800 yen ($110.00 at today's exchange rate) at www.hlj.com |
| DECALS: | Three options |
| REVIEWER: | Tom Cleaver |
| NOTES: |
Eduard photoetch
instrument panel and seatbelts, Xtradecal 32-020, and Victory Models “Spitfire:
Aces of the Empire,” used. |
| HISTORY |
The introduction of the Focke-Wulf Fw-190 in the fall of 1941 put the RAF
in a fix. While RAF intelligence
tried at first to convince pilots of Spitfire Vs who were fighting for their
lives over northern
 Supermarine was already planning production of the Spitfire VIII, which
was to be powered by the Merlin-60 series of engines, with a two-stage
supercharger, providing performance that promised to meet the challenge of the
big bad Wulf. The problem was,
Supermarine was trying to do it right, with a beefed-up airframe to take maximum
advantage of the increased power, and the best estimate was that the new model
Spitfire wouldn’t be ready before early 1943.
Time was now of the essence if Fighter Command was not to give up the
advantage won over northern
Supermarine was already planning production of the Spitfire VIII, which
was to be powered by the Merlin-60 series of engines, with a two-stage
supercharger, providing performance that promised to meet the challenge of the
big bad Wulf. The problem was,
Supermarine was trying to do it right, with a beefed-up airframe to take maximum
advantage of the increased power, and the best estimate was that the new model
Spitfire wouldn’t be ready before early 1943.
Time was now of the essence if Fighter Command was not to give up the
advantage won over northern
The Spitfire IX began life as an “interim” development of the Spitfire V
- which itself was an interim development from the Spitfire I - and entered
production in the late Spring of 1942.
Testing the new Spitfire against the “tame” Fw-190 revealed that the
performance advantage provided was only in certain performance regimes at
certain altitudes, but even where it came in second to the Wurger, it was a very
close second. With production only beginning to gear up, only a few squadrons
were initially able to turn in their Spitfire Vs for the new “long nose”
Spitfire until the summer of 1943.
Provision of the Spitfire IX to Fighter Command squadrons for the first year of
production was based on a squadron “winning” the right to receive the new
Spitfire based on their performance.
By the Spring of 1943, the Spitfire IX had given the RAF back equality of
equipment vis-a-vis the two elite Luftwaffe Geschwadern on the Channel
Front, while increasing numbers eventually provided air superiority.
Interestingly, the Spitfire V, which was an interim type produced from the Mark I airframe, and the Spitfire IX, an interim type produced from the Spitfire V, accounted for more than half of all Spitfires produced during the Second World War, with the Spitfire IX beating out its progenitor by a nose to become the most-produced Spitfire sub-variant.
| THE KIT |
When Tamiya announced their big Spitfire IX in 2009, modelers were ga-ga
over the possibilities. After the
kit was released in December 2009, it was quickly hailed as a “game changer”
that set the bar higher than ever before for detail and quality of design and
production.
 In the box, the kit is either an early or late production Spitfire IXc,
providing options for the different carburetor air intake and different
elevators associated with these slightly-differing sub-types.
In the box, the kit is either an early or late production Spitfire IXc,
providing options for the different carburetor air intake and different
elevators associated with these slightly-differing sub-types.
The kit provides separate control surfaces throughout for the modeler who
wants to pose them in a “dynamic” setting.
Fortunately - since most models nowadays that provide a “flaps down”
option are really providing only a flaps-down model - the kit is designed
to have the flaps up, which is the correct position for any Spitfire past about
30 seconds after touchdown.
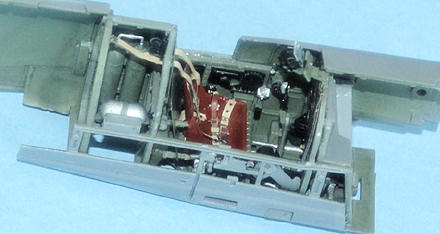
A lot has been made of the provision of a “complete” engine, and cowl
panels that are thin enough to allow the kit to be assembled with the engine
inside, with the provision of magnets so that the panels can be displayed open
or closed. In fact, what is
provided is a generic Merlin engine, which cries out for detailing, since it
provides none of the wires, tubes and hoses that are associated with the real
thing.
Some traditionally-thick Tamiya decals are provided with markings for the
ever-popular EN398 JE-J Spitfire (they’ll probably have a category split for
“JE-J Spitfires” at this year’s IPMS-USA Nats) and two others.
Fortunately, the aftermarket has swung into action very quickly with the
release of this kit, and there are now at least four excellent aftermarket
sheets as of this review - one from Victory Models that is a scale-up of a few
of the options from the 1/48 “Spitfire: Aces of the Empire” sheet, two from
Xtradecals that include one sheet of Spitfire IXe aircraft that can’t be done
with this kit as released (but will be there for the next release), and one from
Zotz that includes markings for Spitfire XIVs that can be cond with the Hasegawa
kit and the
| CONSTRUCTION |
 The real skills needed to build this kit are an ability to read,
understand and follow instructions, and an attention span of at least an
unfettered hour at a stretch, in order to do the various subassemblies of this
complex (but not complicated) model.
The real skills needed to build this kit are an ability to read,
understand and follow instructions, and an attention span of at least an
unfettered hour at a stretch, in order to do the various subassemblies of this
complex (but not complicated) model.
The kit is designed so that anyone from beginner to master can assemble
it without problems. There is
absolutely no likelihood of misaligning the wing to the fuselage, or the
horizontal stabilizer, or not getting the landing gear at the proper angles.
These are all problems that have kept more than one Spitfire builder from
winning awards at IPMS contests where the first thing judges do is separate the
misaligned and badly-assembled models - no matter how nicely painted or decaled
- from those models that will actually compete in a category.
Tamiya is to be complimented for doing this, the same way Hasegawa has
made the Bf-109 and Fw-190 in this scale modeler-foolproof (there’s a lot of us
fools out there)in their kit design.
 an Xacto knife.
I attached all the various wing panels before assembling the wing, so I
could glue them in position from inside, which insured no glue smears or runs on
the outer surface.
an Xacto knife.
I attached all the various wing panels before assembling the wing, so I
could glue them in position from inside, which insured no glue smears or runs on
the outer surface.
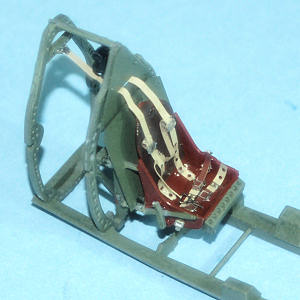
 substituted an Eduard photoetch Spitfire V instrument panel (even Roy Sutherland wouldn’t notice the
difference if he wasn’t told ahead of time, once it’s in place and the model is
closed up), which to me looks far more realistic. The kit-supplied photoetch
harness is nice, but it has to be painted.
I substituted a pre-painted Eduard photoetch RAF Sutton harness set,
because it was easier.
substituted an Eduard photoetch Spitfire V instrument panel (even Roy Sutherland wouldn’t notice the
difference if he wasn’t told ahead of time, once it’s in place and the model is
closed up), which to me looks far more realistic. The kit-supplied photoetch
harness is nice, but it has to be painted.
I substituted a pre-painted Eduard photoetch RAF Sutton harness set,
because it was easier.
 and took the time to scratchbuild the necessary parts to do this, and they look
great. Anything else looks like a
plastic toy, at least to my mind.
and took the time to scratchbuild the necessary parts to do this, and they look
great. Anything else looks like a
plastic toy, at least to my mind.
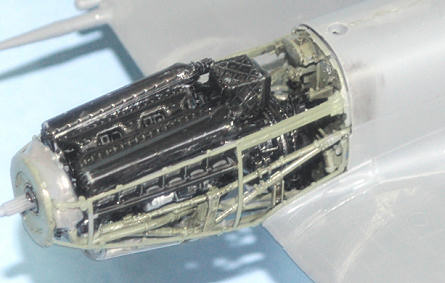
There’s a reason why I build
car models with the hood closed and airplane models with the cowling closed: I
don’t like doing all that. Not only
that, but the magnets should be at least doubled - one fore, one aft on each
part, with corresponding magnets in the engine - to make this whole thing more
than an exercise in silliness. The
parts don’t stay in position with just the one magnet, and they are easily
knocked off. After cramming that
engine in there (it doesn’t fit as nicely as they would have you believe), I
ended up gluing the panels closed.
The next time I build one of these, I will assemble the internal structure -
sans engine - and glue the panels at the outset.
| COLORS & MARKINGS |
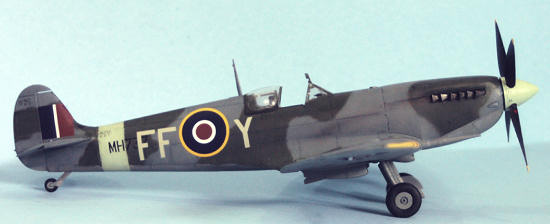
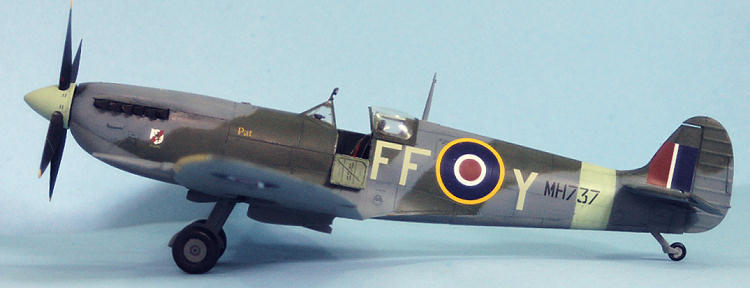
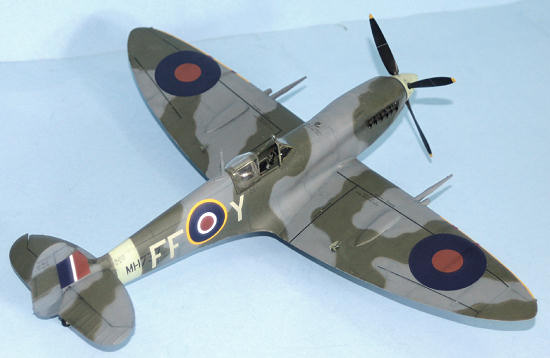
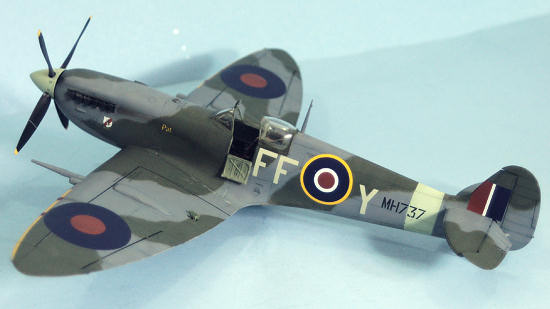
I used the kit decals for the stencils, and used the Xtradecal sheet
X32-020 to do Spitfire IXc MH737/FF-Y of 132 Squadron, while I also used the
national insignia on the Victory Decals sheet.
(I had thought if doing a JE-J Spitfire for personal reasons, but decided
I’d want to be able to pick mine out in the crowd if it was ever on public
display.) FF-Y is an airplane that is well known for having been one of four
Spitfire IXs photographed in formation over
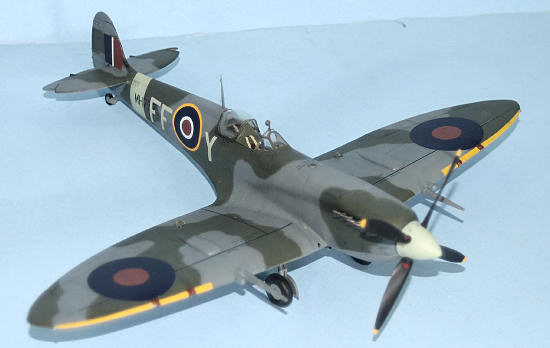
| FINAL CONSTRUCTION |
 Final assembly included attaching the wheels to the landing gear,
attaching the prop, unmasking the canopy and attaching the sliding portion in
the open position, and attaching the side flap in the open position.
I did not attach the “cheese-cutter”
Final assembly included attaching the wheels to the landing gear,
attaching the prop, unmasking the canopy and attaching the sliding portion in
the open position, and attaching the side flap in the open position.
I did not attach the “cheese-cutter”
| CONCLUSIONS |
From what I see of models displayed around the internet, most modelers
aren’t into opening up the engine, and for those who are, doing this as a
“Hasegawa style” kit and allowing the aftermarket to create a resin engine that
would have had the requisite detail to begin with, would likely have led to a
cheaper model overall. (Did I mention such a decision would lead to increased
sales?) Those cowling panels should
have a “Look but do not touch after attachment” sign.
March 2010
If you would like your product reviewed fairly and quickly, please contact me or see other details in the Note to Contributors.