Heller/Ventura 1/72 Tempest I
|
KIT #: |
274 |
|
PRICE: |
$ |
|
DECALS: |
Two options |
|
REVIEWER: |
Peter Burstow |
|
NOTES: |
Conversion |
 The prototype Hawker Tempest Mk.I was first flown on 24th February
1943, some months after the first Mk.V. It was fitted with a Napier Sabre IV 24
cylinder sleeve valve engine of 2240 h.p. At 466 mph, it was the fastest of the
Tempest family. Distinctly different from the Sabre II engined Mk. V, it was
fitted with leading edge radiators, rather than the bulbous chin radiator.
The prototype Hawker Tempest Mk.I was first flown on 24th February
1943, some months after the first Mk.V. It was fitted with a Napier Sabre IV 24
cylinder sleeve valve engine of 2240 h.p. At 466 mph, it was the fastest of the
Tempest family. Distinctly different from the Sabre II engined Mk. V, it was
fitted with leading edge radiators, rather than the bulbous chin radiator.
Only one prototype was built, due to the cancellation of the Sabre IV, and the
perceived vulnerability of the leading edge radiators. The production orders for
400 Tempest Mk. Is being changed to Tempest Mk. Vs.
Only seven low pressure injection moulded parts, two fuselage halves, a
carburettor intake and four wing radiator halves
make up the conversion set. Moulded in brittle, grey
translucent plastic, with thick sprue attachment points. The parts are all very
thick and need thinning in places. There is also a vacformed 'car door' style
canopy and two car doors. There is a single A4 instruction sheet with a
split-plan and profile painting guide. There are no construction notes.
are all very
thick and need thinning in places. There is also a vacformed 'car door' style
canopy and two car doors. There is a single A4 instruction sheet with a
split-plan and profile painting guide. There are no construction notes.
The donor Heller kit, no. 274, is fairly old, and sometimes available. My
boxing is the 'black box' type with instructions in English, French and German.
Typical Heller, nicely detailed with fine raised panel lines, a basic cockpit,
and boxed in wheel wells. It also contained a small bulb of glue, which
fortunately had not leaked. The Heller decals were for two famous and well
photographed Tempests, JF-E and RP-B.
First step was to separate the parts from the sprue. The plastic was
brittle and a piece of sprue shattered when I tried to use my cutters. I used a
razor saw, making two cuts, one to remove the sprue, the second close to the
part. I then cleaned up the part by carving, scraping and sanding. The
attachment on the leading edge of the fin was the most difficult, and one of the
sprues broke away, leaving a large hole in the top of the fuselage which will
need repair. It was about this point I decided that this model was not going to
 get a natural metal finish.
The Heller cockpit has a seat, control column and bulkhead to be added to
a floor. The seat looks more like a park bench. I added blue masking tape seat
belts. The cockpit assembly and instrument panel were fitted to the fuselage and
the halves closed up. A little bit of shaving and trimming was needed to make it
all fit. The Heller wing was assembled and joined to the Ventura fuselage, it
fitted reasonably well, but I had to thin the root trailing edge on the fuselage
to avoid a step. Time for a fill and sand session. I used thick superglue as a
filler.
I then added the wing leading edge radiators, first opening up the front,
and thinning them to a more sensible thickness. While my reference didn't
mention it, I'm sure they were not made from six inch armour plate. They didn't
fit at all well, and needed a lot of trimming and filling to make them look
reasonable. Fit was slightly improved by putting the radiator labelled left on
the right wing and vice versa. I was not happy with the 'see through' look of
the radiators, so fitted a piece of check pattern plastic card to the wing
leading edge. I hand painted the inside of the radiators dark grey, then dry
brushed, with Mr Metal 'iron', to pick up the check pattern.
I butt joined the Heller tailplane halves to the Ventura fuselage and
went over the joints again, adding another layer of superglue especially to the
still obvious hole in the upper fuselage. Made up some cannon from 1mm brass
tube to replace the plastic stub and hole provided on the Heller wing.
 I went for a late WW2 colour scheme of grey, grey and green. Used Tamiya
acrylics, first overall medium sea grey, XF-83. That showed up some joints and
scratches, and the hole in the fuselage, that need more work.
I went for a late WW2 colour scheme of grey, grey and green. Used Tamiya
acrylics, first overall medium sea grey, XF-83. That showed up some joints and
scratches, and the hole in the fuselage, that need more work.
Then the topside camouflage using light grey, XF-66, and deep green
XF-26.
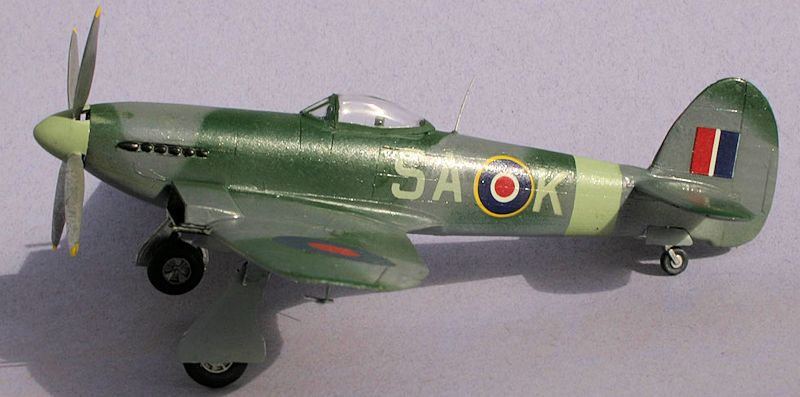
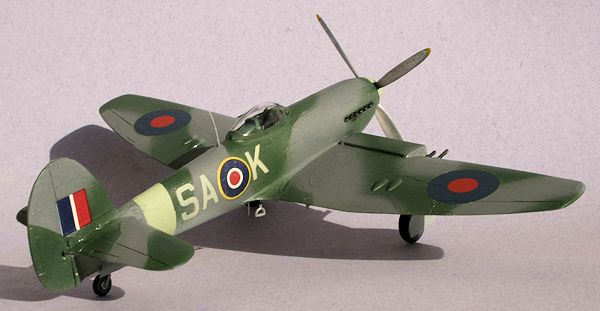
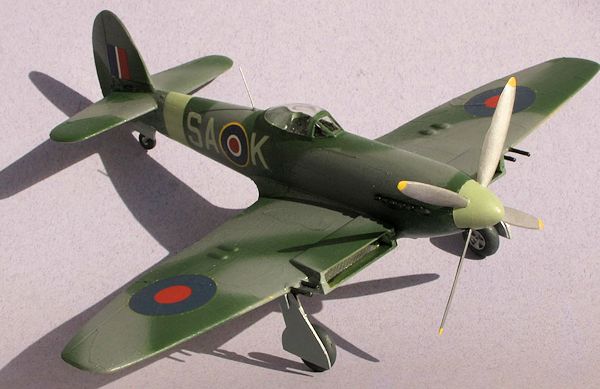
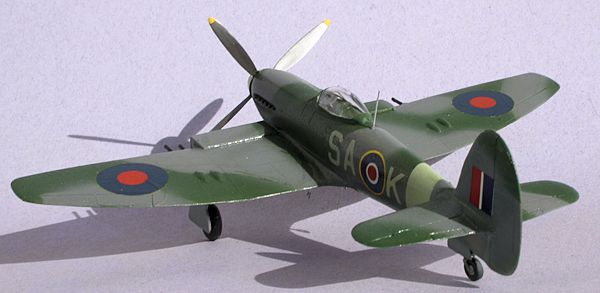
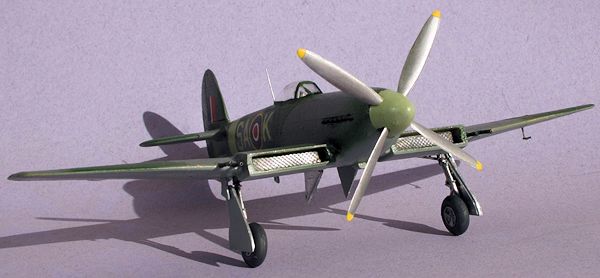
I decided on a 486 squadron RNZAF scheme, code SA-K, they were Tempest
Mk.V operators. I gathered decals for the roundels and fin flash from the spare
stash. For the squadron code I used sky letters from Altmark sheet A18. I didn't
use a serial.
 I added all the remaining small bits from the Heller kit, undercarriage,
pitot, propeller etc. Made the whip antenna from 8lb monofilament. A few bits of
detail and touch up painting, then an overall coat of Testors Dullcote. I used
the Heller bubble canopy, the prototype Mk.I first flew with the car-door style,
but was later fitted with the standard bubble.
I added all the remaining small bits from the Heller kit, undercarriage,
pitot, propeller etc. Made the whip antenna from 8lb monofilament. A few bits of
detail and touch up painting, then an overall coat of Testors Dullcote. I used
the Heller bubble canopy, the prototype Mk.I first flew with the car-door style,
but was later fitted with the standard bubble.
A rather difficult conversion, but the end result is much better than my
scratch built effort, using a Revell Tempest, many years ago.
Recommended for experienced modellers due to the lack of instructions and
the hacking and slashing required.
William Green, Fighters Volume 2, Macdonald, London, 1961
Peter Burstow
June 2013
Copyright ModelingMadness.com. All rights reserved. No reproduction
in any form without express permission from the editor.
If you would like your product reviewed fairly and fairly quickly, please
contact
the editor
or see other details in the
Note to
Contributors.
Back to the Main Page
Back to the Review
Index Page 2026