Academy 1/72 Spitfire XIV
|
KIT # |
2130 |
|
PRICE: |
FF 60 |
|
DECALS: |
One aircraft |
|
REVIEWER: |
Tim Campbell |
|
NOTES: |
Aeromaster 72-020 decals used |
|
HISTORY |
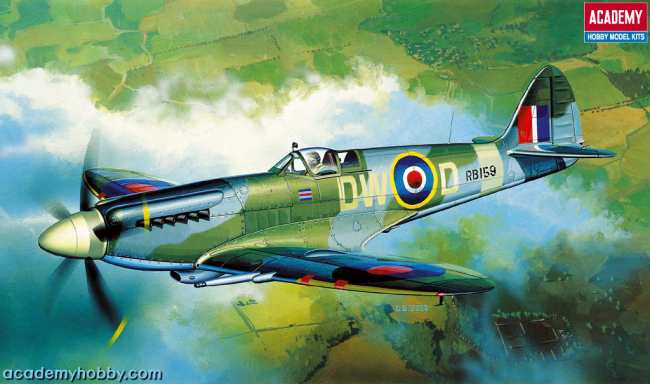
According to the blurb provided by Academy, "history was forever made on October 5, 1944 when a Spitfire XIV of No.610 Squadron was the first Allied aircraft to shoot down a turbojet-powered Messerschmitt 262A". Now, as far as I'm concerned, that's just the sort of stuff we need printed on boxes to get kids to buy kits!
Information on the internet regarding this Spitfire mark seemed to me to be less than clear and also rather contradictory so I went straight to The Bible, Morgan and Shacklady’s "Spitfire: The History". Or, more accurately, I called my father in the UK and asked him if he would be so kind as to send me a little info on the Mk XIV from his copy. A few days later a stack of photocopies showed up in my postbox with all the relevant blurb (thanks Dad).
 The Mk XIV was a development of the Mk VIII and was powered by
a Rolls-Royce Griffon 65 or 66 with supercharger giving 2035 hp at 7000 ft. It
was the first large-scale production Griffon-engined Spitfire, having the
advantage of the latest-development engine available for installation and the
best of the Merlin-engined airframes.
The Mk XIV was a development of the Mk VIII and was powered by
a Rolls-Royce Griffon 65 or 66 with supercharger giving 2035 hp at 7000 ft. It
was the first large-scale production Griffon-engined Spitfire, having the
advantage of the latest-development engine available for installation and the
best of the Merlin-engined airframes.
As an aside, it was not until early 1941 (when cannons came into general use) that the suffix to mark numbers to indicate armament became necessary. The then standard 8 x 0.303" Brownings (300 rpg and 350 from Mk Va onwards) became ‘A’ type armament with the new 2 x 20mm Hispano cannons and 4 x 0.303" Brownings (300 rpg and 350 from Mk Vb onwards) was designated the ‘B’ type.
When the later "Universal" wings were introduced (originally designed for the Mk III) that could accommodate 4 x 20mm cannons or ‘B’ type armament as needed, these became ‘C’ type. Further down the line, wing sets to accept 2 x 20mm cannons (120 rpg) and 2 x 0.5" Brownings (250 rpg) were introduced as the ‘E’ type. Confused? So, ‘A’ ‘B’ ‘C’ or ‘E’ armament depended on the wing fitted…but wings were interchangeable.
Anyway, moving swiftly on; the kit subject is supplied as the ‘C’ wing (‘B’ type armament). You will notice then, that my model (built finally as a Mk XIVe) is incorrect with its two extra holes in the leading edge. This is due to my unorthodox method of researching aircraft after I have built the kit. It was only when I was looking for some background for this article that I became intrigued by the whole wing/armament thing.
A total of 957 Mk XIV aircraft were built, breaking down as 527 F.XIV and 430 F.R.XIV.
|
THE KIT |
 At the time (just over a year ago), this was
my first 1/72 kit purchase after a 14-year break from modelling, and I have to
say that I was amazed at the level of detail - Matchbox and Airfix were never
like this!
At the time (just over a year ago), this was
my first 1/72 kit purchase after a 14-year break from modelling, and I have to
say that I was amazed at the level of detail - Matchbox and Airfix were never
like this!
That said, the kit is by no means perfect. I haven’t measured the kit, but what I can say are that the radiators are perpendicular to the ground when they should be perpendicular to the wing. Also, the wheels are oversized and there’s something not quite right with the propeller. Despite all that, it builds up nicely and certainly looks like a Spitfire Mk XIV to me. However, this particular build was not without its own little disaster.
Rockets are included in the kit, which I was initially going to use. However, when visiting my parents, my father and I got to chatting about Spitfires. Before long he had whipped out Morgan and Shacklady and it shows that these are not appropriate for the markings provided in the box (RB159/DW·D of 610 "County of Chester" Squadron, 1944).
 The canopy is provided as closed (single
piece) or open (three pieces) but the transparencies are very thick and would be
better replaced with a vacuum formed equivalent, if you’re into that kind of
thing.
The canopy is provided as closed (single
piece) or open (three pieces) but the transparencies are very thick and would be
better replaced with a vacuum formed equivalent, if you’re into that kind of
thing.
The tyres are provided as weighted, as is currently so popular. All well and good, I suppose, but I think a couple of passes with a file on un-bulged tyres looks much more realistic. At least this avoids the excessive bulging present in almost every weighted tyre I have seen so far.
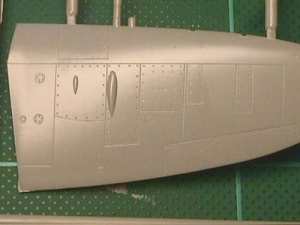
The parts were all very cleanly moulded, with excellent panel line detail and acceptably thin trailing edges. The cannons are helpfully moulded on the wing section for me to break off later in the construction phase.
|
CONSTRUCTION |
The cockpit is adequate, although the
framing behind the seat is way too thick. I would imagine a P-E set would make a
big difference here, although I consider the detail satisfactory for a kit of
this scale and price level. I painted the innards with Xtracolor interior green,
with a black instrument panel. I did a bit of drybrushing here and there to
highlight the detail and used the supplied harness decal on the seat. In this
scale I think this looks OK although the photo doesn't show much to be honest.
I fixed the cockpit access door in place with
white glue and then attached the one-piece canopy with Maskol (Humbrol’s
masking fluid) before covering it with more of the same. I gave the model a coat
of grey primer, using a standard car aerosol primer, rubbing this down with some
worn 1200 grit wet and dry to smooth out a couple of rough spots, mainly around
the chin intake.
 The fuselage was then glued together before
attaching the cowling bulges with liquid cement. The lower wing was attached,
followed by the upper sections and then the tailplanes. Everything was an
excellent fit and the only filler required was a little typing correction fluid
around the chin intake.
The fuselage was then glued together before
attaching the cowling bulges with liquid cement. The lower wing was attached,
followed by the upper sections and then the tailplanes. Everything was an
excellent fit and the only filler required was a little typing correction fluid
around the chin intake.
|
PAINTING & DECALS |
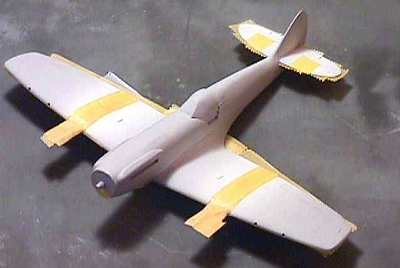 The underside of the model was airbrushed with
Model Master enamel Light Gull Grey (FS36440). Once dry I masked off with Tamiya
tape and spraying the topside with a Tamiya Dark Grey. This was soon dry and I penciled
on the camouflage pattern before spraying a Tamiya Dark Green freehand. I didn’t
make a note of the paint numbers but they were chosen by using the crossover
chart on the IPMS Stockholm website (http://www.hotel.wineasy.se/ipms).
The underside of the model was airbrushed with
Model Master enamel Light Gull Grey (FS36440). Once dry I masked off with Tamiya
tape and spraying the topside with a Tamiya Dark Grey. This was soon dry and I penciled
on the camouflage pattern before spraying a Tamiya Dark Green freehand. I didn’t
make a note of the paint numbers but they were chosen by using the crossover
chart on the IPMS Stockholm website (http://www.hotel.wineasy.se/ipms).
Now, it would have been more correct (especially in this scale) if I had masked off the pattern to avoid such heavily feathered edges. However, I had not had my airbrush long and was keen to try to do this freehand. The results were, well, OK if you like a lot of green on there.
After leaving the kit overnight, I brushed on
a couple of coats of Klir (Future) in preparation for the decals. The decals
(fuselage codes and 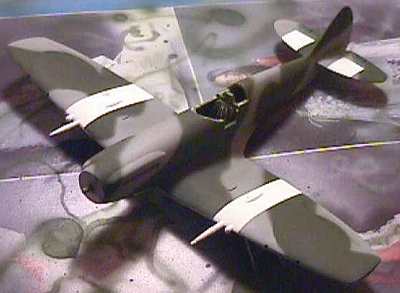 roundels plus the tailband) went on well, but were so
translucent that the camouflage colours came through, badly distorting the
colour. Unfortunately I then had to dash off "mid decals" for a
dentist appointment (yes, really). Talk about forward planning!
roundels plus the tailband) went on well, but were so
translucent that the camouflage colours came through, badly distorting the
colour. Unfortunately I then had to dash off "mid decals" for a
dentist appointment (yes, really). Talk about forward planning!
Coming back to the model later, I could not get the decals off. No surprise there, then. I tried sticky tape first, which dragged off only small fragments. Interestingly enough, this gave a really "authentic" worn look (i.e. completely overdone, really, but handy to know for the future). Then I tried repeated applications of Micro Sol, rubbing with a cotton bud, before moving up to isopropyl alcohol (which worked a little bit) and then acetone. Naturally this removed the decals very well. And most of the paint in the same area (which I was expecting anyway).
I punished the kit for this disobedience by spraying it with oven cleaner and leaving it for the night in a plastic bag. In the morning I scrubbed the paint off with a toothbrush, gave it a quick rub down with worn 1200 grit again, washed it well and let it air dry.
After respraying with primer, I nipped off to my local, the charmingly messy and cramped Kit ‘n’ Doc in a seedy suburb of Paris in the quest for replacement decals. The most helpful staff there came up with the Aeromaster sheet 72-070 "Spitfire Mk XIV Collection". Now, bearing in mind that this was only my third or fourth model since my rebirth into the hobby, you can imagine the pain I felt at having to fork out more than the kit price on some decals.
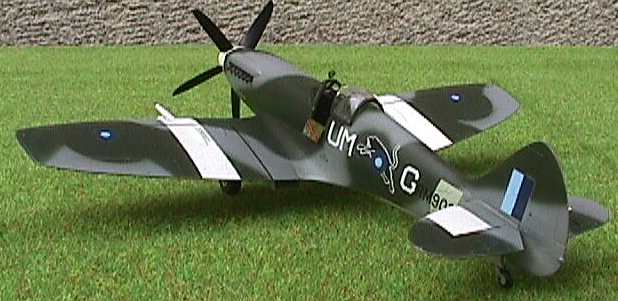
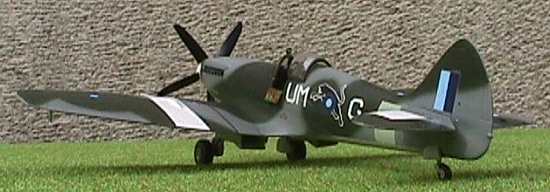
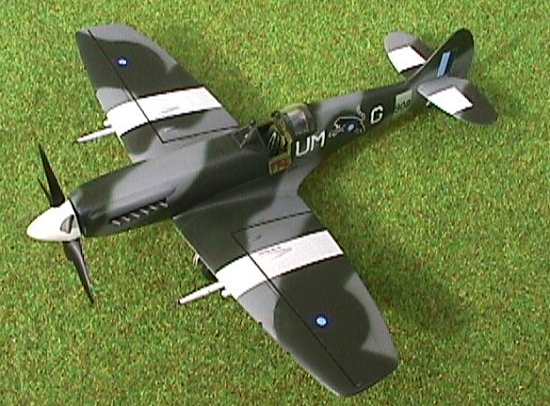
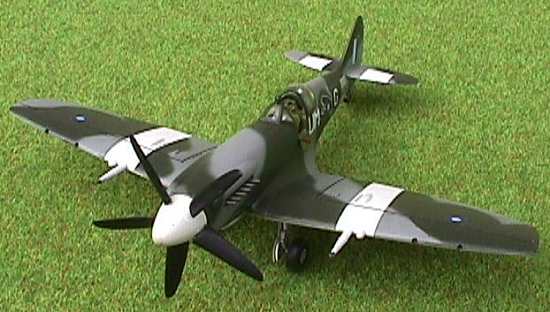
As it was, I liked the selection on the Aeromaster sheet and picked up another Academy kit to make more use of the decals in the future. Now, this sheet also has DW·D as an option, but once I got home, I went for something a bit different to make the whole exercise worthwhile. So I decided on a Spitfire Mk XIVe, RM908/UM·G of 152 Squadron, 1945, complete with a black panther along the sides and white SEAC theatre bands.
 This aircraft was one of a total of 406 Mk XIV
aircraft ordered from Vickers-Armstrong (Supermarine) on October 23rd, 1943.
Later aircraft in this batch were shipped directly to Bombay but it looks like
this one was initially delivered to a home unit.
This aircraft was one of a total of 406 Mk XIV
aircraft ordered from Vickers-Armstrong (Supermarine) on October 23rd, 1943.
Later aircraft in this batch were shipped directly to Bombay but it looks like
this one was initially delivered to a home unit.
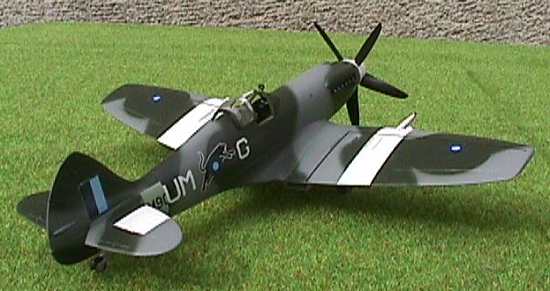
Yes, so we’ve established that the wing on an "e" is different, but it’s 1/72 and only I know the difference in my house! Measuring off the Aeromaster plans, I grabbed for the razor saw and took the wingtips off. A little shaping up with a sanding stick and I was congratulating myself on not having forked out for the Fujimi "e" kit. Highly technical, I know, but it looks fine to me.
After smoothing off the clipped wings and a quick spray of primer in these areas, I airbrushed the wings and the tailplanes white (for the SEAC theatre bands) with Tamiya matt white. After this was dry I measured up (using the Aeromaster sheet) and masked off the bands. The model was resprayed with the same camouflage as previously. I made a mask for where the red/blue roundels were oversprayed with green, taking my measurements from the Aeromaster sheet again. I did a bit of touch-up spraying with the grey where I had overdone things with the green (again) but next time I would mask off the camouflage instead.
Again, a couple of coats of Klir and it was decal time. All the Aeromaster decals went on very nicely, using Micro Set and Sol as appropriate. The white outline (background) for the panther and fuselage codes is provided separately to avoid problems with register. Although I could have sprayed the tailband, I decided to use the decal, and this didn’t fit too badly after a few applications of Micro Sol. Stencils are also included on the Aeromaster sheet which is good as they were not included in the kit decals.
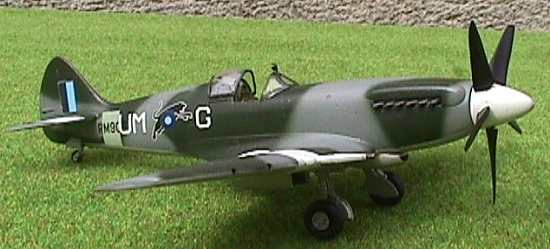
Notwithstanding a very glossy finish before applying the decals, I had a fair bit of silvering (which you can see in some of the photos). Now, this surprised me what with them being Aeromaster decals, but maybe this was a problem with this sheet - read the postscript and you’ll see what I mean.
I brushed on a couple of coats of Klir again and put the thing to one side, while I painted up the landing gear (using Bare-Metal chrome foil for the oleos) and doors. At this time I also made up the propeller and spinner, following the alignment guide provided in the instructions.
 I masked the canopy sections with Bare-Metal
foil and sprayed the frames. After removing the foil (and Maskol from the
inside) I cleaned off the few traces of adhesive with a cotton bud and some
WD40. I then washed the sections carefully in soapy water, rinsed and dried
them, dipped them in Klir and left them to dry on a paper towel. I have
previously had problems with the Klir coming off when using Maskol (no doubt due
to its ammonia content) which is my reason for doing things in this seemingly
convoluted manner.
I masked the canopy sections with Bare-Metal
foil and sprayed the frames. After removing the foil (and Maskol from the
inside) I cleaned off the few traces of adhesive with a cotton bud and some
WD40. I then washed the sections carefully in soapy water, rinsed and dried
them, dipped them in Klir and left them to dry on a paper towel. I have
previously had problems with the Klir coming off when using Maskol (no doubt due
to its ammonia content) which is my reason for doing things in this seemingly
convoluted manner.
I then sprayed the model with Humbrol’s Satincote - I find Mattcote far too matt and not realistic looking in this scale. I attached the canopy sections with Clearfix (which to be honest is one of the most hopeless adhesives ever produced) and faired in the slight join line with thick paint. After this was dry I took a fine brush and touched up these joints and the canopy frames with Satincote.
I attached the landing gear and doors and then repaired a cannon tip (it broke when I caught my sleeve on it!) with some stretched sprue. I fixed the cockpit access door in place, added a crowbar (from stretched sprue painted red) and attached the rearview mirror (with a bit of Bare-Metal foil stuck to it). Finally, I placed the propeller on its shaft and I was done.
|
CONCLUSIONS |
ll in all, a nice kit, notwithstanding its faults, and over half the price of the Fujimi kit in my neck of the woods (granted, the latter is more accurate). The big downer for me was the decals, as I don’t like being expected to buy replacements as a matter of course. Having said that, I really like the scheme with the big black cat, so I won’t grumble too much.
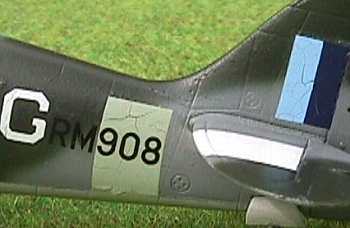 As a postscript, I had mislaid the disk of
completed shots of this model for this article. Going to the display cabinet
(some months later) to get the model, I was disappointed to note that all the
decals had cracked and crazed. This is illustrated here (along with my very
grainy paint finish).
As a postscript, I had mislaid the disk of
completed shots of this model for this article. Going to the display cabinet
(some months later) to get the model, I was disappointed to note that all the
decals had cracked and crazed. This is illustrated here (along with my very
grainy paint finish).
I don’t know why this is, as I left the coats of Klir to dry thoroughly before decaling and again before the Satincote. I followed the same procedure (same Tamiya acrylics, same Humbrol Satincote) when using Aeromaster decals on another kit and these are fine, so it’s a bit of a mystery.
I faxed Aeromaster to see if they had any suggestions and received a faxed reply the same day, apologizing for the inconvenience and promising to send a replacement decal sheet. The decal sheet arrived from the US within five days - excellent service, and much appreciated. All they asked in return was that I send them the remainder of my sheet for quality control purposes - fair enough. With a new sheet all over again, maybe I’ll have to pick up a couple of the Fujimi kits and do it better next time.
Copyright ModelingMadness.com.
If you would like your product reviewed fairly and fairly quickly, please contact the editor or see other details in the Note to Contributors.