Hasegawa 1/48 Hurricane I
|
KIT # |
9065 |
|
PRICE: |
$23.98 |
|
DECALS: |
See review |
|
REVIEW : |
|
|
NOTES: |
|
|
THE KIT |
This is Hasegawa's third release release in there 1/48 Hurricane series, the first being the II C and the second the II D. As an avid fan of BoB aircraft the Mk I came as a pleasant surprise. Much has been published on the kit here in Modeling Madness and other places so I'll not give a complete review but relate some highlights.
|
CONSTRUCTION |
 The fit was excellent with the exception of the trailing edge of the wing sub-assembly
where it joined the rear fuselage. I had
The fit was excellent with the exception of the trailing edge of the wing sub-assembly
where it joined the rear fuselage. I had
a large gap to fill. And as this fell in the fabric covered area recovering the detail was tedious. The gap had to be
filled using plasticard and putty. Other than that area the rest of the kit went together well with a minimum of filling and
sanding. The kit flaps were removed and the Kendall set used, as were the elevators with the Aries resin. The cockpit
is stock with the exception of generic PE Sutton harness. A light wash and chalk was applied to interior for that lived
in look.
|
PAINT & DECALS |
The aircraft was then painted with Modelmaster enamels, using low tack surgical tape for masking.
It was then given 2 coats of future in preparation for decaling. The decals used were
the kit decals almost exclusively. Only the SL's pennant and W/T markings were from Aeromaster. The kit one's appeared
a bit "fuzzy".
After all that had dried I used pastels to give it a bit more wear but not to much as these aircraft
were replaced quite quickly, and it was the CO's a/c after all. I then cut the kit canopy, used the forward windscreen and
Squadron's vac canopy for the sliding section. It was then finished off with True
Details wheel set. It's not a world beater, but it was fun to build, and that after all is what the hobby is all about.
Copyright ModelingMadness.com. All rights reserved. No reproduction in part or in whole without express permission from the editor.
If you would like your product reviewed fairly and quickly, please contact
the editor or see other details in the Note to
Contributors.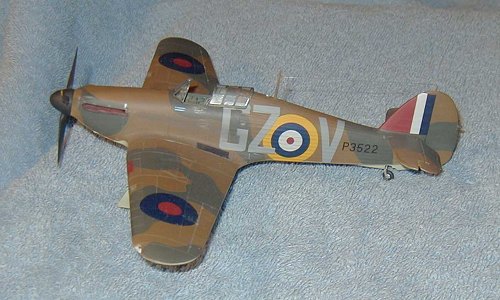 The scheme represents
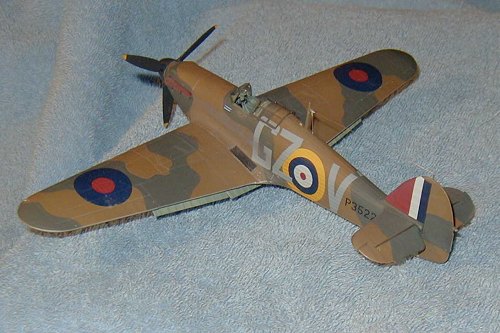
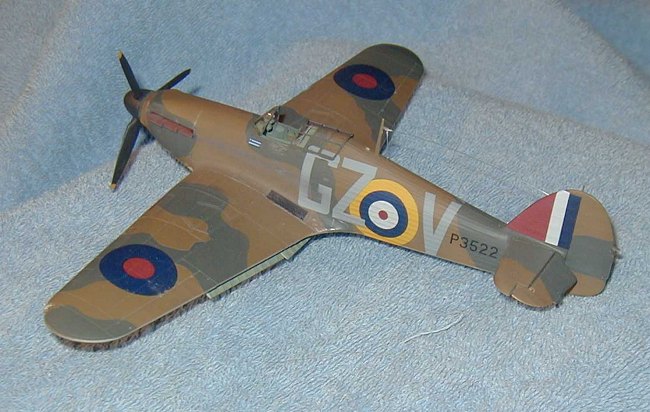
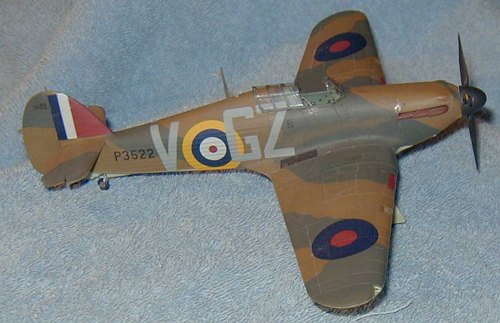
S/L Worall's aircraft OC No 32 Squadron Aug 1940
Biggin Hill. I've always liked 32 squadron's markings with their 40" codes. After decaling I used
thinned Flouquil Scale black on the bottom for the heavy oil leaking and streaking
using the place and drag method. Burnt Umber was used for petrol stains at the fuel fill areas, and darkened Dark
The scheme represents
S/L Worall's aircraft OC No 32 Squadron Aug 1940
Biggin Hill. I've always liked 32 squadron's markings with their 40" codes. After decaling I used
thinned Flouquil Scale black on the bottom for the heavy oil leaking and streaking
using the place and drag method. Burnt Umber was used for petrol stains at the fuel fill areas, and darkened Dark
Earth for the radiator staining and exhaust. When that was completed it was oversprayed with Aeromaster clear flat
with a few drops of dark gull grey to give it that "used" appearance. I find this also tones down the decal colors
as so as not to look too new.