Smer 1/48-scale DH.
Tiger
Moth
| KIT #: | ? |
| PRICE: | AU$8.00 |
| DECALS: | One option |
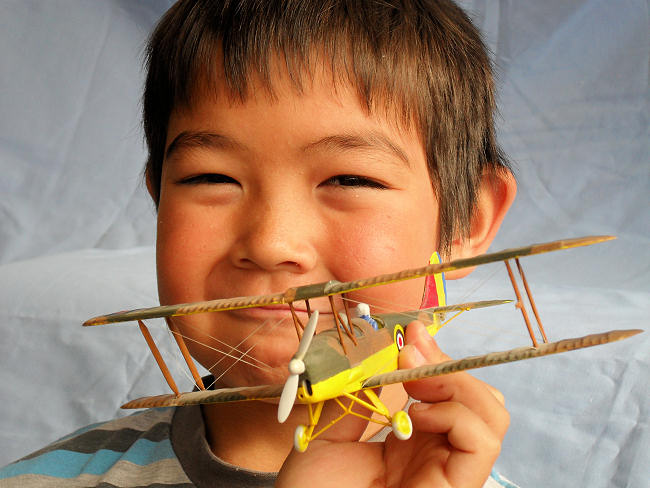
| REVIEWER: | George Oh and son |
| NOTES: |
Stolen from my stash by my son when he was 7. |
| HISTORY |
The De
Havilland DH.82 Tiger Moth
needs no introduction to aero-modellers or aircraft enthusiasts.
 Ever
see the George Peppard movie “The Blue Max” (it differs a bit from the book)?
I first saw it as a boy and bought the DVD last year.
I still love the aircraft scenes (and a few others).
It is obvious to an aircraft enthusiast that some of the
aircraft are modified Tiger Moths, so (for fun) I resolved to build a few of
them in model-form.
Not wanting to spend a fortune on the project, I chose
the Smer Tiger Moth as the base kit because of its size, low cost and
availability.
I bought 3.
Ever
see the George Peppard movie “The Blue Max” (it differs a bit from the book)?
I first saw it as a boy and bought the DVD last year.
I still love the aircraft scenes (and a few others).
It is obvious to an aircraft enthusiast that some of the
aircraft are modified Tiger Moths, so (for fun) I resolved to build a few of
them in model-form.
Not wanting to spend a fortune on the project, I chose
the Smer Tiger Moth as the base kit because of its size, low cost and
availability.
I bought 3.
One
afternoon, I took my family and in-laws to the
| THE KIT |
This
is a basic kit with almost no cockpit detail and only fair detail.
It had less than 30 parts moulded in chunky light-grey
plastic.
Dunno how it measures-up, because I build models – I don’t measure them,
but the finished product looks like a Tiger
Moth.
| CONSTRUCTION |
 Under
my supervision, Jason removed all the large parts from the sprues, and (after I
washed the parts) started splashing (Sunburst) yellow paint over the
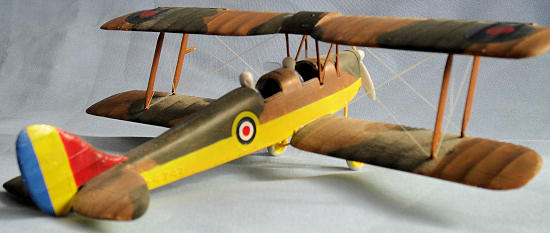
under-surfaces and the fuselage.
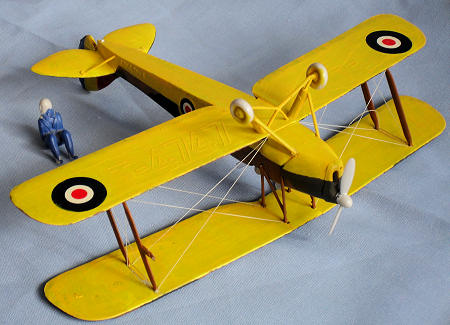
Yellow, because he looked at the colour scheme of the
trainer one on the back of the kit box.
He also painted the few inside bits with odd colours,
and began assembly.
In nothing flat, he had the main parts of the airframe
assembled.
I showed him how to square-up everything, then I showed him how
to mask-off the yellow of the lower fuselage.
I continued to watch over him as he painted the (Beastial)
brown, then the (Catachan) green.
Admittedly, I outlined the green areas, and he filled-in
the rest.
At all times, he was using Citadel Miniatures acrylic paints
because they would clean-up with water and they dried quickly.
Under
my supervision, Jason removed all the large parts from the sprues, and (after I
washed the parts) started splashing (Sunburst) yellow paint over the
under-surfaces and the fuselage.
Yellow, because he looked at the colour scheme of the
trainer one on the back of the kit box.
He also painted the few inside bits with odd colours,
and began assembly.
In nothing flat, he had the main parts of the airframe
assembled.
I showed him how to square-up everything, then I showed him how
to mask-off the yellow of the lower fuselage.
I continued to watch over him as he painted the (Beastial)
brown, then the (Catachan) green.
Admittedly, I outlined the green areas, and he filled-in
the rest.
At all times, he was using Citadel Miniatures acrylic paints
because they would clean-up with water and they dried quickly.
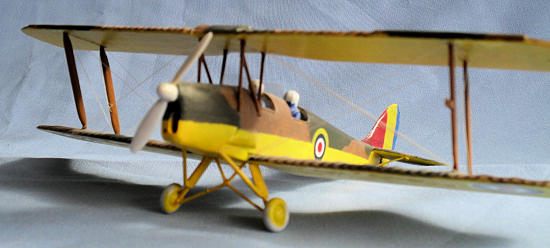
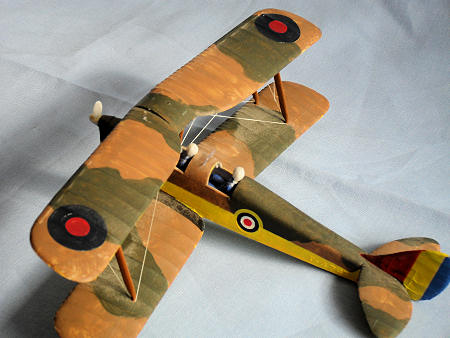
At this point, I decided that this was the perfect vehicle to use in an experiment. I had an idea for a method to rig a biplane and decided to try it on this, my son’s model. While he painted the struts and carbanes, I superglued the middle of a strand of EZ-Line into each of the sockets of the lower wing. Jason fitted the struts, then I dry-fitted the upper wing, squaring it up with coins and blocks. Next day, when it was dry, I removed the top wing, drew the EZ-Line over the tops of each adjacent strut or carbane, and secured it with more superglue. This is when I learnt that the EZ-Line need be only lightly tensioned – say 2-3% of its length.
| FINAL CONSTRUCTION |
OK, I had to attach the top wing to the tops of the struts, then the undercarriage leg assembly underneath. My son attached the unpainted wheels because he was anxious to complete it. Only now did I notice the lack of the two tiny clear windscreen pieces, so I cut some from a piece of thin clear rigid sheet and embedded them into grooves cut across the fuselage spine. Another one finished.
| CONCLUSIONS |
 As I
had surmised, this is a simple kit.
Even a child can make it, and see a Tiger Moth.
Dunno if my son learnt anything, but he certainly
enjoyed the build.
I enjoyed the father/son time and learnt about rigging.
EZ-Line is great stuff as it is a fine elastic ribbon
that is very forgiving of being bumped or snagged.
The other members of our model club certainly thought
that he had done an excellent job and they were equally surprised at his ability
to discuss Tiger Moths, expound on how-I-built-it-with-Daddy’s-help and about
when-I-saw-real-ones-of-these, but then, they are all middle aged (or better)
and he and his sister are the only juniors in the club.
As I
had surmised, this is a simple kit.
Even a child can make it, and see a Tiger Moth.
Dunno if my son learnt anything, but he certainly
enjoyed the build.
I enjoyed the father/son time and learnt about rigging.
EZ-Line is great stuff as it is a fine elastic ribbon
that is very forgiving of being bumped or snagged.
The other members of our model club certainly thought
that he had done an excellent job and they were equally surprised at his ability
to discuss Tiger Moths, expound on how-I-built-it-with-Daddy’s-help and about
when-I-saw-real-ones-of-these, but then, they are all middle aged (or better)
and he and his sister are the only juniors in the club.
| REFERENCES |
Just
the instructions and the boxart.
June 2011
Copyright ModelingMadness.com. All rights reserved. No reproduction in any form without express permission from the editor.
If you would like your product reviewed fairly and fairly quickly, please contact the editor or see other details in the Note to Contributors.
Back to the Review Index Page 2026