Airfix 1/72 Lancaster B.I (F.E.)
| KIT #: | A08013 |
| PRICE: | £24-99 |
| DECALS: | Two options |
| REVIEWER: | Frank Reynolds |
| NOTES: | Eduard CX211 transparency mask, price £7-20. |
| HISTORY |
First introduced into RAF
service in 1942, the basic form of the Avro Lancaster heavy bomber changed
little during its production run and the Mark 1 continued in production to the
end. The B.Mk1 (F.E.) was a special tropicalized version designed for a campaign
that never took place – the RAF’s strategic bombing assault on Imperial Japan’s
Asian Empire. With the dropping of Atomic bombs by US forces, there was no
requirement for deployment but the near-new airframes were available to
 equip
the squadrons of a much-reduced RAF Bomber Command in the early years of peace.
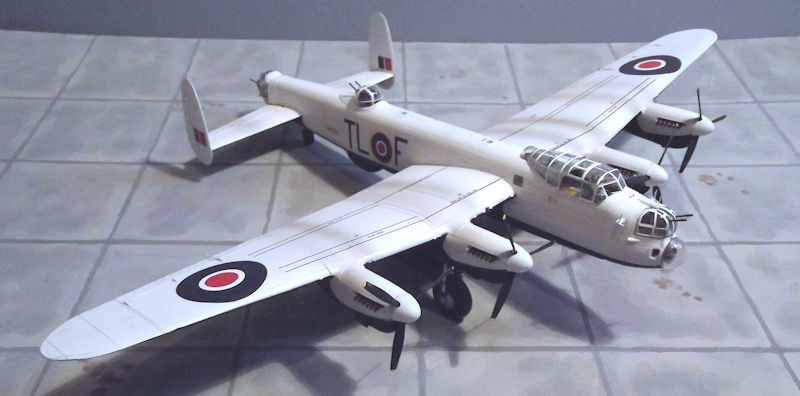
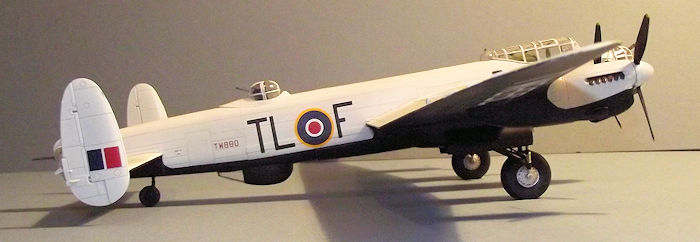
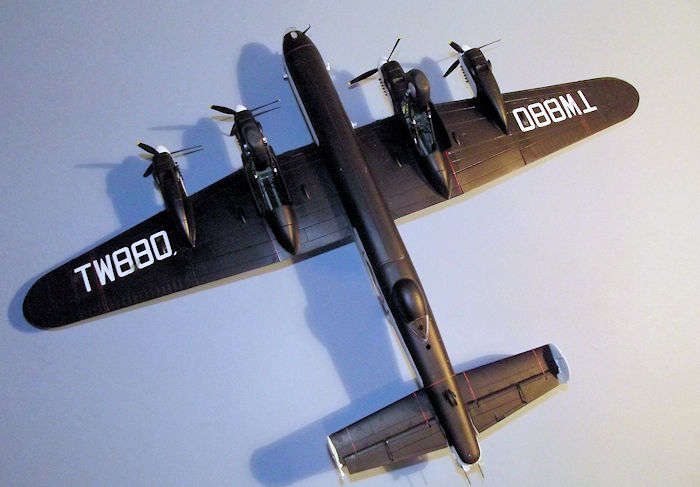
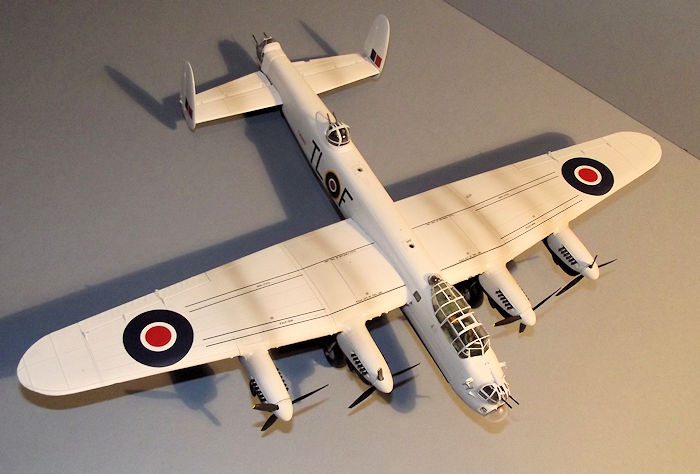
The F.E. versions featured a very distinctive colour scheme; Black undersides
were logical for what was intended to be a night bomber, White upper surfaces to
deflect tropical heat and to provide camouflage on long over-water flights.
These specialised Lancasters were intended to be part of Tiger Force, an
integrated strike and transport force that would range over the Far East in 1946
and beyond. Following Japan’s surrender on 2 September 1945, Tiger Force was
abruptly disbanded on 31 October in that year, without ever being deployed.
Bomber Command was drastically reduced to a peacetime complement of some 270
Lancasters spread across 22 Squadrons. The nearly-new Tiger Force Lancasters
went into service while hundreds of war-weary airframes headed for the scrap
yard and the type was gradually supplanted by the successor Avro Lincoln, a
process completed by late 1949.
equip
the squadrons of a much-reduced RAF Bomber Command in the early years of peace.
The F.E. versions featured a very distinctive colour scheme; Black undersides
were logical for what was intended to be a night bomber, White upper surfaces to
deflect tropical heat and to provide camouflage on long over-water flights.
These specialised Lancasters were intended to be part of Tiger Force, an
integrated strike and transport force that would range over the Far East in 1946
and beyond. Following Japan’s surrender on 2 September 1945, Tiger Force was
abruptly disbanded on 31 October in that year, without ever being deployed.
Bomber Command was drastically reduced to a peacetime complement of some 270
Lancasters spread across 22 Squadrons. The nearly-new Tiger Force Lancasters
went into service while hundreds of war-weary airframes headed for the scrap
yard and the type was gradually supplanted by the successor Avro Lincoln, a
process completed by late 1949.
| THE KIT |
Airfix have made good use of the basic tooling for their 1:72 scale Lancaster with the first release to the market in 2013 being the B.Mk.1 (Special), or Dambuster, reviewed in MM in July 2013 and the radial engined B.Mk.II reviewed in October 2013. There have been subsequent releases as gift sets covering the Dam Buster and standard Mk.I/III bombers, but this time Airfix have produced a version with eye catching box art depicting the Far East version in its distinctive Black and White paintwork.
 There are five parts
frames in Airfix’s now familiar pale blue-grey plastic and one of clear. The
parts were free from flash and none seemed to be warped. Surface detailing is
mainly recessed panel lines that some may consider being too deep but I found
them to look OK under a coat of acrylic. There are no stores provided for the
bomb bay but Airfix provide suitable weapons as a separate accessory set.
There are five parts
frames in Airfix’s now familiar pale blue-grey plastic and one of clear. The
parts were free from flash and none seemed to be warped. Surface detailing is
mainly recessed panel lines that some may consider being too deep but I found
them to look OK under a coat of acrylic. There are no stores provided for the
bomb bay but Airfix provide suitable weapons as a separate accessory set.
An A4 sized instruction book runs to 24 pages and 109 steps of construction. There are two pages of colour three-views as a colour and decals placement guide. Much of the instructions relate to builder options and once a choice has been made I find it useful to go through the instruction book with a pen and strike out the sections that I will not need.
Airfix has carefully designed its Lancaster tooling to cover many of the detail differences between Mks and the early and late production versions of the same Mk. number. They are clear as to which parts are needed for each version in the kit but there are some parts that are only applicable to other boxings of Lancaster. Unfortunately Airfix do not provide a parts chart, where other manufacturers helpfully highlight parts “not for use”, so a bit of planning and checking is necessary and I find it helpful to harvest the parts not needed at an early stage and to keep them nearby in a sealed bag – just in case I have misunderstood the options.
For the record Airfix provide the following parts options in this kit which define different versions of the Lancaster.
Early small and larger late-type bomb aimer’s nose bubble.
Square and oval under-nose bomb aimer’s window.
Nose aerials optional
Flat or bulged cockpit side windows.
Optional H2S radar scanner under the belly
Mid upper turret or blanking plate.
Shrouded or unshrouded engine exhausts.
Standard or paddle blade propellers.
Early and late type rear turrets.
So there is plenty of scope for conversions or alternative finishes. Airfix does not however provide some of the elements of very late build aircraft such as the taller astrodome to the rear of the flight deck, extended rudders or treaded tyres.
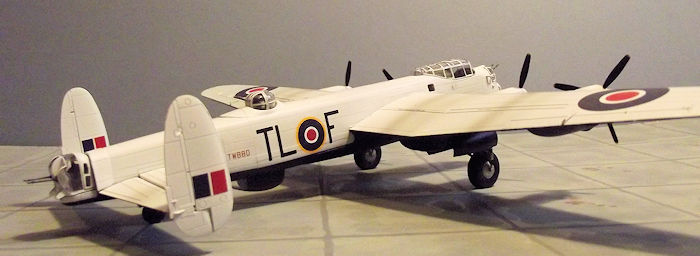
Decals are provided for the flashy white F.E. version shown on the box art, an aircraft assigned to the Tiger Force at Royal Air Force Graveley, Cambridgeshire in 1945 and a more run of the mill aircraft in night bomber finish of Dark Green and Dark Earth upper surfaces with Black undersides, being a B.Mk. III of No 57 Squadron, Scampton, Lincolnshire in August 1943. The latter has no belly radar fit, the early type four-gun rear turret, shrouded engine exhausts, early type propellers and the oval bomb aimer’s window. This neatly illustrates the strange designation system of Lancaster production where the MK.I offered in this kit has all of the late-build features, while the MK.III has the early build details. In fact the fundamental difference between the ‘I and the ‘III is that the ‘IIIs were fitted with American built Packard Merlin engines. So when building other than straight from the box, good references are essential, especially photographs of the version being modelled. As it is, when I came to the end a question remained.
| CONSTRUCTION |
Building the basic Airfix Lancaster has been covered in the previous MM features referred to, so there is no need to repeat the details here and I will only cover the significant points relating to this version
 The F.E.version is a late
build aircraft that does not have the staggered row of small windows along the
length of the fuselage sides. These need to be filled, although this is not made
clear in the Airfix instructions. I find that this is best dealt with at an
early opportunity firstly by gluing the clear window strips in place, allowing
them to set hard and then masking off the fuselage each side of the strips with
6mm Tamiya tape before filling over the windows with Squadron Green Putty. The
tape can be removed before the filler dries leaving a raised ridge of filler
that, once set hard, can be gently sanded down to a smooth finish. A quick blast
of grey auto primer from a rattle can will seal the filler before the primer is
sanded away as a check that the filler has covered all of the previous window
openings. I then proceeded with the fuselage assembly as normal.
The F.E.version is a late
build aircraft that does not have the staggered row of small windows along the
length of the fuselage sides. These need to be filled, although this is not made
clear in the Airfix instructions. I find that this is best dealt with at an
early opportunity firstly by gluing the clear window strips in place, allowing
them to set hard and then masking off the fuselage each side of the strips with
6mm Tamiya tape before filling over the windows with Squadron Green Putty. The
tape can be removed before the filler dries leaving a raised ridge of filler
that, once set hard, can be gently sanded down to a smooth finish. A quick blast
of grey auto primer from a rattle can will seal the filler before the primer is
sanded away as a check that the filler has covered all of the previous window
openings. I then proceeded with the fuselage assembly as normal.
Based on my previous efforts I have learned that following the build sequence as set out in the instructions is a sensible choice and following the options set out should give a satisfactory result.
The wings and tail structures could be treated as sub-assemblies if required . There are nevertheless a couple of potential glitches with awkward parts of the build.
 The main undercarriage is
built into the airframe at a fairly early stage and needs to be masked and
carefully protected thereafter. I have not yet found a way around that problem
and learned to live with it.
The main undercarriage is
built into the airframe at a fairly early stage and needs to be masked and
carefully protected thereafter. I have not yet found a way around that problem
and learned to live with it.
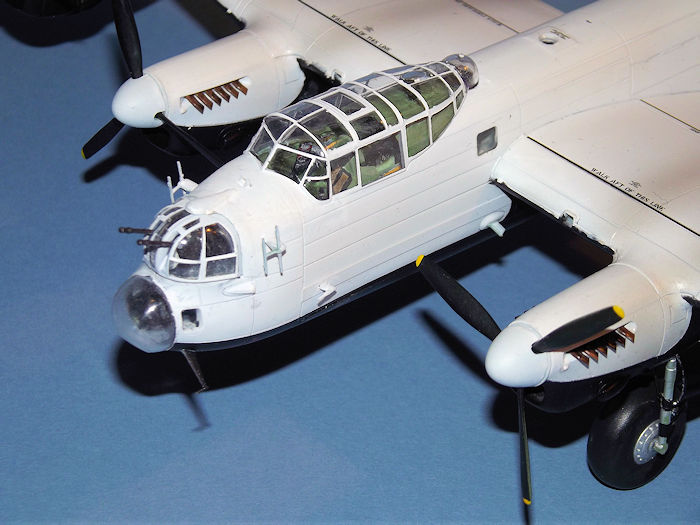
The mid upper and tail turrets can be added at a very late stage after main painting is complete although the seating of the rear turret requires some trimming to get it to fit inside the fuselage fairing. The nose turret is more of a problem in that it has a horseshoe shaped fairing surmounted by a small acorn shaped fairing above the turret pivot. This is meant to be added after the turret is fitted and it is a real problem to try to get the turret to sit in place if this fairing has been first glued to the nose, without hacking away much of the turret base. The alternative is to assemble and paint the turret, mask it and install at an early stage or to add the fairing at the end and touch in the paintwork. Any which way it is a bit of a fiddle.
My standard procedure with these Lancasters is to treat the turrets as separate kits, make, and paint and finish them to be incorporated into the build as it progresses.
With care, steady progress can be made to arrive at a basic airframe, with wings, engines and tail attached, ready for painting.
| COLORS & MARKINGS |
For my money an Eduard
canopy mask is a “must have”. Although it costs over a quarter of the price of
the basic kit, there are over 100 perfectly die cut masks in Kabuki tape that
can be applied with confidence that they will fit each panel of the glazing and
saving what could be hours of work in having to
 cut each mask by hand. Once
applied, I gave the exterior of each masked clear part a quick blast of grey
auto primer to provide a dark colour to the interior framing.
cut each mask by hand. Once
applied, I gave the exterior of each masked clear part a quick blast of grey
auto primer to provide a dark colour to the interior framing.
The completed airframe was primed with Tamiya Ultra Fine White primer applied from a rattle can and a second coat of the same over the top and side surfaces as a finishing colour. I find this product to have an excellent density and coverage. The undersides were masked off with Tamiya tape to receive two lightly misted airbrushed coats of Black, Tamiya XF-1 matt and X-18 semi-gloss in a 50/50 ratio. The demarcation line between the White and Black on the sides of the engine cowlings has a very distinctive swooping curve, so I made a stencil from 20thou plastic card to enable the masking on the eight panels to be trimmed to the same size and shape.
The whole airframe was sealed with two brushed on coats of Future/Klear to provide a gloss surface for the decals.
The decals were of good quality and reacted well with Micro Sol and Micro Set decals solutions. Airfix provides the wing walk markings and a range of airframe stencils. The deal sheet is not vast and this stage of the build was completed over two evenings, before the decals were sealed with two misted airbrush coats of Xtracrylix Flat varnish.
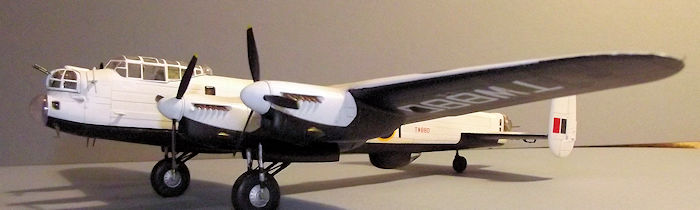
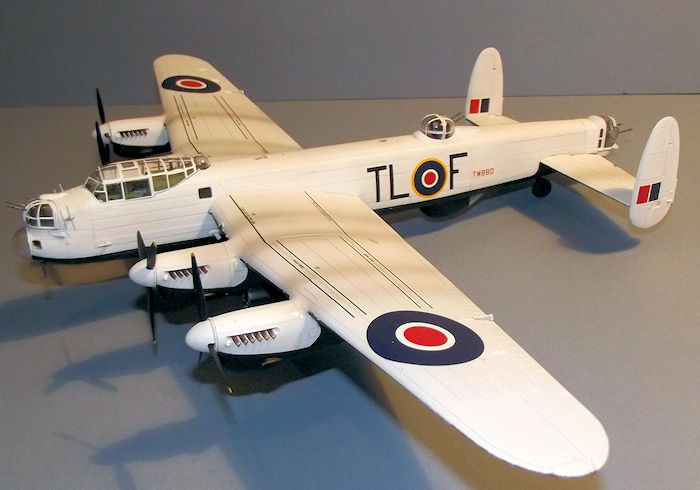 The White finish almost
demands some sort of exhaust staining to the paintwork so a few light passes of
Tamiya X-19 Smoke gave a hint of some service use to the aircraft.
The White finish almost
demands some sort of exhaust staining to the paintwork so a few light passes of
Tamiya X-19 Smoke gave a hint of some service use to the aircraft.
The small external aerials were added and two small windows in the fuselage spine were drilled out to be filled with Micro Kristal Kleer. Propellers and undercarriage were added to complete the project.
However, a query remains. The B.Mk1 (F.E.) is not the best recorded version and I found only limited references in my books or on the web. I have found a single photo that shows at least one F.E to have a long external intake on the right side of the fuselage above the wing root. Indeed Revell provides such a component in their 1:72 Lancaster kit. Airfix have a good reputation for well researched colour schemes so should TW880 have such an intake or not? I have a pre-painted Revell intake on stand-by to attach to this model if needed.
| CONCLUSIONS |
The Airfix Lancaster has been deservedly well received by modellers and this version maintains the good standard. The white colour scheme of the post war era is unusual and provides a dramatic contrast to the more dowdy night bombers in my collection. Not a shake and bake build, but like most current Airfix kits it rewards careful work and in the hands of those with more skill and application than I have a show-stopper can result. Recommended.
| REFERENCES |
Avro Lancaster, Lincoln and York in Post-War RAF service by Martin Derry, Dalrymple and Verdun 2010
December 2015
Copyright ModelingMadness.com If you would like your product reviewed fairly and fairly quickly, please contact the editor or see other details in the
Note to
Contributors.