Hasegawa 1/48 Spitfire T.9 (conversion)
| KIT #: | ? |
| PRICE: | $ |
| DECALS: | Three options |
| REVIEWER: | Frank Reynolds |
| NOTES: | Brigade Models conversion set includes four decal options |
| HISTORY |
At the
end of World War 2, hundreds of surplus examples of the Spitfire IX became
available to equip the Air Forces of many countries looking for a fast means to
re-establish their inventory after the disruption of that conflict. Formerly
occupied countries such as the Netherlands, Norway, Denmark, France and
Czechoslovakia; the newly emerging nations of Israel and India joined
 the club,
Egypt and Italy also fell under the spell of this most charismatic of aircraft.
Although later and more powerful versions of the Spitfire had been developed,
the Mk IXs were the most successful export as they were easily available in
large quantities, spares were plentiful and so was the expertise to maintain
them.
the club,
Egypt and Italy also fell under the spell of this most charismatic of aircraft.
Although later and more powerful versions of the Spitfire had been developed,
the Mk IXs were the most successful export as they were easily available in
large quantities, spares were plentiful and so was the expertise to maintain
them.
| THE KIT |
A T9
trainer has always been something of a Holy Grail for Spitfire fans. The full
blown canopy over the rear cockpit is a challenge for any tool maker and the
subject is relatively obscure for a mainstream manufacturer, since the subject
has no combat history, is post World War 2 and was only operated in small
quantities.
 The
conversion comes in a stout and neat cardboard box that is strong enough to
survive the
The
conversion comes in a stout and neat cardboard box that is strong enough to
survive the
The
parts are moulded in a soft pale grey plastic in a decidedly agricultural style
with much flash evident. There are eleven parts to the replacement fuselage and
a single clear plastic moulding for the rear cockpit’s bubble canopy. The mould
gates from the parts runners to the actual components are thick and heavy and
great care is required in separating the parts. This is especially true of the
awkward way in which the plastic flows into the lower edge of the clear canopy
component. The thick canopy has some faintly etched frame detail which is too
high up the canopy sides and a paint scheme masked to this line will result in a
lower canopy rail that is far too deep. The truly brave will polish the frame
line out. I chose to ignore it on the basis that the existing etching is quite
faint.
The
selling point of this conversion is the use of Hasegawa’s widely available
So
Brigade Models supplies a new fuselage complete with engine cowlings and lower
cowling air intake, combined tail fin and rudder, a small insert panel for the
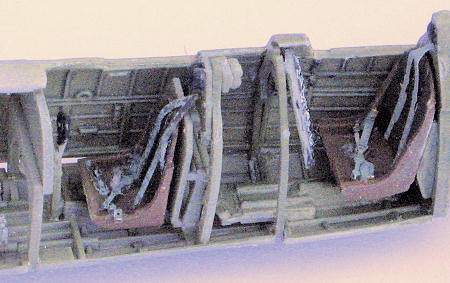
lower wing leading edge to fair in the lower cowling intake, a floor, seat, rear
bulkhead and instrument panel for the rear cockpit and mysteriously a
replacement for the perfectly good Hasegawa instrument panel for the front
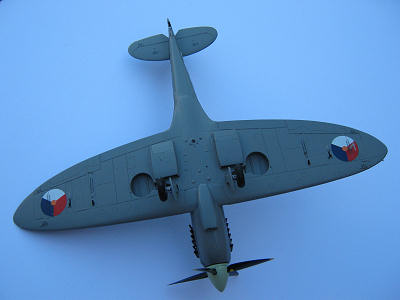
cockpit. The Hasegawa kit provides the wing, complete with radiators and
undercarriage unit, horizontal tail and fixed tail
 wheel, the complete front
cockpit interior, the propeller and exhaust stubs. Additional parts required by
scratch building or from the spares box are a stick and pedals for the rear
cockpit, seat harnesses and new upper wing covers for the redundant cannon bays
wheel, the complete front
cockpit interior, the propeller and exhaust stubs. Additional parts required by
scratch building or from the spares box are a stick and pedals for the rear
cockpit, seat harnesses and new upper wing covers for the redundant cannon bays
The
conversion parts are rather oddly designed in that the engine covers and lower
intake from the firewall forward are moulded separately from the main fuselage
halves and the fin/rudder are moulded as one separate unit. I guess that this
may be due to mould size limitations, but the result is that there are extra
joints in the fuselage that will require careful alignment during assembly.
Having said that, the surface details are acceptable, with reasonably fine
recessed panel lines. The fuselage halves have moulded in sidewall detail that
is a close match to Hasegawa’s interpretation and that is good enough for me.
Now in my sixth decade of modelling, I have decided that my completed models
shall have a standard of detailing sufficient for them to be viewed through the
glass of my showcase at a distance of about 12”, so no super detailed cockpits
for me, the basic Hasegawa cockpit fit suits me, the only extras being etch seat
belts left over from a Special Hobby kit.
The
decals are a positive feature of this package, gloss finished and in good
register and offer four choices, two from the Irish Air Corps – one in their
distinctive overall
mid-green, one
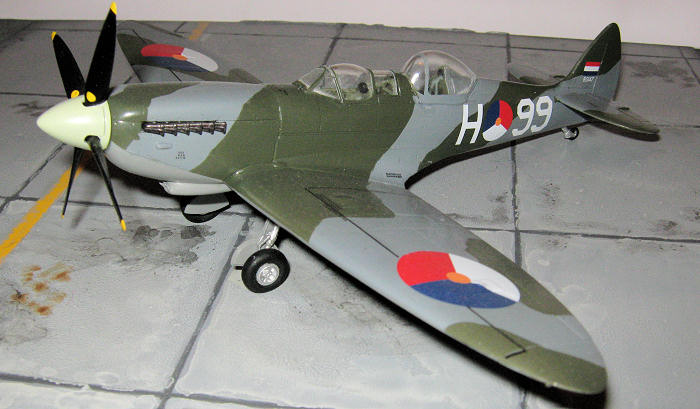
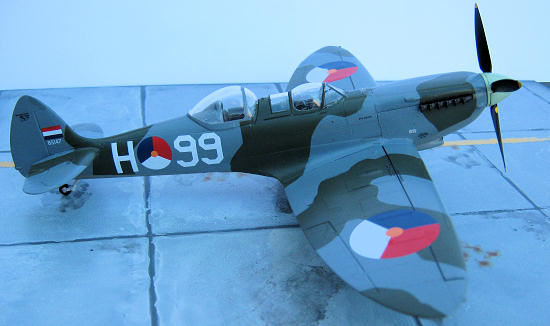
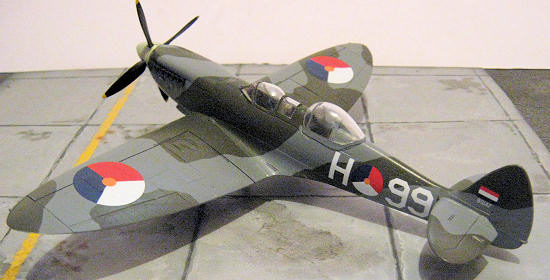
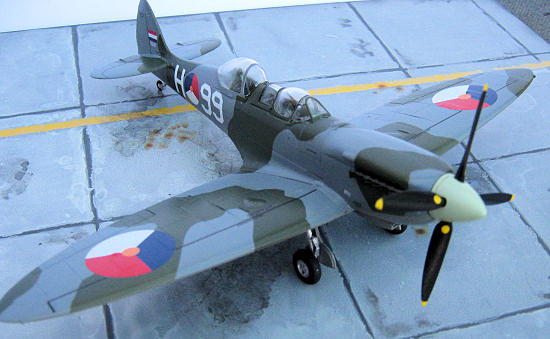
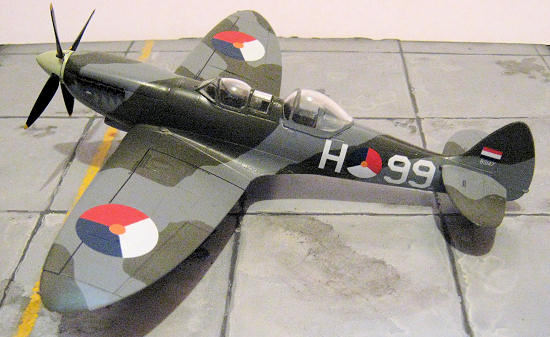
in overall silver with black anti glare panel and two from the Royal Netherlands
Air Force, one in the RAF-style delivery scheme of Dark Green and Ocean Grey
with Sea Grey Medium undersides and one in overall silver with Black anti-glare
panel.
The
instructions are more akin to guidance notes consisting of a 1:48 scale 3-view
drawing on an A3 sheet of paper with some build hints scattered around. The
colour call outs are helpful and cross referenced to the Xtracolor and Humbrol
paint ranges.
The
conversion parts require careful separation from the parts trees and very
careful trimming and fettling while being constantly checked for fit and
alignment. This is a time when I find Squadron’s sanding sticks to be essential.
With a
little thought and pre-planning, construction is little different from a
mainstream kit, in that all components are styrene so there is no need for the
blend of textures and adhesives that
might occur with a mixed media kit.
 I had my
first attempt at this model about 5 years ago, using the ICM kit as a donor for
the wings and ancillaries; originally finished as a silver Irish Air Corps
version, subsequently repainted as the Netherlands Green/Grey/Grey version..
Over the last couple of years I have been replacing and updating my 1:48
Spitfire/Seafire collection, using mainly Tamiya kits for the early short nose
Merlin versions and Hasegawa for the later Marks, VII and onwards.
I had my
first attempt at this model about 5 years ago, using the ICM kit as a donor for
the wings and ancillaries; originally finished as a silver Irish Air Corps
version, subsequently repainted as the Netherlands Green/Grey/Grey version..
Over the last couple of years I have been replacing and updating my 1:48
Spitfire/Seafire collection, using mainly Tamiya kits for the early short nose
Merlin versions and Hasegawa for the later Marks, VII and onwards.
Although
heavily loaded with flash, the conversion parts are moulded in a soft plastic
that is easily trimmed back to clearly defined edges and this is a simple matter
of carefully paring with a scalpel blade and finishing off with sanding sticks.
The
short run parts require some extra work around the nose where a hole needs to be
drilled for the propeller shaft and the front of the carb air intake opened out.
While the Hasegawa kit has handy recessed slots for precise positioning of the
exhaust outlets the Brigade parts only offer a slot in the cowl which needs a
plastic card backing sheet and a certain amount of sanding and juggling to
ensure that the exhausts sit correctly. The thickness of the rear canopy is such
that this kit will be closed cockpit only.
The Hasegawa parts are, as ever, sharply moulded and beautifully engineered with virtually click-tight joints. I have noted on the last five kits I have examined that there is some flash around the four-bladed propeller, so perhaps there is just a hint of mould wear.
| CONSTRUCTION |
 Construction can follow the sequence set out in the Revell instruction sheet.
The standard single seat interior for the front cockpit will fit into the new
fuselage with a bit if juggling and trimming. The inner faces of the exhaust
slots in the sides of the engine cowlings were blanked out with strips of
plastic card. The parts for the second cockpit dovetail neatly in behind the
mainstream kit parts and the new floor bulkhead, seat and instrument panel line
up effectively with a minimum of
re-adjustment. The fuselage halves were joined and left overnight to harden.
The joining faces between the fuselage
halves showed heavy mould wear and a long shallow trench along the seam line
needed a heavy application
of Green
Putty. The wings were assembled as a separate unit complete with tips and a new
insert to the leading edge of the centre section. At this stage I decided not to
join the nose/engine halves together since the entire nose has to be juggled
around the wing and onto the engine firewall break and I wanted to leave
the maximum scope
for any
extra cutting and trimming that might be necessary.
Construction can follow the sequence set out in the Revell instruction sheet.
The standard single seat interior for the front cockpit will fit into the new
fuselage with a bit if juggling and trimming. The inner faces of the exhaust
slots in the sides of the engine cowlings were blanked out with strips of
plastic card. The parts for the second cockpit dovetail neatly in behind the
mainstream kit parts and the new floor bulkhead, seat and instrument panel line
up effectively with a minimum of
re-adjustment. The fuselage halves were joined and left overnight to harden.
The joining faces between the fuselage
halves showed heavy mould wear and a long shallow trench along the seam line
needed a heavy application
of Green
Putty. The wings were assembled as a separate unit complete with tips and a new
insert to the leading edge of the centre section. At this stage I decided not to
join the nose/engine halves together since the entire nose has to be juggled
around the wing and onto the engine firewall break and I wanted to leave
the maximum scope
for any
extra cutting and trimming that might be necessary.
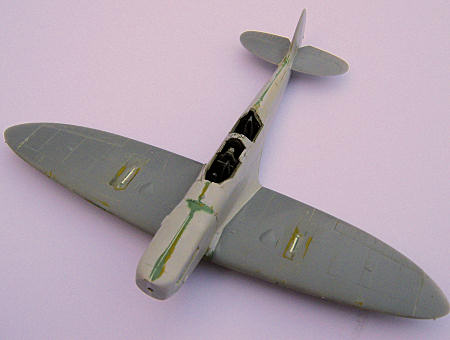
When the
wing was added to the centre section every joining surface was carefully checked
and re-checked before committing to glue. The tailplanes were added next and I
found it easiest to trim away the locating tabs and seat the horizontal sections
onto the shallow steps provided. The
nose halves were joined and again with much trimming and fettling
persuaded to fit onto the forward fuselage and centre section leading edge. The
whole unit was left for a further overnight setting, then more filling and
blending around the join lines, with each panel line carefully checked and
rescribed.
| COLORS & MARKINGS |
| CONCLUSIONS |
| REFERENCES |
Spitfire
the History, by Eric Morgan and Edward
Shacklady. 2000. Key Publishing
Spitfire
International by Terbeck, van der Meer, Sturtivant. 2002. Air Britain.
Frank Reynolds
March 2012 If you would like your product reviewed fairly and fairly quickly, please contact the editor or see other details in the
Note to
Contributors.