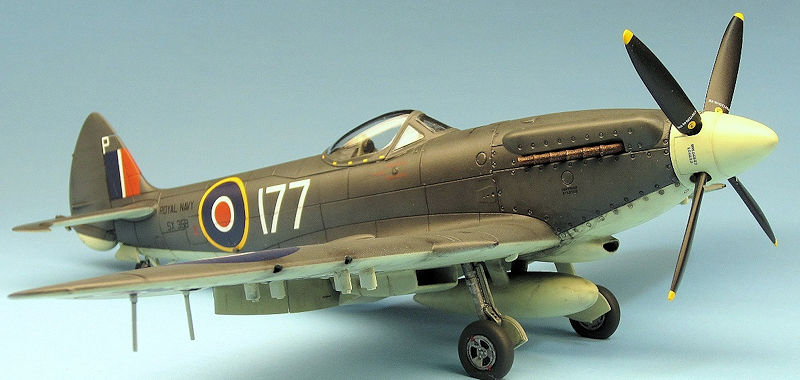
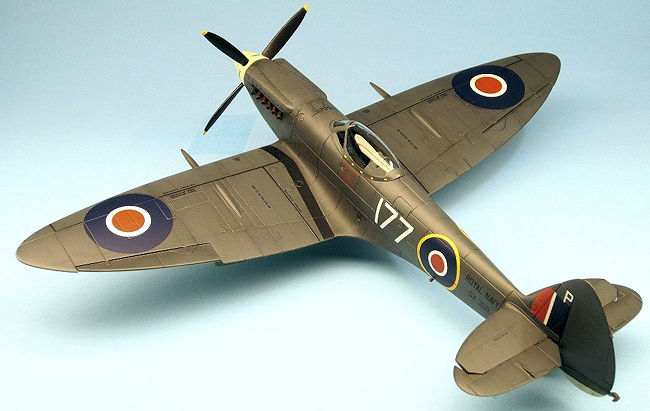
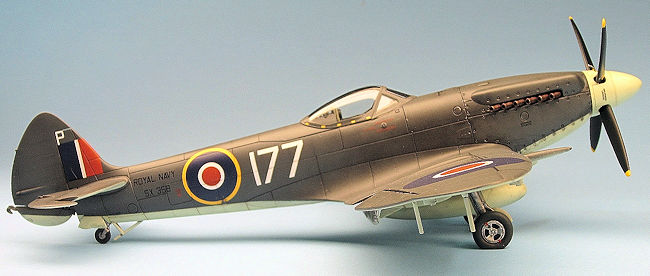
Airfix 1/48 Seafire F.XVII
| KIT #: | A06102 |
| PRICE: | $24.99 SRP |
| DECALS: | Three options |
| REVIEWER: | Jonathan Prestidge |
| NOTES: | Out of the Box build |
| HISTORY |
WWII caught the Royal Navy without a
capable shipboard fighter. Drastic times called for drastic measures and so,
though never intended as a carrier aircraft, the R.A.F.’s Hurricane and Spitfire
fighters were hastily equipped with arresting gear and put aboard R.N. carriers.
The Seafire was the Royal Navy’s version of the Spitfire. Like the Spitfire, it
was constantly upgraded during WWII keeping it competitive
 with its
adversaries throughout the conflict. The Seafire’s airframe was adaptable, able
to take on larger engines and higher power while retaining its legendary
handling characteristics.
with its
adversaries throughout the conflict. The Seafire’s airframe was adaptable, able
to take on larger engines and higher power while retaining its legendary
handling characteristics.
From the kit instructions: “The F.XVII was the first of the Seafire variants to feature a cut down rear fuselage and distinctive tear drop style canopy, distinguishing it from previous marks of Seafire. Based closely on the preceding Seafire XV, the F.XVII also featured a reinforced main undercarriage which used longer oleos with a lower rebound ratio. This went some way towards taming the deck behavior of the Mk.XV, which had resulted in a number of accidents on deck. These changes reduced the chances of the propeller tips striking the deck during landings.
Due to reinforcements in the wings, a heavier weapons load was also able to be carried, with both fuel tanks and rockets becoming an option for under the wings. A total of 232 of this variant were produced, with the majority being built by Westland, it remained on the front line until the early 1950s, whereupon it was relegated to training duties before being retired. Today, a number still survive. Speed: 387 mph; range: 435 miles; armament: 2 x 20 mm Hispano Cannons”
| THE KIT |
When released, Airfix’s
Seafire F.XVII was the first injected plastic kit of this Seafire variant in
1/48th scale. As with most Airfix kits of a few years ago, the F.XVII was nicely
molded with a decent cockpit. The instructions were top notch and presented in
booklet form with four-view color profiles of each of the three marking options.
The decals were of
 excellent
quality. The clear parts were also of good quality, not exceptionally thin but
reasonably clear. The shape of the finished kit looked true to the prototype
though I admit to not being a rivet counter.
excellent
quality. The clear parts were also of good quality, not exceptionally thin but
reasonably clear. The shape of the finished kit looked true to the prototype
though I admit to not being a rivet counter.
This kit had tons of options! One could model the wings folded or straight, flaps up or down, gear up or down, tail hook stowed or deployed, canopy open or closed, etc. As a nice touch, Airfix provided duplicates of most parts including two complete sets of wings thus allowing any option to be built without surgery to the kit parts – very nice. This also provided lots of leftovers for the parts bin.
On the down side: the surface detailing of the parts was a bit sparse and heavy handed (the worst aspect being the trench-like panel lines), the wing trailing edges are thick and the surface of the plastic is grainy. Overall scale appearance of the finished kit was not up to the refinement of say a Hasegawa kit of the late 1990s.
| CONSTRUCTION |
Construction began with
choosing what options I wanted on the finished kit. Once that was decided, I
began removing the major parts from the sprues and cleaning them up. Next, parts
that could be assembled prior to paint were glued together resulting in a series
of subassemblies. I then shot the i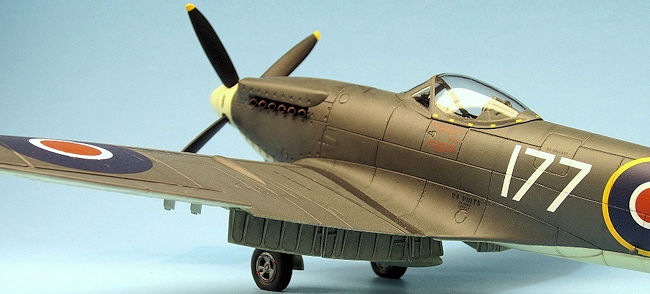 nterior
with Poly Scale British Interior Green and Flat Black thinned with Future. The
semi-gloss finish allowed washes to flow freely and also made it easier to
remove excess wash from the high spots. Detailing continued in the cockpit with
individual dials cut from a decal sheet and placed on the instrument panel. I
added a seatbelt made from .010 x .030” Evergreen strip. A thin black soapy
water wash was applied. Once the wash had dried, I drybrushed the interior with
a slightly lighter shade of interior green.
nterior
with Poly Scale British Interior Green and Flat Black thinned with Future. The
semi-gloss finish allowed washes to flow freely and also made it easier to
remove excess wash from the high spots. Detailing continued in the cockpit with
individual dials cut from a decal sheet and placed on the instrument panel. I
added a seatbelt made from .010 x .030” Evergreen strip. A thin black soapy
water wash was applied. Once the wash had dried, I drybrushed the interior with
a slightly lighter shade of interior green.
With the cockpit complete, I closed up the fuselage. The rest of the airframe was then assembled. I decided to model this aircraft with the flaps dropped as if it had just touched down on the deck. They fit with minor tweaking. The fit of the airframe was good needing just a bit of putty in the seams. Next came sanding, sanding, and more sanding! Determined to get a smooth finish on the plane before paint, I spent several hours sanding and polishing the airframe.
Finally, I added the canopy. The clear parts were dipped in Future prior to assembly. White glue was used to attach the canopy sections. Once dry, I masked the canopy using Tamiya tape and a new #11 blade.
| COLORS & MARKINGS |
As always, before choosing
a color scheme I searched for photos of Seafire F.XVIIs. I found some great
shots of the plane I chose to model in “The Encyclopedia of Aircraft of WWII” by
Amber Books. Having actual photos proved invaluable in the painting and
weathering process. I used the markings for a Seafire
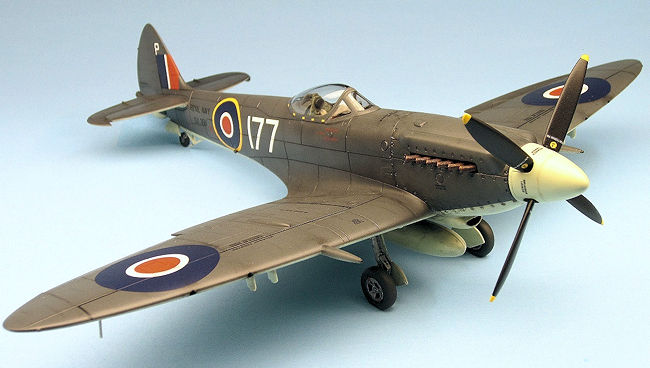 operated by
No. 800 Naval Air Squadron, HMS Triumph & Hal Far, Malta, 1947. I used Polly
Scale acrylics RLM 84 Sky for the lowers and RLM66 for the top color since they
closely match the Beige Green and Extra Dark Sea Gray called for in the
instructions.
operated by
No. 800 Naval Air Squadron, HMS Triumph & Hal Far, Malta, 1947. I used Polly
Scale acrylics RLM 84 Sky for the lowers and RLM66 for the top color since they
closely match the Beige Green and Extra Dark Sea Gray called for in the
instructions.
At this point I used pastels to emphasize the panel lines and dirty the airframe a bit. The photos of 177 showed a very clean aircraft so I tried to keep things subtle, adding just enough shade variation to enhance detail. I then sealed everything with a coat of Future in preparation for decals.
The kit supplied markings went down beautifully. Once in position, the decals responded well to an application of Micro Sol. After weathering the decals, I gave the plane a final semi-gloss clear coat. Once dry I added some chipping around maintenance panels with a silver Prismacolor colored pencil.
The landing gear, exhaust and other fiddly bits were added at this time. Final detailing was then completed.
| CONCLUSIONS |
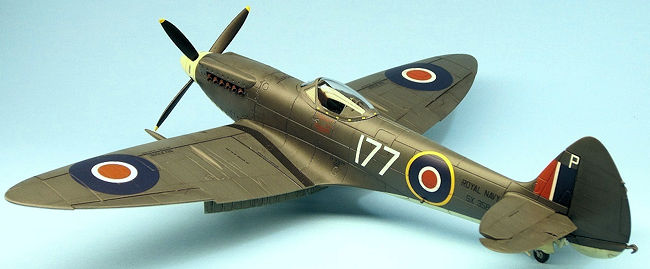 I’m happy
with the end result. The finished kit looks good on the shelf. The simple color
scheme really shows off the beautiful lines of the Seafire F.XVII. Overall, I
think the kit is a good value for the money. Every new Airfix kit that comes out
seems to be better than the last. Though this kit is simple to build, the higher
parts count and plethora of options mean that it is suited to modelers with one
or two kits under their belt. The kit decals are among the best I’ve used to
date. Recommended if you like Spitfires/Seafires and want a complete collection!
I’m happy
with the end result. The finished kit looks good on the shelf. The simple color
scheme really shows off the beautiful lines of the Seafire F.XVII. Overall, I
think the kit is a good value for the money. Every new Airfix kit that comes out
seems to be better than the last. Though this kit is simple to build, the higher
parts count and plethora of options mean that it is suited to modelers with one
or two kits under their belt. The kit decals are among the best I’ve used to
date. Recommended if you like Spitfires/Seafires and want a complete collection!
| REFERENCES |
The Encyclopedia of Aircraft of WWII by Amber Books
December 2015
Copyright ModelingMadness.com If you would like your product reviewed fairly and fairly quickly, please
contact
the editor or see other details in the
Note to
Contributors.