Airfix 1/48 Spitfire PR.XIX
| KIT #: | A05119 |
| PRICE: | $24.99 SRP |
| DECALS: | Two options |
| REVIEWER: | Jonathan Prestidge |
| NOTES: | Eduard tailplanes and Xtradecal decals |
| HISTORY |
The Spitfire
certainly needs no introduction. It was the darling of Great Britain, and
remains one of the most iconic aircraft ever produced. That it was one of just a
few truly beautiful British aircraft makes it even more striking. Fortunately
for the Allies the Spitfire flew like it looked. The Spitfire was constantly
upgraded during WWII keeping it competitive with its adversaries throughout the
conflict. The Spitfire’s
 airframe was adaptable, able to take on larger engines
and higher power while retaining its legendary handling characteristics. Many
variants were produced including planes optimized as reconnaissance aircraft,
low and high altitude interceptors, fighter bombers, shipboard fighters, etc.
airframe was adaptable, able to take on larger engines
and higher power while retaining its legendary handling characteristics. Many
variants were produced including planes optimized as reconnaissance aircraft,
low and high altitude interceptors, fighter bombers, shipboard fighters, etc.
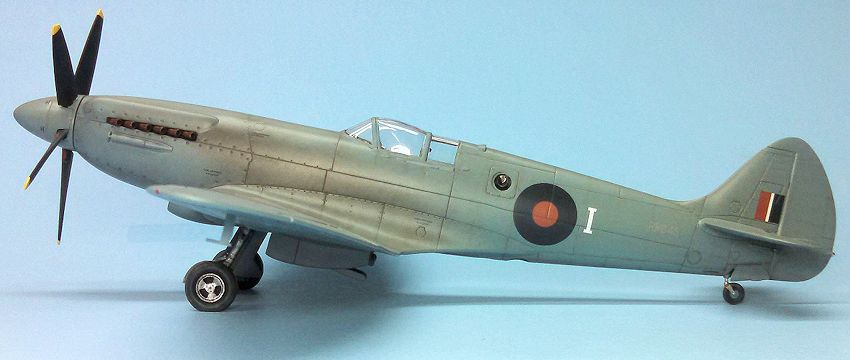
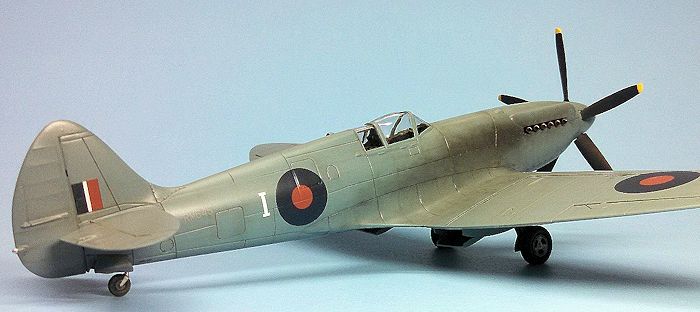
The PR Mk. XIX is arguably the best looking Spitfire of all with its longer fuselage and enlarged rudder giving it a very streamlined, balanced look. The fact that there are no bumps or bulges on the fuselage and wings only contributes to its sleek lines.
From the kit instructions: “The PR.XIX was the final Photo Reconnaissance version of the Spitfire to see active RAF service. Produced by mating features of the Mk.XI Spitfire to the powerful Griffon engine of the XIV, the PR.XIX was one of the fastest and some say best looking of all Spitfire variants. Due to its role as a reconnaissance machine it featured no armament, instead relying upon its high top speed to evade potential enemies. Against piston engine adversaries this worked well, however the advent of the Luftwaffe’s new jet interceptors in the last year of the Second World War rendered the PR.XIX vulnerable, and post war the MiG 15s of the Soviet Air Force rendered it obsolete.
 The first PR.XIX was
delivered to the RAF on the 27th of November 1944, with the final airframe being
delivered on the 18th of May 1945. The initial 25 aircraft were unpressurized,
but this was later changed and the internal fuel capacity was also increased,
thus improving the aircraft’s effectiveness.
The first PR.XIX was
delivered to the RAF on the 27th of November 1944, with the final airframe being
delivered on the 18th of May 1945. The initial 25 aircraft were unpressurized,
but this was later changed and the internal fuel capacity was also increased,
thus improving the aircraft’s effectiveness.
After the war the PR.XIX served in the Far East, operating over Hainan Island and finally performed the RAF’s last ever operational sortie by a Spitfire over Malaya on the 10th of June 1957. However, the PR.XIX continued to be used as a trials aircraft, even seeing a new role in the 1960s as a training aircraft, teaching RAF fast jet pilots how to intercept slower piston engine aircraft in case of an operational need during the Indonesian conflict.
Today a number of PR.XIXs are kept flying, most notably with the Battle of Britain Memorial Flight but also with a number of private collectors.
Speed: 445 mph, Wingspan: 11.2M (36ft 10in), Length: 9.96M, Range: 1,010 miles, Armament: None”
| THE KIT |
 When released, Airfix’s
PR.XIX was the first injected plastic kit of this Spitfire variant in 1/48th
scale. As with most Airfix kits of a few years ago, the PR.XIX was nicely molded
with a decent cockpit. The decals were of good quality. The clear parts were
also of good quality, not exceptionally thin but reasonably clear. The shape of
the finished kit looked true to the prototype though I admit to not being a
rivet counter.
When released, Airfix’s
PR.XIX was the first injected plastic kit of this Spitfire variant in 1/48th
scale. As with most Airfix kits of a few years ago, the PR.XIX was nicely molded
with a decent cockpit. The decals were of good quality. The clear parts were
also of good quality, not exceptionally thin but reasonably clear. The shape of
the finished kit looked true to the prototype though I admit to not being a
rivet counter.
On the down side: the surface detailing of the parts was a bit sparse and heavy handed, the wing trailing edges were thick, the surface of the plastic was grainy, and on my example there were several sink holes on the fuselage that needed filling. Overall scale appearance of the finished kit was not up to the refinement of say a Hasegawa kit of the late 1990s. Finally, given the popularity of WWII subjects, I’m surprised that the markings in the kit were all for post war birds.
| CONSTRUCTION |
Construction began with
removing the major parts from the sprues and cleaning them up. Next, parts that
could be assembled prior to paint were glued together resulting in a series of
subassemblies. I then shot the interior with Poly Scale British Interior Green
thinned with Future. The semi-gloss finish allowed washes to flow freely and
also made it easier to remove excess wash from the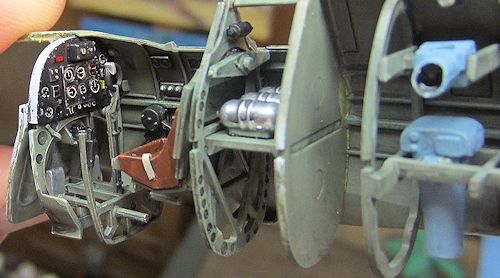 high spots. Detailing
continued in the cockpit with individual dials cut from a decal sheet and placed
on the instrument panel. I added a seatbelt made from .010 x .030” Evergreen
strip. A thin black soapy water wash was applied. Once the wash had dried, I drybrushed the interior with a slightly lighter shade of interior green. One
note of caution: pay attention to the lower camera installation! I didn’t
realize that I misaligned the lower cameras until I glued the fuselage halves
together and they didn’t line up with their respective ports. I quickly ripped
things apart and corrected my mistake.
high spots. Detailing
continued in the cockpit with individual dials cut from a decal sheet and placed
on the instrument panel. I added a seatbelt made from .010 x .030” Evergreen
strip. A thin black soapy water wash was applied. Once the wash had dried, I drybrushed the interior with a slightly lighter shade of interior green. One
note of caution: pay attention to the lower camera installation! I didn’t
realize that I misaligned the lower cameras until I glued the fuselage halves
together and they didn’t line up with their respective ports. I quickly ripped
things apart and corrected my mistake.
With the cockpit complete, I closed up the fuselage. The rest of the airframe was then assembled. Since I was building an Eduard Spitfire IX at the same time, I used leftover tailplanes from that kit. They fit with minor filing. The fit of the airframe was good needing just a bit of putty in the seams and fuselage sink holes. Next came sanding, sanding, and more sanding! Determined to get a smooth finish on the plane before paint, I spent several hours sanding and polishing the airframe.
Finally, I added the canopy. The clear parts were dipped in Future prior to assembly. White glue was used to attach the canopy sections. Once dry, I masked the canopy using Tamiya tape and a new #11 blade.
| COLORS & MARKINGS |
Wanting to build a wartime
bird I searched the internet for photos of Spitfire PR.XIXs in wartime service.
A friend was kind enough to send me some pictures as well. Actual photos proved
invaluable in the
 painting and weathering process. I bought Xtradecals sheet
X48118 for the PR.XIX and used the markings for RM645/I of No.682 Squadron, San
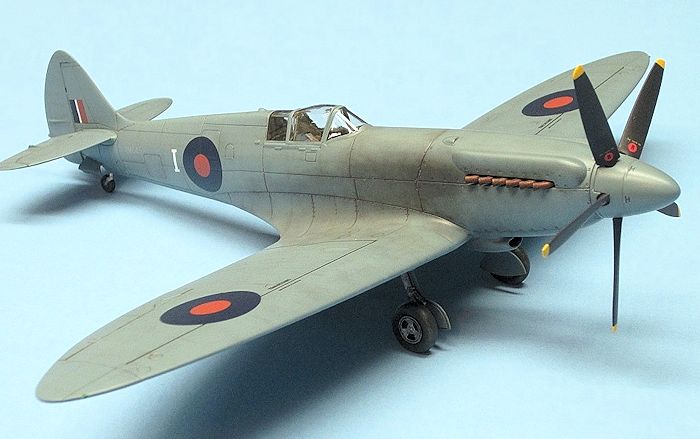
Servo, Italy, in January of 1945. I used Polly Scale acrylics PRU Blue for the
airframe.
painting and weathering process. I bought Xtradecals sheet
X48118 for the PR.XIX and used the markings for RM645/I of No.682 Squadron, San
Servo, Italy, in January of 1945. I used Polly Scale acrylics PRU Blue for the
airframe.
At this point I used pastels to emphasize the panel lines and dirty the airframe a bit. I tried to keep things subtle, adding just enough shade variation to enhance detail. I then sealed everything with a coat of Future in preparation for decals.
The Xtradecal markings went down beautifully. Since there were no stencils on the Xtradecals sheet, I had to use the kit decals for the few that appear on the PR.XIX. Once in position, the decals responded well to an application of Micro Sol. After weathering the decals, I gave the plane a final semi-gloss clear coat. Once dry I added some chipping around maintenance panels with a silver Prismacolor colored pencil.
The landing gear and other fiddly bits were added at this time. Final detailing was then completed.
| CONCLUSIONS |
Well, I’m happy with the end result. The finished kit looks good on the shelf. The simple color scheme really shows off the beautiful lines of the Spitfire PR.XIX. Overall, I think the kit is a good value for the money. Every new Airfix kit that comes out seems to be better than the last. This kit is simple to build and easy enough that beginners should have no trouble making a respectable model. The Xtradecal decals are among the best I’ve used to date. Recommended if you like Spitfires and want a complete collection!
November 2015
If you would like your product reviewed fairly and fairly quickly, please contact the editor or see other details in the Note to Contributors.