| KIT #: | JT 5 |
| PRICE: | ~$25.00 |
| DECALS: | options |
| REVIEWER: | Jonathan Prestidge |
| NOTES: | Aeromaster 48-580 decals, Evergreen strip seat belts. |
| HISTORY |
It is fair to say that the Germans inspired the Spitfire V. With the introduction of the Messerschmitt Bf-109F, the Luftwaffe gained a performance edge over the RAF’s Spitfire I and II fighters. The RAF was left “scrambling” to catch up (very sorry, couldn’t resist). Since the planned Spitfire Mk III was not yet ready for production, a 1,515 hp Merlin 45 was hastily installed in a Mk Ia airframe. The results were excellent, giving a marked increase in performance over that of the Mk I and II Spitfires then in service. An order was quickly placed for the conversion of 46 Mk I airframes to Mk V standard. These were intended to serve as a stopgap until the Mk III was ready. However, the lash-up Mk Vs proved so successful and the conversion so easily implemented into production that the Mk III was eventually canceled. The order for 1,500 Mk III Spitfires was changed to the Mk V.
Spitfire Mk Vs were powered by the Merlin 45 and most had three exhaust
stacks per side as seen in the earlier Mk I and II fighters. The most common Mk
V was the Mk Vb. It could be identified by the typical “B” wing armament of two
20mm cannon and four 0.303 machine-guns. Other wing configurations seen on the
Spitfire Mk V were the “A” wing with eight 0.303 machine-guns and the “C”
 wing
with four 20mm cannon (though only two were usually fitted) and four 0.303
machine-guns. Spitfire Mk Vs could be fitted with a variety of engine intakes:
standard, Vokes Sand Filter, and Aboukir system. The Mk V could also be fitted
with either standard or “clipped” (LF) wing tips. The use of either a Rotol or
De Havilland propeller caused further variation in the look of the Mk V. The
many possible combinations of these varying features have caused quite a few
headaches for the modeler and the kit maker alike. More than anything else, this
project highlighted the need for careful research.
wing
with four 20mm cannon (though only two were usually fitted) and four 0.303
machine-guns. Spitfire Mk Vs could be fitted with a variety of engine intakes:
standard, Vokes Sand Filter, and Aboukir system. The Mk V could also be fitted
with either standard or “clipped” (LF) wing tips. The use of either a Rotol or
De Havilland propeller caused further variation in the look of the Mk V. The
many possible combinations of these varying features have caused quite a few
headaches for the modeler and the kit maker alike. More than anything else, this
project highlighted the need for careful research.
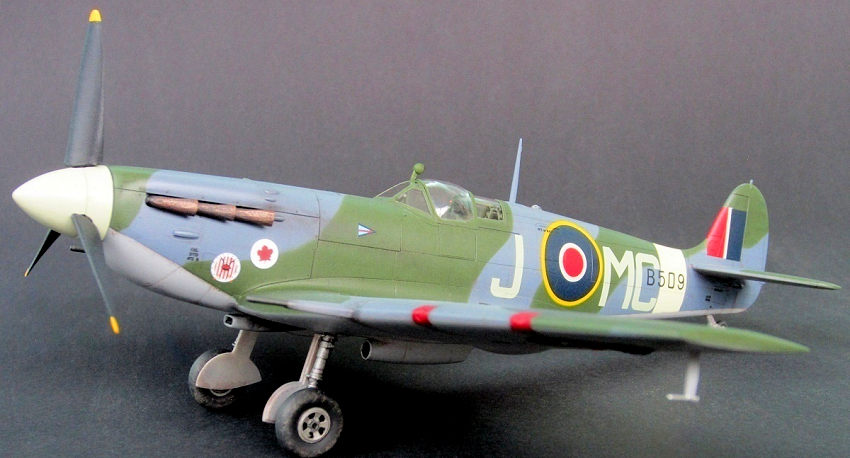
Where did I get this insight? Well, when I started this build I wanted to model the box-art plane – a Mk Vb with standard wingtips, Vokes tropical filter, and De Havilland propeller in Mediterranean camouflage. What I ended up building was a clipped wing (LF) Mk Vc with a Rotol propeller and standard air filter in European camouflage. According to the AeroMaster instruction sheet, this particular aircraft had the outer cannon barrel stubs removed thus making it look like a Mk Vb (or close enough) - so please no nasty e-mails from you Spitfire Boffins!
| THE KIT |
I was surprised to see that the Hasegawa Mk V Spitfire had not yet been
reviewed on MM. This one was an older Hasegawa kit (JT5) and thus had an odd
combination of extremely fine surface detailing and delicate airframe features
with some clunky bits (landing gear, interior). In the box the kit looked to be
nicely molded with a simple cockpit. There were few parts compared to today’s
wonder kits. The kit did
 include
optional wingtips, optional bombs, different intakes, etc. The decals were of
useable quality but the white was a typical Hasegawa cream color and the red on
the roundels was slightly too bright. The clear parts were of good quality -
thin and clear. The plastic itself was smooth and shiny, minimizing the need for
sanding prior to paint. The instruction booklet was well done and easy to
follow. The shape of the finished kit looked true to the prototype though I
admit to not being a rivet counter.
include
optional wingtips, optional bombs, different intakes, etc. The decals were of
useable quality but the white was a typical Hasegawa cream color and the red on
the roundels was slightly too bright. The clear parts were of good quality -
thin and clear. The plastic itself was smooth and shiny, minimizing the need for
sanding prior to paint. The instruction booklet was well done and easy to
follow. The shape of the finished kit looked true to the prototype though I
admit to not being a rivet counter.
On the down side: the surface detailing of the parts was a bit sparse, the Vokes Sand Filter was really badly done, and on my example the standard wing tips did not fit well. The propeller assembly (De Havilland or Rotol) did not provide positive locations for the blades and had to be fully painted prior to assembly, after which it was not removable. Finally, the interior and landing gear were overly simplified.
| CONSTRUCTION |
Construction began with careful review of the instructions to decide what parts were going to be used on the plane I modeled. As stated before, I wanted to model the box-art plane, ZX-N. I began removing the major parts from the sprues and cleaning them up. Next, parts that could be assembled prior to paint were glued together resulting in a series of subassemblies. It was during this process that I noticed the poor quality of the Vokes Sand Filter. Located on its own sprue and obviously developed as an afterthought, the molding was clearly in contrast to the fine detailing on the rest of the kit. I also noticed the poor fit of the standard wingtips. It was time to rethink things.
 Since
I had the AeroMaster decal sheet Post D-Day Spitfires (48-580), I decided to
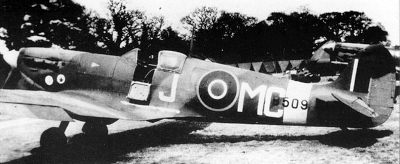
model Spitfire LF Mk Vc of 142 Wing, June 1944, flown by Wing Commander John
Milnes Checketts. “Johnny” Checketts was a New Zealander who flew for the RAF
during WWII. He was credited with 14 ½ air-to-air victories, 3 probables and 11
enemy aircraft damaged. He was shot down twice but was rescued both times - once
by the Royal Navy (from the English Channel) and once by French Partisans (from
occupied France). I found one period photo of Wing Commander Checketts’ actual
aircraft. It showed a clean aircraft with minimal wear. This helped later on
with painting and weathering. Thankfully, the plastic parts to model this plane
were included in the kit and the fit and detail of these parts was great.
Since
I had the AeroMaster decal sheet Post D-Day Spitfires (48-580), I decided to
model Spitfire LF Mk Vc of 142 Wing, June 1944, flown by Wing Commander John
Milnes Checketts. “Johnny” Checketts was a New Zealander who flew for the RAF
during WWII. He was credited with 14 ½ air-to-air victories, 3 probables and 11
enemy aircraft damaged. He was shot down twice but was rescued both times - once
by the Royal Navy (from the English Channel) and once by French Partisans (from
occupied France). I found one period photo of Wing Commander Checketts’ actual
aircraft. It showed a clean aircraft with minimal wear. This helped later on
with painting and weathering. Thankfully, the plastic parts to model this plane
were included in the kit and the fit and detail of these parts was great.
After that change of direction, construction continued. I sprayed the interior with Poly Scale British Interior Green (FS34226) thinned with Future. The semi-gloss finish allowed washes to flow freely and also made it easier to remove excess wash from the high spots. Detailing continued in the cockpit with individual dials cut from a decal sheet and placed on the instrument panel. I added seatbelts made from .010” x .030” Evergreen strip. A thin black soapy water wash was applied. Once the wash had dried, I drybrushed the interior with a slightly lighter shade of interior green.
With the cockpit complete, I closed up the fuselage. Following my usual procedure, I glued the upper wings to the fuselage before gluing the upper and lower wing halves together (filler-free seam every time). The rest of the airframe was then assembled. The fit of the airframe parts was good. Careful cleanup and dry fitting of said parts insured filler-free seams (well, mostly). I did use Mr. Surfacer 500 on the upper engine cowl to eliminate a fairly prominent seam there. Next came sanding the airframe seams in preparation for paint. I spent less time than usual sanding and polishing the airframe on this kit due to the smooth surface of the kit plastic.
Finally, I added the canopy. The clear parts were dipped in Future prior to assembly. White glue was used to attach the canopy sections. Once dry, I masked the canopy using Tamiya tape and a new #11 blade.
| COLORS & MARKINGS |
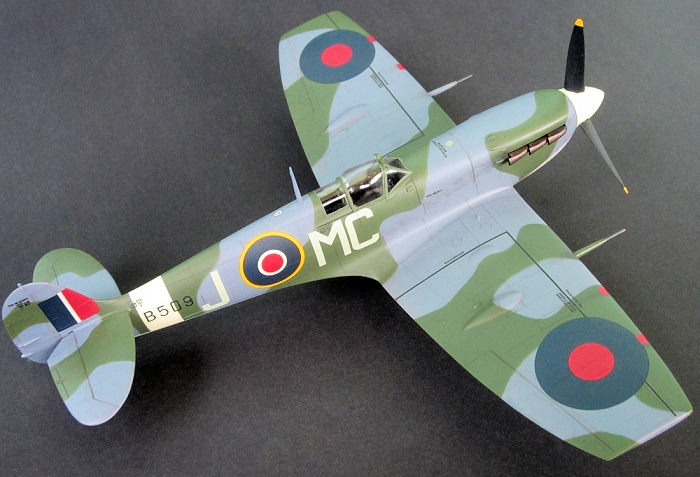
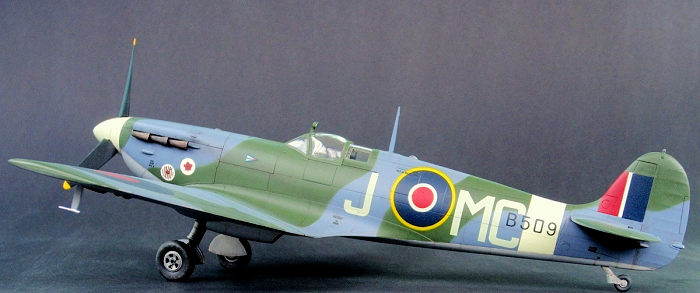
 Wing
Commander Checketts’ plane wore the standard European camouflage of Ocean Gray
(FS35237) and Dark Green (FS34079) over Medium Sea Gray (FS36293) with a Sky (I
used RLM 84 FS34554) nose and fuselage stripe. I used Polly Scale acrylics for
the airframe and masked between the colors with thinly rolled snakes of kneaded
eraser. I then applied a thick coat of rubber cement over the color I was
protecting. This technique is much faster for me than cutting paper/tape masks
and keeps out paint better than any method I have previously tried. Once the
paint was dry the rubber cement peeled right off. I had no ill effects due to
the rubber cement reacting with the underlying acrylic paints or peeling them
off.
Wing
Commander Checketts’ plane wore the standard European camouflage of Ocean Gray
(FS35237) and Dark Green (FS34079) over Medium Sea Gray (FS36293) with a Sky (I
used RLM 84 FS34554) nose and fuselage stripe. I used Polly Scale acrylics for
the airframe and masked between the colors with thinly rolled snakes of kneaded
eraser. I then applied a thick coat of rubber cement over the color I was
protecting. This technique is much faster for me than cutting paper/tape masks
and keeps out paint better than any method I have previously tried. Once the
paint was dry the rubber cement peeled right off. I had no ill effects due to
the rubber cement reacting with the underlying acrylic paints or peeling them
off.
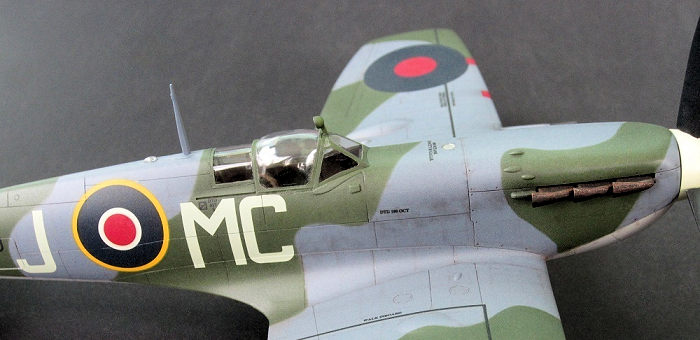 At
this point, I used pastels to emphasize the panel lines and dirty the airframe a
bit. Looking at the photo, I tried to keep things subtle, adding just enough
shade variation to enhance detail. I also used the Eduard Spitfire Mk IX kit as
a reference for adding detail to the airframe. I didn’t just use pastels to
highlight the engraved detail but effectively “drew on” detail where it was
missing. Hopefully, the pictures showed this. I then sealed everything with a
coat of Future in preparation for decals.
At
this point, I used pastels to emphasize the panel lines and dirty the airframe a
bit. Looking at the photo, I tried to keep things subtle, adding just enough
shade variation to enhance detail. I also used the Eduard Spitfire Mk IX kit as
a reference for adding detail to the airframe. I didn’t just use pastels to
highlight the engraved detail but effectively “drew on” detail where it was
missing. Hopefully, the pictures showed this. I then sealed everything with a
coat of Future in preparation for decals.
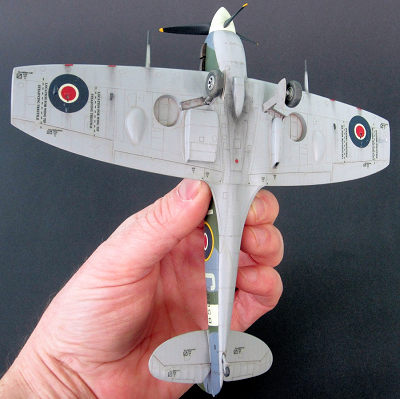
The AeroMaster markings went down beautifully. I used the kit decals for the roundels and stencils without issue. I wetted the area receiving the decals with Micro Set. Once in position, the decals responded well to an application of Micro Sol. After weathering the decals, I gave the plane a final semi-gloss clear coat. The landing gear, prop (what was Hasegawa thinking?) and other fiddly bits were added. Final detailing was then completed.
| CONCLUSIONS |
I am very happy with the end result and the finished kit looks good on
the shelf. I’m still amazed at the fine surface detail on these older Hasegawa
kits (far more petite than any newer Airfix kit I’ve built). This oldie is a
simple build save for the overly complex propeller installation. Once the kit is
com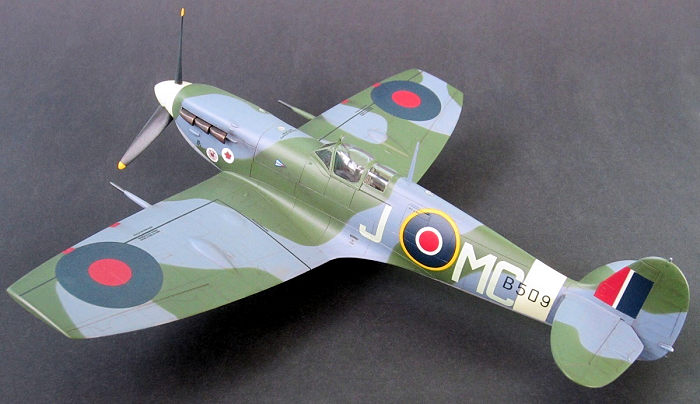 pleted,
the rather basic cockpit looks fine through the closed canopy and the wheels and
landing gear are passable if not state-of-the-art. On the other hand, I’m not
thrilled with the Vokes Sand Filter provided or the fit of the standard
wingtips. I’ll rate this one as not perfect but enjoyable!
pleted,
the rather basic cockpit looks fine through the closed canopy and the wheels and
landing gear are passable if not state-of-the-art. On the other hand, I’m not
thrilled with the Vokes Sand Filter provided or the fit of the standard
wingtips. I’ll rate this one as not perfect but enjoyable!
How does it stack up against the competition? The new Airfix kit is currently the best Spitfire Mk V or so I’m told (I haven’t built one). Though the Tamiya Spitfire Mk V is more prolifically modeled and the easiest to build, I think this Hasegawa kit better captures the graceful look of the Mk V Spitfire. The shape of the Rotol prop, delicate wing to fuselage fillets and rear fuselage of the Hasegawa look more accurate to my eye. However, if you are building a tropicalized Mk V, the Tamiya or Airfix kits may be a better starting point.
News Flash! Since writing the above, I have started the Tamiya Mk Vb ‘Trop’. The Vokes Sand filter is beautiful, the Aboukir filter is included - nice! No De Havilland prop is included however, and if you decide to model either of the LF “clipped” wing Mk Vb aircraft with the Aboukir filters, the kit-supplied wingtips for the Tamiya do not look like any photos I have seen. No kit is perfect - do your research and have fun!
| REFERENCES |
References: The Encyclopedia of Aircraft of WWII, 2004, Amber Books Ltd.
3 April 2017
Copyright ModelingMadness.com
If you would like your product reviewed fairly and fairly quickly, please contact the editor or see other details in the Note to Contributors.
Back to the Main Page Back to the Review Index Page Back to the Previews Index Page