Special Hobby 1/48 Seafire III
| KIT #: | 48052 |
| PRICE: | Approx $32.00 |
| DECALS: | Three options |
| REVIEWER: | Fernando Rolandelli |
| NOTES: | Kitbashed with ICM Spitfire IX. |
| HISTORY |
It is
a remarkable fact that Royal Navy´s Fleet defence fighter in 1945 was a kind of
glorified Spitfire Mk V, a heavier one by the way, the same that the RAF had
deemed unsuited for offensive combat operations back in 1942. It is even more
remarkable that at that late date, it was still the fastest Allied naval
interceptor at low level, and the one with a steepest climb rate. That made it
an ideal anti-kamikaze weapon; but it should be said that, fitted with a slipper
tank, the machine had an endurance that enabled
 them for a
CAP time of more than three hours, or an useful combat radius for offensive
operations. The aircraft was never safe, with operational losses far
outnumbering those due to enemy action; that said, by the time of its deployment
with the BPC, an acceptable degree of operational safety had been achieved. It
might be that only the fact that it could fly and fight kept it in service; in
peacetime, most probably, it would have never been considered at all.
them for a
CAP time of more than three hours, or an useful combat radius for offensive
operations. The aircraft was never safe, with operational losses far
outnumbering those due to enemy action; that said, by the time of its deployment
with the BPC, an acceptable degree of operational safety had been achieved. It
might be that only the fact that it could fly and fight kept it in service; in
peacetime, most probably, it would have never been considered at all.
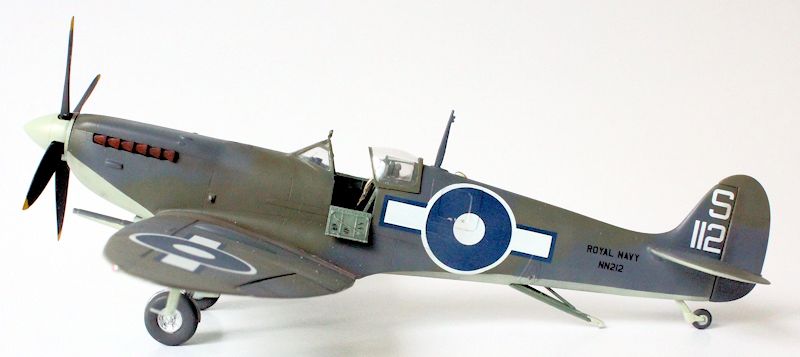
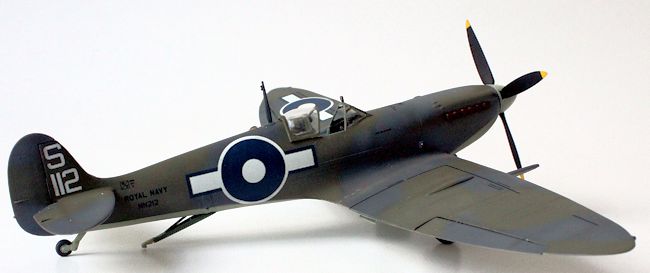
NN212, a Seafire L.III, belonged to a batch ordered on 5 January 1943 under
Contract B124305/40 and Contract Acft/2605/C23(c), for a total of 200 Type 358
Seafire LIII airframes built by Westland Aircraft.
It was flown by SubLt. Ed Murphy to shoot down two A6Ms
and share another on 15th August,
1945, while escorting an Avenger strike package to Kisarazu, in a mission which
got famous as “the last combat in the Pacific”, and in which the RN-FAA suffered
its last fatal casualty, the formation leader, Lt. Hocksley (shot down, captured
and executed later). Of course, that didn´t exempt NN212 to bang its nose on the
deck sometime later (it had already hit the ship´s gun director on 03.3.45), as
a picture in Osprey´s book testify, and an entry in Sturtivant´s book
confirms, saying “Floated over the barrier, HMS
Indefatigable, 22.01.46, Mid.WA Armstrong”
| THE KIT |
| CONSTRUCTION |
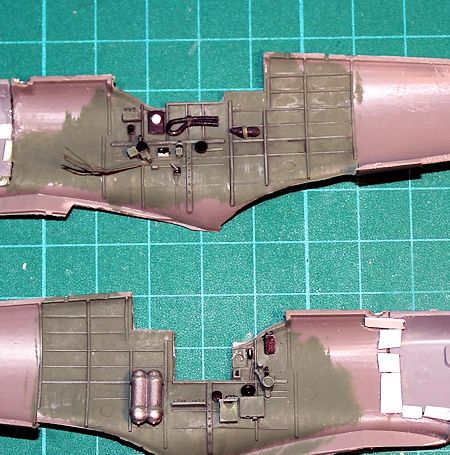
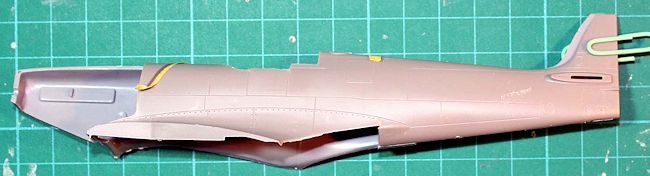
It
must be said that the fit in the SH kit is undistinguished at best, as well as
the definition of most small parts. Ailerons are particularly ill-fitting, but
that can be masked by posing them with a small deflection. Gun covers require
heavy sanding no matter how much attention you put in them. Undercarriage is
rather complex but realistic enough (but the detail in the wells has to be
scratchbuilt –it is included as a resin piece in later iterations of the kit),
and the angle looks correct. Fairing in the radiator, oil cooler and carburettor
intakes proved labour intensive, too.
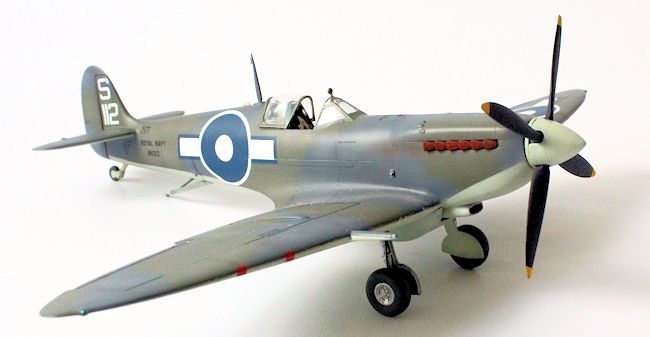
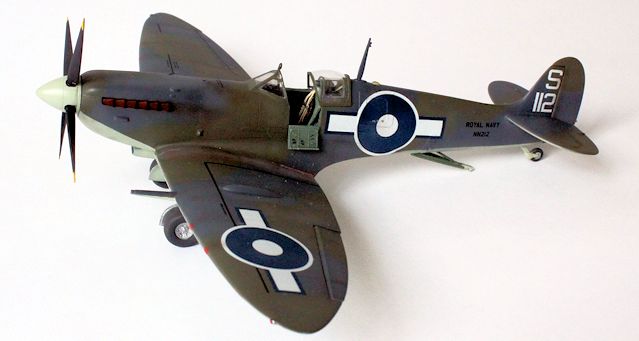
| COLORS & MARKINGS |
 between the
colours undoubtedly helps to get the fuzzy appearance seen in pictures. That
said, floating masks or Blue Tack (or a finer airbrush tip!) would probably
render a equally good result, with better definition.
between the
colours undoubtedly helps to get the fuzzy appearance seen in pictures. That
said, floating masks or Blue Tack (or a finer airbrush tip!) would probably
render a equally good result, with better definition.
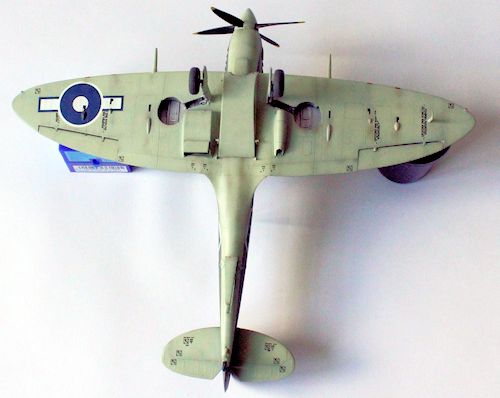
Kit decals were used. They proved a bit fragile, and most of them curled
in some dangerous way at some point, but they conformed well to even difficult
surfaces with no silvering (just see the picture showing the big insignia
conforming to the various reinforcements in the left fuselage). I had a problem
with the size of the large insignia: shouldn´t they be all the same size (48
in)? Well, it looks like someone realized the fuselage was a bit short and
adjusted the ones going there… something which I missed. The difference is
minimal; mine are “crossed”, but you could only notice if looking very intently.
| CONCLUSIONS |
| REFERENCES |
-
“Supermarine
Spitfire – Part I: Merlin Engined”, Robert Humphreys, SAM Publications;
-
“RN Aces of WW2”,
Andrew Thomas, Osprey Publications;
-
“Seafire vs. Zero”,
Donald Nijboer, Osprey Publications
-
“Aircraft of the Royal Navy 1939-1945”, Ray Sturtivant, Air Britain.
-
“Supermarine Seafire”,
Kevin Darling, Crowood Publications.
June 2015
If you would like your product reviewed fairly and fairly quickly, please contact the editor or see other details in the Note to Contributors.