| KIT: | Merlin 1/72 O-47 |
| KIT #: | 34 |
| PRICE: | $18.00 in the late 1980's |
| DECALS: | one option |
| REVIEWER: | Joel Hamm |
| NOTES: | You could do it if you HAD to. |
| HISTORY |
PREVIEW # 2 in a series on Kits From Hell
The O-47, in fact the entire O- for Observation designation, was one of those ideas that looked good on paper but fizzed in flight – a powerful, fast, armed reconnaissance platform. The eve-of WWII war game maneuvers showed that such machines could not be supported in the field environment where they were needed. When push came to shoot, a few O-47’s flew submarine patrol, but most turned for their keep to training or target tugging. Long range high altitude observation went to modified photo-recon fighters and bombers, while liaison and what several wars later became “forward air control” was given over to off-the-shelf light planes such as the L-4 Grasshopper.
| THE KIT |
 Previous
previews had heaved a heap of brick bats at Merlin Models, but this kit,
despite its short run shortcomings, is actually quite buildable by any
modeler man enough to manage the clean up campaign and scrounge or scrap
build all the fiddledy-fidgits. Let’s start with the canopy. Anyone not
overly concerned with optical quality could use it almost SOB. It’s not
terrifically clear; but it is not opaque either. It is relatively thin,
properly shaped, and endowed with precisely portrayed framing which would
be a shame to lose by sanding away the longitudinal scarifications that
cause its cataracts. Actually, most of those are on the inside and could be
debrided, as long as the thin-ness of the plastic is kept in mind.
Previous
previews had heaved a heap of brick bats at Merlin Models, but this kit,
despite its short run shortcomings, is actually quite buildable by any
modeler man enough to manage the clean up campaign and scrounge or scrap
build all the fiddledy-fidgits. Let’s start with the canopy. Anyone not
overly concerned with optical quality could use it almost SOB. It’s not
terrifically clear; but it is not opaque either. It is relatively thin,
properly shaped, and endowed with precisely portrayed framing which would
be a shame to lose by sanding away the longitudinal scarifications that
cause its cataracts. Actually, most of those are on the inside and could be
debrided, as long as the thin-ness of the plastic is kept in mind.
Polishing the outside of the individual panes would be a prolonged and painstaking project. The best solution would probably be to cast a female mold of the greenhouse, either in silly-cone rubber, or by vacu-ing; then in turn use this to cast a male form out of easily smoothed material, such as plaster or wood putty (Durham’s Rock Hard – my favorite). That could be cleaned up and tweaked for a perfect fuselage fit, then used to suck a new acetate transparency. I may yet end up doing this multi-stage remanufacture, since the canopy of the AML kit is, according to website reviewers and my own preliminary peek, shaped too tall and narrow, giving the pot-bellied plane an even more comical appearance.
That brings up a bit of a break in the logical flow of a kit discussion. Merlin’s instructions take the useless narrative form: “Glue the fuselage together; the wings to the fuselage, the wheels to the wings, paint it, rig it, plunk it on the shelf, and you’re done.” No exploded view is provided, but the back side of the sheet is occupied by a set of accurate drawings in 1/72 scale. All panel lines are depicted, for performing the inevitable re-scribe; but more importantly, the profile and plan views, particularly of the canopy, can be micrometered and compared to this kit, or any alternative. Will definitely do that when it comes time to tackle AML’s acromegaliac clear section.
Mr. M. devotes fully a quarter of his instruction sheet to apologizing for, and explaining, his omission of a cockpit floor. I mean, what’s the big deal? Anyone can cut a section of card stock; besides – hardly any other interior details are provided.
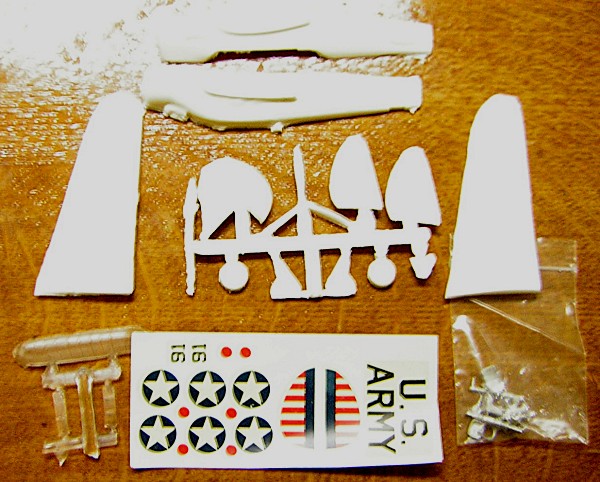
Might as well cover the decals at this point. They appear to be early Airfix variety, thick and printed on a heavy, yellow carrier film. Locating alternate insignia and graphics wouldn’t be too great a challenge; but finding properly sized tricolor stripes to clothe that barn-door rudder would take the blessing of The Gods; or at least access to an alps printer.
Back to the basics: Fuselage clam shells need extensive machining of the mating surfaces, but are otherwise thin and well formed. An exception is the “armpit” observer’s windows. That wing root underside area is deformed by scar tissue that would need to be excised, reshaped and replaced with transparent panes. Interestingly, the fuselage inner surface is scribed and cross hatched to show where to punch through. Wing panels are molded as single pieces, very thick but properly profiled and cambered without any shrink/sink holes. Wheel wells are just shallow depressions, but the thickness of the wings would allow them to be excavated.As opposed to the fuselage skin, which is smooth, the wings are grainy and “picky”, which would mean deepening all scribing before sanding. Finish sanding on these kits was never easy, because of the soft waxy plastic required for the low pressure injection process. Since this plane gets the dreaded Bear (pun intended) Metal Finish, one would need to shpritz everything with Mr Surfacer or sandable automotive primer, then work down from 600 grit to about 2000.
Tailplanes are not nearly as well formed as the wings. One stab is notably thicker than the other, and all three fins need sanding down to remove deep surface gouges. No problem there, since scribing and rib stitch tapes are heavy handed. Prop and engine would definitely have to come from the spares department. Wheels – well if you could not come up with any, they could be cleaned. There’s a semi-amorphous tapered tube-like thing. Don’t throw that out with the rest of the sprue. It’s the extended exhaust stack. Actually, you would want to make it out of telescoping sections of Al tube, just as you would replace the main gear legs. Those, and other minor players, are cast in white metal that’s too rough to wrestle with.
| CONCLUSIONS |
In previewing Merlin’s hellish HOK-1helicopter, I mentioned that the kit screams out the impression of haste to get it out the door then close up shop. The O-47 hints at the opposite outlook; that despite the limitations of the company’s short run injection technology, they would do their best to offer customers a shot at a sought after subject that Italmygawa would never touch. If there were no alternate O-47 (there are two; AML has a land plane and floated version) this kit would make a challenging but successful project.
Editor's Note: With Joel's permission, I'm going to use the images in this article to show you that the least desirable way to take pictures of something while using a flash is direct. If you take your images at more of an angle, then the flash will not bounce back into your camera lens but will bounce away. It also points out that if the picture isn't in focus, take another shot. This is especially true when using a digital camera as you can inspect your image immediately and re-shoot if necessary. I can not fix out of focus or too bright and the images they supply are not very useful.
I'm sure that Joel doesn't mind using his images as an example as this will not only help him but those of you who are considering submitting articles as well.
January 2006
If you would like your product reviewed fairly and quickly by a site that has over 300,000 visitors a month, please contact me or see other details in the Note to Contributors.