|
KIT: |
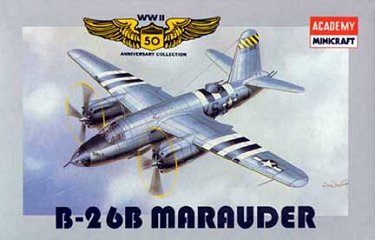
Minicraft 1/144 B-26C Marauder |
|
KIT # |
4406 |
|
PRICE: |
$6 |
|
DECALS: |
One aircraft |
|
REVIEW BY: |
|
|
NOTES: |
Ex-Crown Molding |
|
HISTORY |
"CHESAPEAKE CIGAR"
The B-26 Marauder was a twin-engined medium bomber with a streamlined fuselage of circular cross-section and a relatively small shoulder wing. It was difficult to handle due to its high wing loading, but it also gave high performance. It started life with high accident rates due to its high technical demands placed on the pilots. It was known to be a "hot" aircraft with a relatively fast landing speed around 152 mph. If an inexperienced pilot, and most trainees were, brought it in too slow it would stall and spin with little room to recover. In the beginning it carried the moniker "The Widow Maker".
With proper pilot training it later proved to be a safe and effective aircraft. The Marauder posted the lowest loss rate, about 1%, of USAAF combat planes during World War II. The B-26 was used most effectively for bombing raids on railroad depots, bridges, and airfields, and it developed an excellent reputation as a dam buster. Many crews grew to appreciate its agility and strong defensive armament.
The B-26 along with the B-25 Mitchell formed the US medium bomber forces in WWII. These flew mainly daylight raids, called Ramrods, against such targets as railroad stations, coastal gun batteries, important factories, and bridges. There were 4863 built in all variants.
Technical Details:
The B-26 was powered by two Pratt & Whitney Double Wasp, 18 cylinder, air-cooled, radial engines. Maximum speed at 5,000 feet with a maximum load was 283 mph with a cruising speed of 190 mph. It had an operational ceiling of 19,800 ft, a range of 1,100 miles and a maximum bomb load of 4,000 lbs. It packed a mighty defensive armament of 11 M2 50- caliber machine guns located in the dorsal turret, tail, belly and nose. All of this armament required a crew of seven: two pilots, bomb aimer/nose gunner, navigator, top gunner, tail gunner and belly gunner.
|
THE KIT |
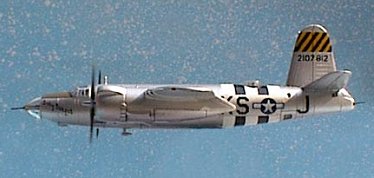
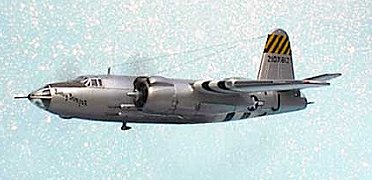
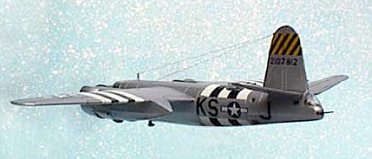
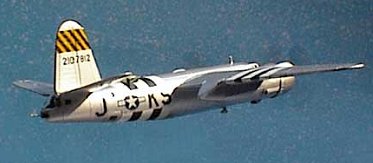
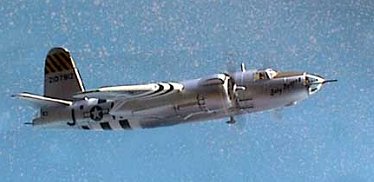
The model represents "Baby Bumps II", a B-26C belonging to the 557th Bomber Squadron, 387th Bomber Group, 9th Air Force, and was based in England at the beginning of the Normandy invasion. Thanks go out to Alex Lebrecque for supplying this information to me. The kit instructions supply nothing.
|
CONSTRUCTION |
Interior:
I bought this kit as a quick build and had planned to build it out-of-the-box. Once I cut the parts from their sprues, cleaned and sanded the nubs and flash, I was astonished at what a very good dry fit this model had. Therefore, I decided to open up everything, scratch-build a cockpit, and add a full crew, with exception of the navigator and belly gunner, as they would not be seen and I didn't want to waste the figures.
I opened up the nose, top turret gun platform, and rear gun opening. While I was going crazy with the Motor tool, I opened all the small windows and portals also. All were done using Dremel cutting bit. I only cut back to within about 1-mm of each orifice. I did the remainder of the cutting win an X-Acto knife and #11 blade. The windows were replaced with Krystal Klear in the final assembly.
The cockpit was scratch built using scrape sheet styrene. I made a bulkhead, seats, control columns, instrument panel and bombardier kneepad for the cockpit area. The kit's turret gun was detailed a little more with scrap plastic and sprue. All gun barrels were cut sections of insulin hypodermic needles. I also built two belly machine guns, but it's doubtful they can be seen inside the belly glass replaced with Kystal Klear. Shine a bright light inside and you may see the barrels.
The figures are much-modified Preiser Modern Luftwaffe figures in 1/144 scale. I had to cut the legs and arms and reposition them for the pilot and co-pilot. The bombardier and rear gunner had to have their legs cut and repositioned. The turret gunner had to have his arms cut and repositioned. If was all rather easy, except for the handling of such tiny parts.
The cockpit and entire interior was painted interior green. The instrument panel and control columns were painted semi-gloss black. The seat cushions and bombardier kneepad were painted leather. I used several Reheat Model Control Panel and Data Placard decals for the instrument panel, center console, and cockpit sides. The figures were primed in neutral gray and hand painted with acrylics. Seat harnesses for the pilot and co-pilot were done with thin strips of masking tape, as were all the parachute harnesses of the other figures.
Exterior:
All I added to the exterior were the two antennas, their wiring, and the tail post for the wiring, which was done with smoke-colored invisible thread. I cut the landing lights from the wings. These were replicated using two Waldron pinched disk of chrome foil and filled with Kristal Klear. I had to apply three layers of Krystal Klear and allow each to dry in order to build it up to the wing contour. Navigation lights are also done with Krystal Klear and painted clear red and clear green as required.
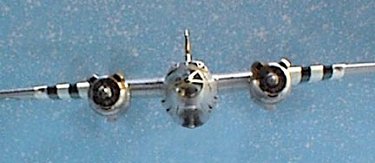
The engine openings come filled and the instructions tell you to paint the area black. I did not like that effect, especially with so much effort going into the rest of the kit. But rather than cut out the engine openings and trying to find suitable engines in 1/144 scale, I took a novel approach and photographed the R-2800 of my Hobbycraft F8F-1. First I took the photo to a computer photo editor and masked the engine opening with a circular mask. I next scaled down the photo to the exterior opening size of the model and ran off two copies. The copies were cut out with scissors and the center of each was punched out with a suitable diameter Waldron punch. The result was better than I had expected and could be better if I had a printer that would do better than 300 dpi. It distinctly looks better than that black opening. Here's an idea for all those decal makers. Lots of kits are being sold in 1/144 scale these days and decals made to install in the engine openings would really be a plus for us modelers.
|
PAINT & DECALS |
All openings were masked with tape. I only installed the cockpit canopy, so that I could sand a bit where it left an ever so slight step. The entire canopy was masked with masking tape strips. After cleaning the assembly with alcohol I gave it three coats of Polly Scale Bright Silver, applying mist coats and allowing the silver to build up. After this had dried for a day, I gave the model two light coats of FUTURE to prep it for decals.
Being 1/144 scale, there are no aftermarket decals for this kit, so one is forced to use the kits decals and herein lies the only disappointment of this kit. The decals were thick and would not conform to the various bends involved. They appear to have a latex-like clear coat, as it is impossible to sand once the decals are dry and believe me, the decals required a good deal of sanding to remove wrinkles after they dried. Worse yet the white was totally translucent! After all the decals had dried, I applied a coat of FUTURE to harden the wrinkles and they were then sandable. I sanded all the wrinkles with #1000 grit sanding film and touched up all areas in the appropriate color. Since the white was so translucent, naturally the touch up stuck out like a sore thumb. So......I ended up cutting white trim film and overcoating the invasion stripes. I also replaced the wings National Insignias with two from Superscale, but I could not find another the proper size for the side National Insignias. The machine gun ejection slots, exhaust openings, and coolant openings were done using strips of black trim film.
All canopy frames were done with thin cut strips of trim film. I first applied AeroMaster's olive green over interior green, with the interior green toward the interior. After these had dried, I cleaned the canopy and gave it a coat of FUTURE to seal the green strips, so that they would not come up in the next step. Lastly I overlaid the green strips with strips of silver trim film. Once all was dried and leaned up I gave the model a coat of FUTURE to seal the decals. All control and access recesses were given an ink wash, some powdered black pastel was applied for exhaust stains, and "Baby Bumps II" was ready to fly again.
Article and photographs copyright Caz Dalton 1999