|
KIT: |
AMtech 1/48 P-40E Warhawk |
|
KIT # |
|
|
PRICE: |
$21.95 |
|
DECALS: |
Four aircraft |
|
REVIEWER: |
|
|
NOTES: |
Resin Cockpit and Vac canopy used. |
|
HISTORY |
Who has not heard of the Curtiss P-40? It was damned by many of its pilots and loved by others. The late Erik Shilling once sat down and told me exactly how one could dogfight a Zero in a P-40 "if you kept your wits about you and paid attention to your airspeed;" he loved the airplane and had flown several different versions. On the other hand, AVG ace Charles Older damned the airplane for its shortcomings as a weapon and couldn't wait to throw it away and climb into a P-51, "where they finally did everything right."
Like the P-39, the P-40 was victim of an Army policy that saw no need for high-altitude interceptors at the time of their debuts, so the turbocharging that would have given them the performance to meet the enemy on equal terms above 10,000 feet was removed from each prototype.
 For at least the first
year of the war in the Pacific, the P-40 and the P-39 were all the Army had.
Ill-trained pilots (many of who had never fired on a target in all of their
training before being designated "fighter pilots") were up against
superbly-trained pilots of the Japanese Navy, flying an airplane that at the
time was among the best fighters in the world. The United States paid the price
for its lack of preparedness.
For at least the first
year of the war in the Pacific, the P-40 and the P-39 were all the Army had.
Ill-trained pilots (many of who had never fired on a target in all of their
training before being designated "fighter pilots") were up against
superbly-trained pilots of the Japanese Navy, flying an airplane that at the
time was among the best fighters in the world. The United States paid the price
for its lack of preparedness.
As the pilots came to understand the airplane, they found ways to play to the P-40's strengths and by so doing negate the advantages of the Zero. The P-40 ailerons were effective at all speeds, unlike the Zero - above 250 mph the Zero's ailerons became progressively heavier. The same was true of the Japanese Army's Ki.43 Hayabusa. Thus, if an American pilot kept his speed above 250 m.p.h. and refused to "dogfight," the Japanese fighters could not out-maneuver the P-40. As heavy as it was, the P-40 could always escape its lighter opponents by diving away from the fight. Additionally, its rugged construction made it hard to shoot down; as long as it wasn't hit in the radiator, the P-40 could be reliably depended upon to get home even if it looked like a sieve upon arrival.
The P-40E was the version of the airplane that saw combat in that first year of the war, and is justly famous for the battles it engaged in over China and New Guinea, as well as combat over North Africa with the RAF.
The two major American users of the P-40E were the 23rd Fighter Group in China - successors to the American Volunteer Group - and the 49th Fighter Group in New Guinea, who successfully defended Port Moresby in the dark days of the Spring and Summer of 1942.
|
THE KIT |
Scott has already reviewed this kit, so I'll send to to that review for the details.
 While Scott and Brett
Green at HyperScale have reviewed test shots of this kit, my model is made from
a production kit. Upon opening the box, I immediately saw that production
quality control had slipped: the tail was "off" from the rest of the fuselage,
leaving a very noticeable "step" and "fault line." This is because the original
AMT molds produced both short- and long-tail versions by substituting a
different tail section into the mold; in this case, it slipped. The same was
true on the other kit I had, and has been remarked on at length by modelers on
the internet this past week as kits have arrived from the mail order houses.
While Scott and Brett
Green at HyperScale have reviewed test shots of this kit, my model is made from
a production kit. Upon opening the box, I immediately saw that production
quality control had slipped: the tail was "off" from the rest of the fuselage,
leaving a very noticeable "step" and "fault line." This is because the original
AMT molds produced both short- and long-tail versions by substituting a
different tail section into the mold; in this case, it slipped. The same was
true on the other kit I had, and has been remarked on at length by modelers on
the internet this past week as kits have arrived from the mail order houses.
One friend of mine merely sanded away the step. This results in the overall model being incorrect in its profile outline. The easy solution to this is to pull out your trusty razor saw and cut the tail off along the "fault line." Reposition the tail correctly, and glue it; I used a piece of sheet styrene inside the fuselage to strengthen the joint.
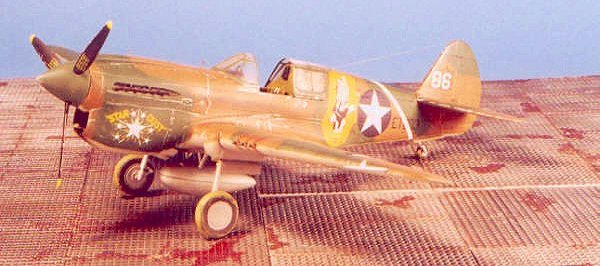
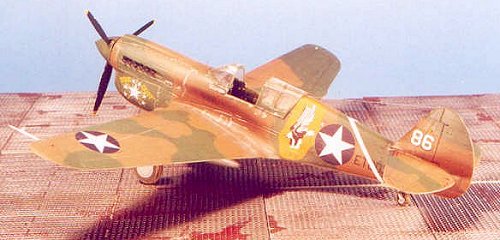
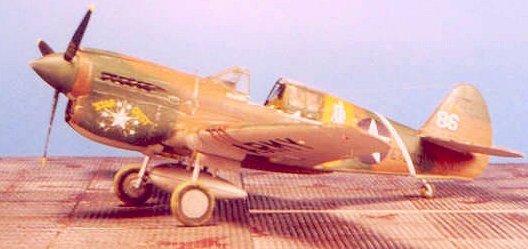
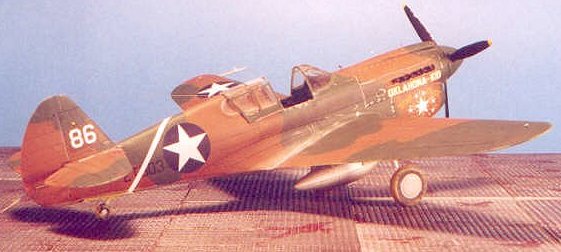
The production kit comes with decals by Three Guys Replicas, and provides markings for a P-40E of the 23rd Fighter Group, a P-40E - "Star Dust"/"The Oklahoma Kid" - from the 49th Fighter Group, and two Kittyhawks - a Mk.I from 250 "Sudan" Squadron RAF, and a Mk.Ia from 450 Squadron RAAF - both in desert camouflage.
|
CONSTRUCTION |
Other than having to cut
off the tail and re-position it, I built the model mostly as Scott did his, with
the following differences: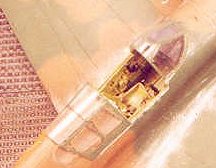
I used the True Details P-40E/N resin cockpit. This fits easily once you cut off the headrest, which is for the P-40N. You also need to cut off the resin outboard of the cockpit walls, so that you can fit the wings to the fuselage. The seat does not have the rounded top line that the P-40E seat had; I didn't worry about it, and I doubt 98 percent of those who look at the completed model will notice.
I painted the cockpit interior "Curtiss Interior Green." Dana Bell has described this color as "a lighter shade of standard Interior Green." I created this by putting a drop of yellow into the paint cup that had put Gunze-Sanyo Interior Green; since this was a mixed color done on the production line, I am sure it varied from paint can to paint can. Overall, the True Details cockpit looks much better than the kit-supplied cockpit interior.
 I also made "walls" in the
wheel wells with thin sheet styrene. The P-40E had a canvas boot inside the
otherwise-open wheel well, to keep dirt out of the wing interior. (There
is a shot at this link) I spread a
bit of white glue on the plastic ring and let it dry to give an uneven surface,
to mimic the canvas boot. I painted this zinc chromate green. I have seen it
done both ways from some photos - so you could also paint it with the lower
surface camouflage color. Additionally, I cut the single retraction gear off
the gear leg and replaced it with two pieces of Evergreen strip, to look
correct.
I also made "walls" in the
wheel wells with thin sheet styrene. The P-40E had a canvas boot inside the
otherwise-open wheel well, to keep dirt out of the wing interior. (There
is a shot at this link) I spread a
bit of white glue on the plastic ring and let it dry to give an uneven surface,
to mimic the canvas boot. I painted this zinc chromate green. I have seen it
done both ways from some photos - so you could also paint it with the lower
surface camouflage color. Additionally, I cut the single retraction gear off
the gear leg and replaced it with two pieces of Evergreen strip, to look
correct.
The kit canopy is so thick you cannot pose the sliding portion open, so I used the Squadron/Falcon vacuform canopy. Do not get the "P-40E" canopy, as that is made to fit the old Otaki P-40E, and it will not fit this kit. I used the "P-40M" canopy. This canopy has the additional bracing in the left quarterpanel that is in P-40s from the P-40F onward; I sanded that off, then dipped the canopy in Future and covered over the light scrape marks.
|
PAINT & DECALS |
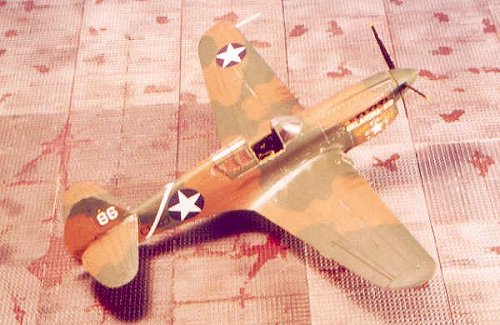
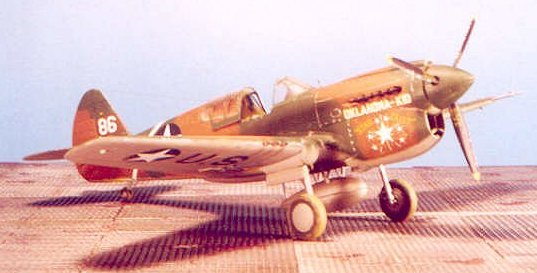 The P-40E-1 flown by CAPT
Andrew Reynolds of the 49th FG is actually a Kittyhawk Ia - the Lend-Lease
version of the P-40E-1. When the 49th FG arrived in Australia in March 1942,
there was not much attention paid to whether the P-40s the unit was issued were
"American" or "otherwise." The fact this is actually a Lend-Lease airplane is
shown by the RAF serial number, ET903, it carried. Thus, the airplane would be
painted in "U.S. equivalent colors." Curtiss used DuPont enamels, and mixed a
pretty good equivalent for Dark Earth; I did this using Gunze-Sanyo "Dark Earth"
with a couple drops of Gunze-Sanyo "Cocoa Brown" to give it a more brown tinge.
I used Gunze-Sanyo Medium Green FS34092 for the Dark Green, and Tamiya "Sky
Grey" for the lower camouflage color. I also used the camouflage pattern shown
in the old Camouflage and Markings pamphlet for the Curtiss P-40 in RAF service,
which is different from the pattern shown in the markings instructions of the
kit; this is in accordance with photos of the "Eagle Flight" this airplane was
part of. I freehanded this camouflage with a fine tip on my Paasche H airbrush.
The P-40E-1 flown by CAPT
Andrew Reynolds of the 49th FG is actually a Kittyhawk Ia - the Lend-Lease
version of the P-40E-1. When the 49th FG arrived in Australia in March 1942,
there was not much attention paid to whether the P-40s the unit was issued were
"American" or "otherwise." The fact this is actually a Lend-Lease airplane is
shown by the RAF serial number, ET903, it carried. Thus, the airplane would be
painted in "U.S. equivalent colors." Curtiss used DuPont enamels, and mixed a
pretty good equivalent for Dark Earth; I did this using Gunze-Sanyo "Dark Earth"
with a couple drops of Gunze-Sanyo "Cocoa Brown" to give it a more brown tinge.
I used Gunze-Sanyo Medium Green FS34092 for the Dark Green, and Tamiya "Sky
Grey" for the lower camouflage color. I also used the camouflage pattern shown
in the old Camouflage and Markings pamphlet for the Curtiss P-40 in RAF service,
which is different from the pattern shown in the markings instructions of the
kit; this is in accordance with photos of the "Eagle Flight" this airplane was
part of. I freehanded this camouflage with a fine tip on my Paasche H airbrush.
Decals:
The kit-supplied decals are printed by MicroScale, and are excellent. They went down easily under a couple of applications of Micro-Sol with no silvering.
Weathering:
These airplanes were flown from a muddy field at Port Moresby, and did not receive more care than the maintenance necessary to operate. I scuffed up the area of the wingwalk by the fuselage, the area around the gun bays, and the attachment points for the cowlings, then did exhaust and oil staining with Tamiya "Smoke." I also did "mud spray" on the lower wing surface behind the wheels and behind the tail wheel on the rudder. I finished the model with three coats of thinned Dullcote.
|
CONCLUSIONS |
As other reviewers have said, this P-40E kit makes up into the best-looking model of this famous fighter. It's unfortunate that the producers of the kit managed to "screw the pooch" with the mold mistake, but it is not fatal, and with a coat of Mr. Surfacer over the seam once the tail is glued to the fuselage, there is no evidence of the problem at all when the model is completed.
I'll probably build a few more of this very-nice kit.
Thanks to
 for the review sample.
If you would like your product reviewed fairly and quickly by a site that has well over 100,000 visitors a month, please contact me or see other details in the Note to Contributors.