Hasegawa 1/32 F6F-3/5 Hellcat
|
KIT # |
08057 |
|
PRICE: |
$39.98 MSRP |
|
DECALS: |
Three options |
|
REVIEWER: |
|
|
NOTES: |
|
HISTORY |
The Hellcat was
the perfect aircraft to take on the Japanese A6M. It's a big plane, with the
largest wing area of any fighter. Pilots report it
was a gem to fly, slightly heavy on the control surfaces; it was not the
brute that the Corsair was -
 with all due respect to the corsair
(my favorite U.S. fighter). The Hellcat had its day in the "Marianas
Turkey Shoot" (Battle of the Philippine Sea) in June 1944 when 160 enemy
aircraft were shot down - the combination of inexperienced flyers on
their part and
with all due respect to the corsair
(my favorite U.S. fighter). The Hellcat had its day in the "Marianas
Turkey Shoot" (Battle of the Philippine Sea) in June 1944 when 160 enemy
aircraft were shot down - the combination of inexperienced flyers on
their part and
excellent flyers and aircraft on ours.
|
THE KIT |
The challenges:
Windscreen does not fit great. Cockpit could use a more accurate
aftermarket. I chose to go with OTB, due to time and money. The engine is
a good start but needs work on the exhausts, real tough due to the
tangle. There are some bad mismatches on some panel lines, along the
wings and the forward cowl is missing the top seam altogether, but
not tough to
scribe in. The instructions give some questionable guidance as to the
differences between the -3 and the -5. Get good
reference for your plane. I found "The Great Book of WWII Airplanes" to
be a great source as usual.
|
CONSTRUCTION |
 With the windscreen I dry-fit it with the center canopy to make sure the
placement on the fuselage was accurate and as tight as possible, then
used crystalline cement (the stuff dries clear) to fill the slight gap in
the center. I felt that grinding the sides to make the center fit would
distort it too much.
With the windscreen I dry-fit it with the center canopy to make sure the
placement on the fuselage was accurate and as tight as possible, then
used crystalline cement (the stuff dries clear) to fill the slight gap in
the center. I felt that grinding the sides to make the center fit would
distort it too much.
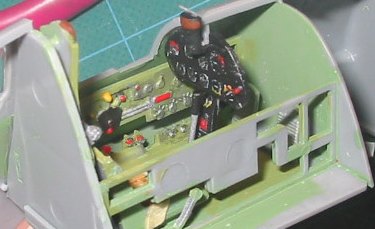
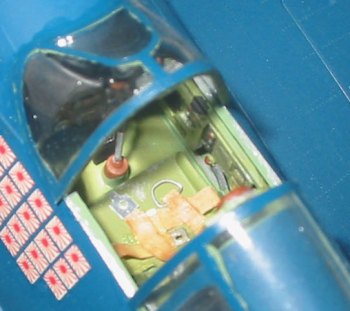 In the cockpit I detailed the control panel with flat black, and used
a toothpick (really!) with minimal paint to hit just the raised surfaces
with aluminum detailing. use the side of the toothpick, not the point,
and swipe it across the raised detail. Then use just the tip to apply
some Future to the dial faces. Good reference was used to pick out some
details,
In the cockpit I detailed the control panel with flat black, and used
a toothpick (really!) with minimal paint to hit just the raised surfaces
with aluminum detailing. use the side of the toothpick, not the point,
and swipe it across the raised detail. Then use just the tip to apply
some Future to the dial faces. Good reference was used to pick out some
details, 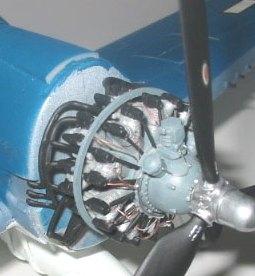 yellow or red, dials/handles/switches. The harness was done with
masking tape and sheet brass.
yellow or red, dials/handles/switches. The harness was done with
masking tape and sheet brass.
On the engine I used stretched sprue as the fuel lines from the distributor ring around the engine case, and highlighted them with copper. The main problem with the engine is the exhaust pipes. Lots of flash to clean up, and the lower left set presses on the fuselage just enough when the engine is attached to the firewall to force the engine over to the right slightly. Make sure the engine is centered and secure as the cement sets, or the whole thing will be off-centered.
As for the panel lines, just do a lot of dry fitting and choose your battles. I found the top cowling to be an easy fix (centerline seam), and the seams at the wingfolds can be done pretty well too. Get good reference so you know exactly where the seams/panels are for your plane (-3 or -5).
|
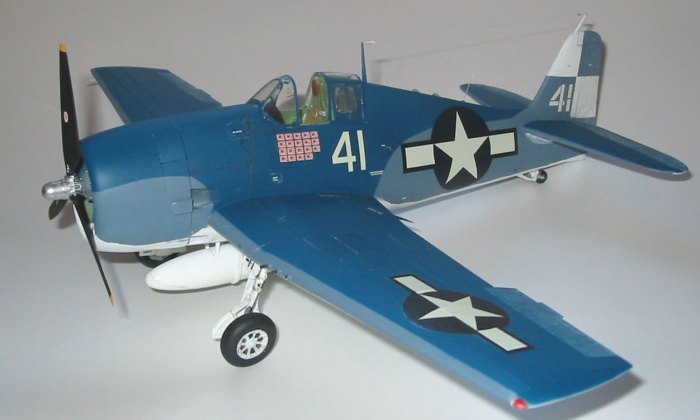
CAMOUFLAGE & MARKINGS |
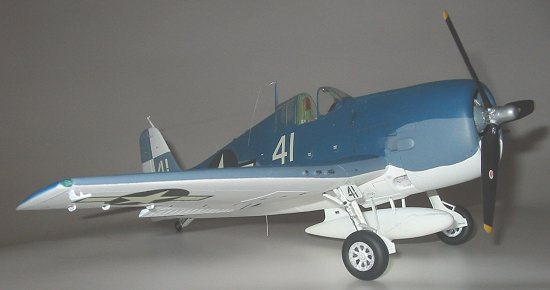
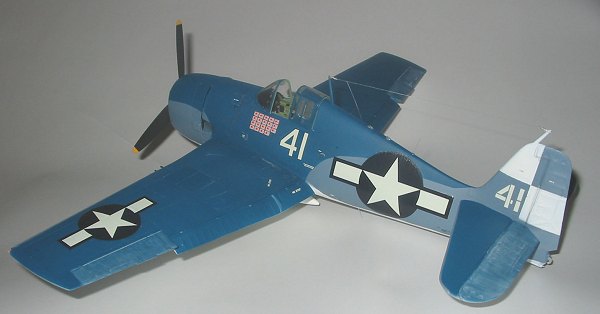 I used Testors Model Master enamel and acrylics. I worked from the white
(underside) up, but feel that I need to soften the edge between colors. I
also feel I need to grey back the upper blue, seems too blue. Maybe a
scale thing.
I used Testors Model Master enamel and acrylics. I worked from the white
(underside) up, but feel that I need to soften the edge between colors. I
also feel I need to grey back the upper blue, seems too blue. Maybe a
scale thing.
I used the kit decals, which seem adequate. Not many stencils though. So I did some detailing with the toothpick, just enough to give the visual clue that "something is written here". If you have the resources, you can make your own using decal sheets and a computer.
The kit instructions are inaccurate (according to my references) as to the markings. They suggest the tail markings are from USS Essex. My references say VF-17 USS Hornet. I'm sure someone knows.
|
FINAL CONSTRUCTION |
My upgrades:
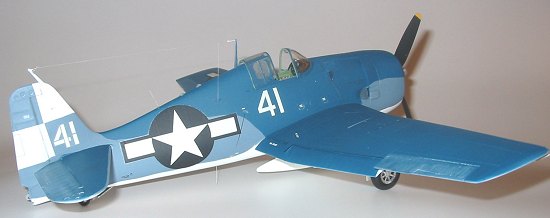
As I do on all my builds, I cut clear sprue for the navigation lights,
fit to the wingtips, drill a small hole on the inside surface, fill
with clear green or red, and polish. Likewise to the Dorsal Lights. They
look great. Seat Harness from masking tape and wire/brass. The antenna
wire is stretched clear sprue.
 The attachment points are very fine silver
wire wound around another fine wire, creating a very small tight
spring, then all is secured with CA. I also ran brake lines using wire.
Make sure you take into account the twist of the gear upon raising.
The attachment points are very fine silver
wire wound around another fine wire, creating a very small tight
spring, then all is secured with CA. I also ran brake lines using wire.
Make sure you take into account the twist of the gear upon raising.
What I learned:
That Blue just looks TOO blue. Doesn't look that blue in Real Life. I
think the border between the Bue and Intermediate Blue could be a lot
softer too. I really need to lay down a coat of Future to prep for
decals. As good as the Hasegawa decals are, they still silver on the flat
enamels.
I still need to airbrush in the exhaust line. This was very distinctive on the Hellcats. Patience and Focus are key to any good result, whether Tamiya or Academy.
|
CONCLUSIONS |
I was not excited initially about this kit, but it really did grow on me as I did the detail research. I think its one of my better builds from the past few years. I'd recommend it to anyone with adequate experience to push a fair kit with some problems into a good finish.
Copyright ModelingMadness.com. All rights reserved. No reproduction in part or in whole without express permission.
If you would like your product reviewed fairly and fairly quickly, please contact the editor or see other details in the Note to Contributors.