Sword 1/72 Beech Staggerwing
| KIT #: | ? |
| PRICE: | ? |
| DECALS: | See review |
| REVIEWER: | Joel Hamm |
| NOTES: | Currently out of production |
| HISTORY |
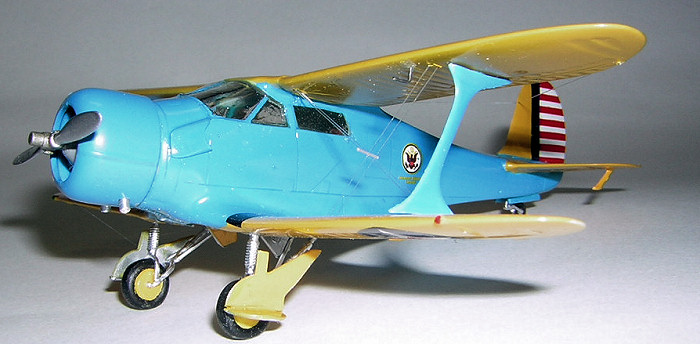
Everyone thought the Staggerwing was a stupendously stupid project – a high performance limo in the height of the Great Depression. Walter Beech taught everyone a thing or two about market niches, though. Despite its $18,000 sticker, the Staggerwing attracted enough takers to make it a commercial success. When wartime budgets allowed the military to grab for the gusto, the Army and Navy scarfed up a fistful for their high-up muckey-mucks to cruise around in. The subject of this build was attached to the US Embassy in London in the early Forties.
| THE KIT |
Sword may be a separate company, or
just a separate label, associated with MPM, Pavla, and the other Czech molders
who have brought us so many unusual subjects. Their quality is consistently
pretty-darn good for short run issues. This one represents two steps forward
and one step back. First improvement is inc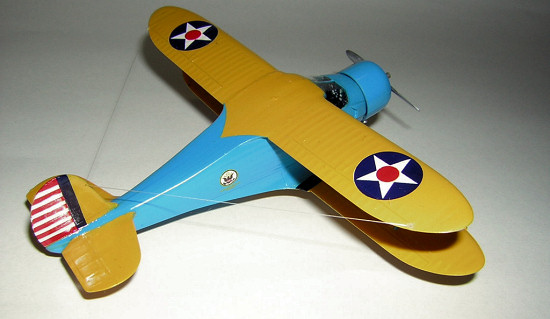 lusion
of half-hearted locating pins and holes on major pieces. These do nothing to
hold assemblies in place, but they do help locate fins, stabs, and struts, whose
location isn’t always obvious. Second step up is the switch from vacu-transparencies
to injected clear plastic. This also constitutes the back-step, as these pieces
are a bit thick, not terribly clear (or, rather, their clarity borders on being
terrible), and all-around ill fitting. Side cabin windows are unusable
translucent snippets. The windshield is molded in right and left panels. When
stuck together the piece is several millimeters too wide, and the center post
scales out to the size of a two-by-six stuck flat-wise against the plexi. The
centerpost framing should be sanded off each half, with additional sculpting
where the window curves around to the side. Take it just a few file strokes at
a time, to avoid an acute case of gap-osis. Had I known how much surgery the
windscreen required, I would have attached it pre-painting; sanded and polished
it; sealed and coated with epoxy; then re-sanded and re-polished for a seamless
see-through assembly; a technique that worked so well on the rock-candy
windshield of PM’s BE-18 (q.v). I’ll explain anon how I got a reasonable fit
without all that abrasion and ablation.
lusion
of half-hearted locating pins and holes on major pieces. These do nothing to
hold assemblies in place, but they do help locate fins, stabs, and struts, whose
location isn’t always obvious. Second step up is the switch from vacu-transparencies
to injected clear plastic. This also constitutes the back-step, as these pieces
are a bit thick, not terribly clear (or, rather, their clarity borders on being
terrible), and all-around ill fitting. Side cabin windows are unusable
translucent snippets. The windshield is molded in right and left panels. When
stuck together the piece is several millimeters too wide, and the center post
scales out to the size of a two-by-six stuck flat-wise against the plexi. The
centerpost framing should be sanded off each half, with additional sculpting
where the window curves around to the side. Take it just a few file strokes at
a time, to avoid an acute case of gap-osis. Had I known how much surgery the
windscreen required, I would have attached it pre-painting; sanded and polished
it; sealed and coated with epoxy; then re-sanded and re-polished for a seamless
see-through assembly; a technique that worked so well on the rock-candy
windshield of PM’s BE-18 (q.v). I’ll explain anon how I got a reasonable fit
without all that abrasion and ablation.
Other than the clear parts, everything else is crisply molded and fits together with minimal fiddling. Photo etched brass would have done nicely for the complex landing gear doors, but there ain’t none of that stuff. Neither is there any resin. The injected engine is OK, but I gave it a bit more realistic depth by cutting away the webbing between the cylinders, and backing it with a PEB firewall disc from the spares box.
| CONSTRUCTION |
 Starts with drilling holes
for the doubled flying and landing wires, facilitated by sharply engraved
locating ovals on the wing panels. They will have to be cleared out again after
painting, but drilling them before hand is neater and safer.
Starts with drilling holes
for the doubled flying and landing wires, facilitated by sharply engraved
locating ovals on the wing panels. They will have to be cleared out again after
painting, but drilling them before hand is neater and safer.
Next step is figuring out what to do with those aft cabin windows. I was unsuccessful is filing and fitting rhomboids of clear plastic. More patience and additional tries might have paid off, but I was anxious to get the project on the display shelf before winging westward to winter quarters; so I opted for a standard quick and dirty fix. This entails pasting over the openings from inside with thin acetate, then, post painting, filling the depressions from outside with clear epoxy. Assuming you don’t stir air bubbles into the A+B mix, this creates a clear, but somewhat unrealistic window panel. Epoxy performs some drastic refraction on the paths of photons passing through, so interior details appear distorted.
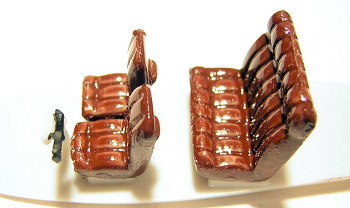 The other parts that need to go inside before mating the fuselage halves are the
side panels representing plushy padded leather. These must be thinned down
(from the back side, of course) to leave room for the sea
The other parts that need to go inside before mating the fuselage halves are the
side panels representing plushy padded leather. These must be thinned down
(from the back side, of course) to leave room for the sea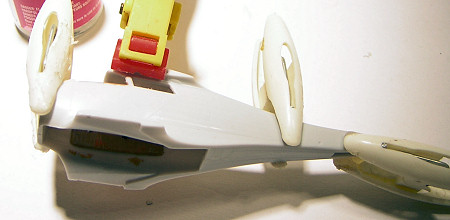 ts.
The floorboard, seats, and instrument panel can be inserted after the fuselage
gets glued together. The parts breakdown leaves the under-belly open until the
lower wing and landing gear bays are built. I added some bogus structural
members out of Plastruct extrusions, in case anyone flips the plane on its back
to peer into the wheel wells. A problem that persistently crops up with these
Czech kits is placement of the seats too far aft. I should have test fitted and
set them a few millimeters forward. There seems to be too much space behind the
windshield.
ts.
The floorboard, seats, and instrument panel can be inserted after the fuselage
gets glued together. The parts breakdown leaves the under-belly open until the
lower wing and landing gear bays are built. I added some bogus structural
members out of Plastruct extrusions, in case anyone flips the plane on its back
to peer into the wheel wells. A problem that persistently crops up with these
Czech kits is placement of the seats too far aft. I should have test fitted and
set them a few millimeters forward. There seems to be too much space behind the
windshield.
As I said, wings’n’things go together easily, aided by the locating pins. Diagrams on all 3 kits (Meikraft and Merlin, too) show no dihedral, but I somehow ended up with a few positive degrees, undetectable viewed head-on, but pronounced from the side.
| COLORS & MARKINGS |
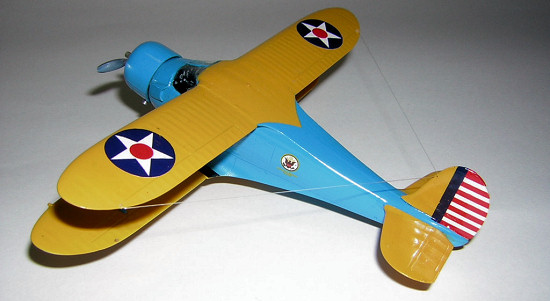
It would be
a shame to plaster a plane this pretty with the drab olive drab/neutral gray
called for in the kit. One of Squadron/Signals “Air Force Colors” volumes shows
a blue and yellow craft assigned to the US embassy in London. This is the
 scheme chosen for the 1989
Meikraft kit. I thought those purloined decals would either be early Airfix
variety, or disintegrate on hitting water; but even after 17 years of basement
storage they turned out to be the absolute best quality transfers I have ever
encountered. They hadn’t yellowed a bit, were printed in perfect register, with
no trace of carrier film. They came away easily from the paper with little
soaking; slid into place without balking or curling; and settled down snugly
without use of setting fluids. After they were dry I dribbled them with
Micro-Sol (after testing some of the unused British roundels) and they seemed
to conform even tighter to the surface. Several coats of Future made everything
shiny. Stuff from the quart bottle I had been drawing from for about 15 years
had been getting cantankerous, but a new bottle ($6) solved all the spraying
problems. Forgot to mention. Paints are Testors little square bottle enamels
(the blue is lightened a bit with white). If that recent Forum posting is true
about enamels going bye-bye soon, I’ll have to find a new hobby – or just slit
my wrists. I’ve tried several acrylics and just can’t get them to work.
scheme chosen for the 1989
Meikraft kit. I thought those purloined decals would either be early Airfix
variety, or disintegrate on hitting water; but even after 17 years of basement
storage they turned out to be the absolute best quality transfers I have ever
encountered. They hadn’t yellowed a bit, were printed in perfect register, with
no trace of carrier film. They came away easily from the paper with little
soaking; slid into place without balking or curling; and settled down snugly
without use of setting fluids. After they were dry I dribbled them with
Micro-Sol (after testing some of the unused British roundels) and they seemed
to conform even tighter to the surface. Several coats of Future made everything
shiny. Stuff from the quart bottle I had been drawing from for about 15 years
had been getting cantankerous, but a new bottle ($6) solved all the spraying
problems. Forgot to mention. Paints are Testors little square bottle enamels
(the blue is lightened a bit with white). If that recent Forum posting is true
about enamels going bye-bye soon, I’ll have to find a new hobby – or just slit
my wrists. I’ve tried several acrylics and just can’t get them to work.
| FINAL CONSTRUCTION |
I spoke earlier of the windshield
shortcomings. Even after meticulous re-shaping it still didn’t sit right. I
coated it liberally with Future that had been allowed to thicken a bit in air;
and that sealed the gaps and faired the glass perfectly to the fuselage, while
improving the transparency. Had I paid closer attention to the instruction
diagrams and Internet photos, I would not have missed the prominent inverted V
strut that extends from the lower windshield corners to the center of the roof.
This would have eased the unrealistic wide-open-spaces problem with the cabin
interior.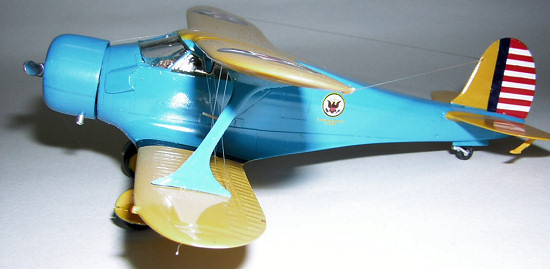
Lots of little pieces and sub assemblies frustrated a quick stick-together; particularly landing gear and doors. The kit wheels are too wide and square to fit in their forks, looking more like tires belonging on a dragster rather than an airplane. I couldn’t find a suitable set in the spares bin, but lo and behold – those from the Meikraft kit needed only minor cleanup to fit. No references were available for the hub color; but fixed gear blue-and-yellows had the wheels matching the wings; which was close enough for me.
I mentioned earlier my engine enhancement. A more realistic prop would have been welcome, but none came forward. Instead of the glue-on exhaust stubs, I drilled through the cowl and CA-ed in bits of Al tube. Rigging was done with monofilament “invisible thread”, which is somewhat more invisible than desired. If anyone knows a source of silver monofilm, or real wire that thin, please let us bipe-builders know.
| CONCLUSIONS |
The stash still contains a few utility-transport-liasion a/c, but I think I’ll try something different for awhile.
July 2006
Copyright ModelingMadness.com. All rights reserved.
If you would like your product reviewed fairly and fairly quickly, please contact the editor or see other details in the Note to Contributors.