Pavla 1/72 Curtiss AT-9 'Jeep'
| KIT #: | ? |
| PRICE: | $18.95 |
| DECALS: | Three Options |
| REVIEWER: | Carmel J. Attard |
| NOTES: | Short run injected plastic kit with brass etch and resin detail parts |
| HISTORY |
In 1940
the USAAC knew that it was essential to begin preparation for the very real
possibility that the 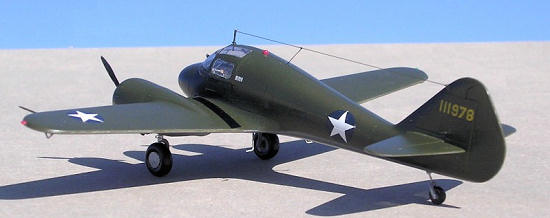 advanced
training of crews for the B-25 and B-26 bombers, the USAAC and its successor,
the
advanced
training of crews for the B-25 and B-26 bombers, the USAAC and its successor,
the
The
C-25 was a cantilever low-wing monoplane with tail wheel landing gear, full
metal construction, two-seater, and driven by two Lycoming R-680-9 radial
engines. These had the metal two-blade automatically variable pitch
The
aircraft remained in use for comparatively short time, for the
| THE KIT |
 The
Curtiss Jeep comes in a soft cardboard box with a side view colour painting on
the top cover. Upon opening you will find a plastic fret of a short run material
with 33 grey plastic pieces, two clearly moulded vac canopies with one being
spare, resin detail parts for the 2 two- bladed propellers, two 9 cylinder
radial engines and instrument panel. There is also a metal fret which contains
tiny items like seat belts, instrument panel with cut dial gauges, two control
steering wheels, antenna, foot step sticks, etc which will add a lot of
authenticity to the cockpit interior that can be easily visible from the clear
canopy.
The
Curtiss Jeep comes in a soft cardboard box with a side view colour painting on
the top cover. Upon opening you will find a plastic fret of a short run material
with 33 grey plastic pieces, two clearly moulded vac canopies with one being
spare, resin detail parts for the 2 two- bladed propellers, two 9 cylinder
radial engines and instrument panel. There is also a metal fret which contains
tiny items like seat belts, instrument panel with cut dial gauges, two control
steering wheels, antenna, foot step sticks, etc which will add a lot of
authenticity to the cockpit interior that can be easily visible from the clear
canopy.
The 8-page instruction sheet is clearly printed and very easy to follow. Apart from the aircraft history there are two pages dedicated to painting and decal emplacement. These cover two overall metal finish aircraft and another one in olive drab and neutral grey. Decals to propeller blades also included. In general this makes into a handsome kit and the only care needed is when separating the pieces from the runner as the attachment points are thick.
| CONSTRUCTION |
Once the
parts are carefully separated from the sprue with an X-acto knife the attachment
area is carefully shaped and smoothened with a smooth file. The undercarriage
struts require opening by carefully sawing and then cleaning the slot like
 opening
with a small flat narrow file. The kit provides resin single blades or plastic
ones. The resin ones are more of the true shape. The metal etch parts decorate
the cockpit interior nicely especially the delicately produced steering wheels,
boarding steps, door handles. I noticed that the central console required to be
fixed nearer to the two crew seats in order to allow the instrument panel to fit
at its intended place. I also removed 1mm from the side of the cockpit floor and
from the side of the rear bulk head in order to fit correctly inside the
fuselage.
opening
with a small flat narrow file. The kit provides resin single blades or plastic
ones. The resin ones are more of the true shape. The metal etch parts decorate
the cockpit interior nicely especially the delicately produced steering wheels,
boarding steps, door handles. I noticed that the central console required to be
fixed nearer to the two crew seats in order to allow the instrument panel to fit
at its intended place. I also removed 1mm from the side of the cockpit floor and
from the side of the rear bulk head in order to fit correctly inside the
fuselage.
There are also navigation lights to fit under the fuselage. Other detail parts are added to the kit as the assembly goes on which includes control links for the ailerons, torsion links for the wheel legs and aerials for the cabin roof. There was little need for filler at the fuselage centreline and a small amount was needed at the roots of butt jointed wing and tail planes. When it came to fitting the engines, the engine cowling two peace fronts are first glued, then the trimmed resin radial engine is pushed through so that the prop shaft hole just protrudes from the cowling.
| COLORS & MARKINGS |
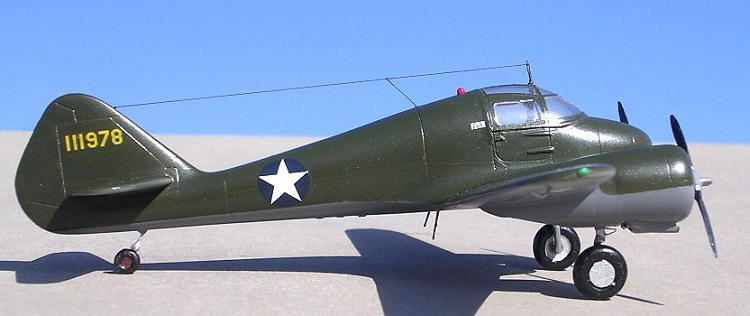
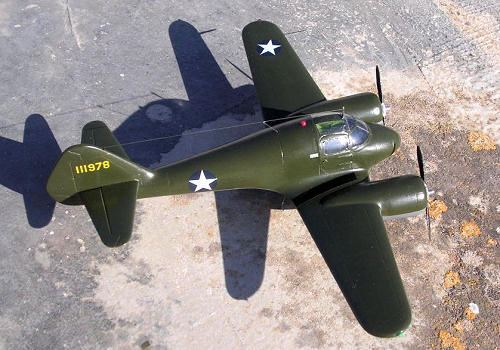
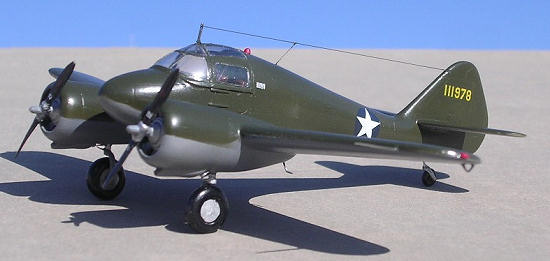
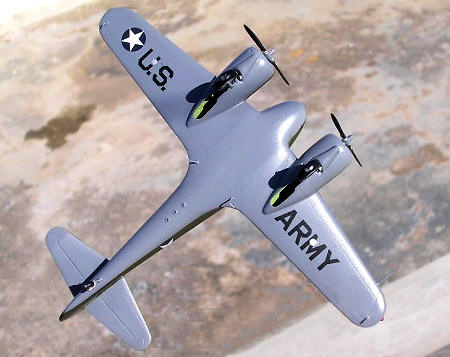 I painted
my model in Tamiya enamel Olive drab top and neutral grey under surfaces. I gave
this an overall coat of Johnson’s Klear and then placed the decals on. The
complete model was allowed to set and afterwards was given an overall coat of
semi matt Model Master clear Varnish.
I painted
my model in Tamiya enamel Olive drab top and neutral grey under surfaces. I gave
this an overall coat of Johnson’s Klear and then placed the decals on. The
complete model was allowed to set and afterwards was given an overall coat of
semi matt Model Master clear Varnish.
| CONCLUSIONS |
This was
a straight forward build and ideal for anyone who has never tried their hands on
short run kits. I recommend this kit to those keen on WWII
Allied
aircraft as the Jeep was much in use to train twin engine bomber crew until more
modern trainers came into service.
May 2009
Copyright ModelingMadness.com. All rights reserved. No reproduction in any form without express permission from the editor.
If you would like your product reviewed fairly and fairly quickly, please contact the editor or see other details in the Note to Contributors.