| KIT #: | A01039 |
| PRICE: | AU$9.00. |
| DECALS: | Two options |
| REVIEWER: | George Oh |
| NOTES: |
Not a new tool kit |
| HISTORY |
The P.39 Airacobra had several radical design
features, which produced both advantages and disadvantages. From the outset,
it was designed around a large 37mm cannon. To fit this cannon into a
single-engined fighter, the designers hit upon an elegant solution. They
placed the 2-stage supercharged engine behind the pilot, on the aircraft’s
Centre of Gravity. The nose was further filled with two heavy machineguns,
all the ammo, and a long legged nose wheel. Another heavy machinegun and a
lighter one in each wing made the Airacobra a heavily-armed fighter. But
with the cannon and e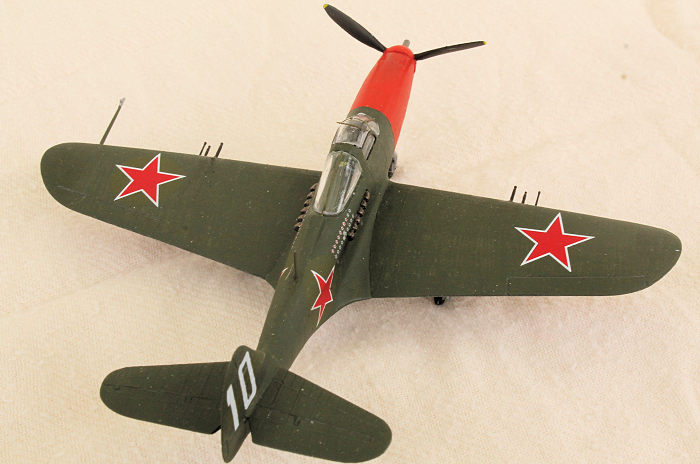 ngine, there was little room for fuel, so the Airacobra
had short legs. This forced the designers to allow the Airacobra to be
fitted with a drop-tank (or a bomb). And, when the ammo in the nose had all
been used, the Airacobra became light in the nose and could enter into a
dangerous flat spin.
ngine, there was little room for fuel, so the Airacobra
had short legs. This forced the designers to allow the Airacobra to be
fitted with a drop-tank (or a bomb). And, when the ammo in the nose had all
been used, the Airacobra became light in the nose and could enter into a
dangerous flat spin.
Unfortunately, the P.39 Airacobra has gone down in aviation history as a fighter that was hated by all who flew it in combat because of under-performance – except the Russians. Its underperformance was a reality because the first buyers ordered it with the single-stage supercharged engine. This limited its good performance to under 10,000 feet. Then they required that its undertrained pilots fight battle-hardened opponents at higher altitudes. All except the Russians, whose war was fought at low altitudes.
The British bought some Airacobra Ds for the RAF, but requested that the 37mm cannon be replaced by a 20mm cannon, and all American machineguns replaced by lighter British 303 machineguns. Then the RAF rejected the aircraft because of its poor high-altitude performance and because of another design flaw. Each nose-mounted machinegun was operated by an electro-magnet. Just eight inches from both magnets lay the compass. Firing the guns disrupted the compass, and it took a while to recover. When a Russian delegation went to England seeking combat aircraft, they were offered all of the ex-RAF Airacobras. What’s the bet that nobody mentioned the compass to the Russians!!
 The Russians went-on to buy more Airacobras from
America, but they requested that the wing guns be removed to allow the aircraft
to roll at a faster rate. Crated Airacobras were delivered to the Russians via
the Middle East, or by being flown from America, over Canada and Alaska, then
across the Bering Straight to the Russian Far East District. Some were delivered
pre-painted in full Russian markings (like the crashed one found in Canada)
while others were still in USAAF markings. In the latter case, the Russians
usually over-painted the white stars with red paint, and the blue circles (and
the later white bars) with black or dark green paint. Usually – sometimes the
circles were left white. Internet research and viewing other models (see
Academy’s Russian Aces P.39) tells me this. It also shows that different models
of the Airacobra had three or four-bladed propellers, and that they may, or may
not, have carried a drop-tank or bomb.
The Russians went-on to buy more Airacobras from
America, but they requested that the wing guns be removed to allow the aircraft
to roll at a faster rate. Crated Airacobras were delivered to the Russians via
the Middle East, or by being flown from America, over Canada and Alaska, then
across the Bering Straight to the Russian Far East District. Some were delivered
pre-painted in full Russian markings (like the crashed one found in Canada)
while others were still in USAAF markings. In the latter case, the Russians
usually over-painted the white stars with red paint, and the blue circles (and
the later white bars) with black or dark green paint. Usually – sometimes the
circles were left white. Internet research and viewing other models (see
Academy’s Russian Aces P.39) tells me this. It also shows that different models
of the Airacobra had three or four-bladed propellers, and that they may, or may
not, have carried a drop-tank or bomb.
| THE KIT |
Touted as a P.39Q, this is a recent(?)
pressing of the original Airfix kit - the flash, mould seams and lack of
internal detail all scream it. The kits wings had large recesses for the
under-wing gun gondolas so the modeller has to use them or do a lot of
filling. They are not mentioned in the boxart or painting diagrams (of
either Air Force). On the other and, both the boxart & instructions show
protruding wing an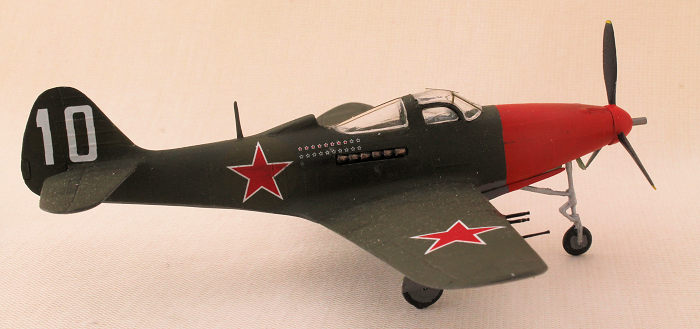 d nose gun barrels but none are provided. Only a 3-bladed
prop is provided, and its spinner is too rounded (should be more conical).
But the whole prop was moulded as one piece, so trimming it down will be a
problem. I reckon that the cannon barrel that protrudes from the spinner, is
over-scaled for a 37mm cannon, and too short and fat for a 20mm cannon. I
found that the bottom edge of the rear canopy piece doesn't reach the
fuselage, and the shelf it covers is devoid of anything. The clear bits were
thick and they distorted the view of the interior (one seat only). Surface
detail is raised and quite fictitious. Fit of parts was generally pretty
good and the mouldings were quite crisp for their age.
d nose gun barrels but none are provided. Only a 3-bladed
prop is provided, and its spinner is too rounded (should be more conical).
But the whole prop was moulded as one piece, so trimming it down will be a
problem. I reckon that the cannon barrel that protrudes from the spinner, is
over-scaled for a 37mm cannon, and too short and fat for a 20mm cannon. I
found that the bottom edge of the rear canopy piece doesn't reach the
fuselage, and the shelf it covers is devoid of anything. The clear bits were
thick and they distorted the view of the interior (one seat only). Surface
detail is raised and quite fictitious. Fit of parts was generally pretty
good and the mouldings were quite crisp for their age.
| CONSTRUCTION |
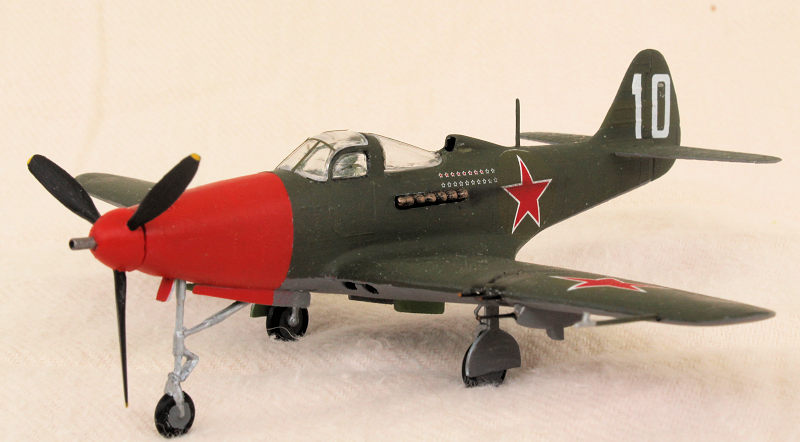
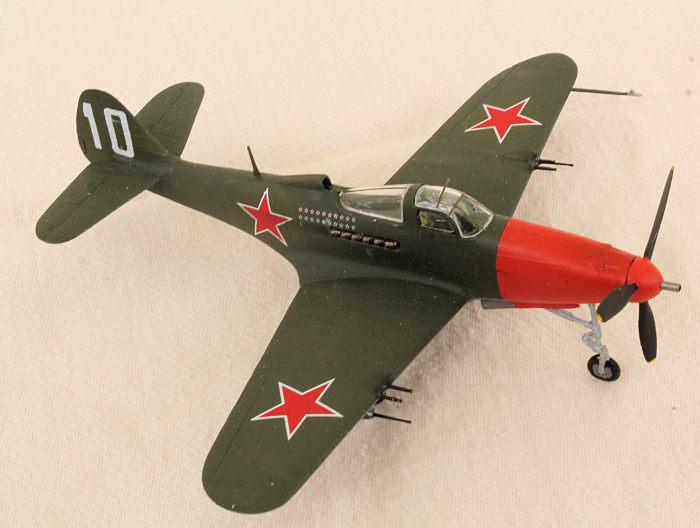
This kit came to me as a freebie (Many thanks Robert B). I started it because I was seduced by the red nose of the Russian aircraft - and the overall dark green looked to be an easy paint job (and it was – easier that the white trim required for the American aircraft).
I deviated from the usual construction sequence
(and instructions) by first attaching the wing tops to the fuselage sides. A
little sanding was required to get close to 100% contact, and then they were
clamped tightly in place till they dried. No filler was required. A goodly
portion of the wing roots and locating tags had to be cut away so as to clear
the wheel wells of artificial obstructions. To prevent a view into the wing and
cockpit voids, I fabricated a wing spar and cockpit floor from plastic card. The
seat was spruced-up a little by trimming and thinning, then paint and tape
seatbelts were added. The prop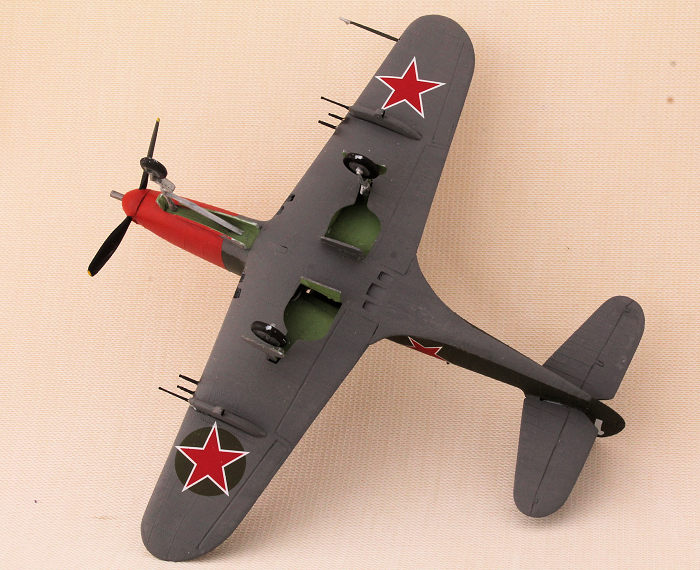 eller was prepared and fitted, but its design
won’t allow it to turn. This let me paint the insides – green for the cockpit
and wells, and black for the intakes, then close the fuselage.
eller was prepared and fitted, but its design
won’t allow it to turn. This let me paint the insides – green for the cockpit
and wells, and black for the intakes, then close the fuselage.
The one-piece wing underside had a distinct step where it met the belly, and the plastic was thin. So first, the join was backed-up by a length of plastic card (a rearward extension of the cockpit floor), and the step filled with a little more card, then putty. The fuselage spine was a wee-bit short-shot just in front of the intake so I squared-off the hole, dropped-in a length of square-section rod (down to that inside floor) then trimmed it flush with the spine. Now I came to the critical decision. The underwings had those deep recesses for the gun gondolas. Rather than fill them, I decided to add the guns - AFTER I first cut-off the gun barrels. Fit into the recesses was poor, but some Krystal Kleer filled the bill. The top nose seam and the wing leading edges needed a little filler to correct a step, and all trailing edges needed some thinning, but nothing major.
While I still had access to the cockpit, I dropped-in a length of rod to represent the long driveshaft that ran along the floor between the pilot’s feet, and connected the engine to the propeller. Note – I coulda’ added an instrument panel and a control stick. But I test-fitted the clear bits and could barely see the seat, so I left things as they were. Fortunately, I also remembered to provide some nose weight (a first for me), and locked two small fishing sinkers in with a bit of packing sponge. The tailplanes were fitted, and he (Russian machines are masculine) was ready for painting.
| COLORS & MARKINGS |
Everything was brush-painted with Citadel Miniatures acrylic paint because they are what I had at hand, and I was away from my AB. The first order of business was blood red for the nose and spinner. When dry, it was masked-off with a flexible white masking tape that accommodates curved surfaces. Castellan green followed then the fuselage was masked before the dawnstone grey was applied to the undersurfaces. Both are a bit too dark, but I’ll live with it. Some references indicate that there was no red underneath the nose (see MPM’s 72-scale Russian Airacobra, 72005)
 A coat of Future prepared the model for masking.
To me, the markings look to be too large by @ 20%, when compared with the kit
diagrams, but they are all I have (so I’ll live with them). Both upper-wing red
stars were supposed to have a dark-green circle behind them, but not the
underwing ones. As these represent the painted-over American blue circles, I put
one each where the standard American markings are placed, and the plain red ones
in the alternate positions. My argument for the underwing green circle is that
the Russian painter was too busy(/lazy?) to seek a grey paint to do the
underside circle – so he used the green that he had already used on the
upper-wing surround. The side stars also had green circles, and they are
positioned too far forward because of that 20% oversize. If I’d put them in the
correct positions, not only would they overlap the underside grey, but both
would have touched along both the spine and belly fuselage seams.
A coat of Future prepared the model for masking.
To me, the markings look to be too large by @ 20%, when compared with the kit
diagrams, but they are all I have (so I’ll live with them). Both upper-wing red
stars were supposed to have a dark-green circle behind them, but not the
underwing ones. As these represent the painted-over American blue circles, I put
one each where the standard American markings are placed, and the plain red ones
in the alternate positions. My argument for the underwing green circle is that
the Russian painter was too busy(/lazy?) to seek a grey paint to do the
underside circle – so he used the green that he had already used on the
upper-wing surround. The side stars also had green circles, and they are
positioned too far forward because of that 20% oversize. If I’d put them in the
correct positions, not only would they overlap the underside grey, but both
would have touched along both the spine and belly fuselage seams.
Even the tail numbers have green bars behind them – probably to cover the American serial numbers (or something). But the bars are too long for the tail (that 20%) so I merely trimmed the decals to conform. And after all this, it is almost impossible to see the green decals against the green paint because of a too-close colour-match – Rats!!
All decals went on and settled without the aid of a setting solution. A coat of Gunze H 20 clear flat sealed them in. It also put a liberal spotting of white specks over the model – Double Rats!!! Scraping at them removed only a few. My panic solution was to grab the paint pot and a small brush, and to whisk a little paint from the dot/s in the direction of the air-flow. It seems to work IF you regard it as weathering. I also sprayed-on some gun-stains and exhaust stains with Tamiya smoke.
| FINAL ASSEMBLY |
Virtually all of the last parts needed trimming to some degree, either because of mould seams or excessive thickness or both. The bottom edge of the rear canopy piece doesn't reach the fuselage, so I glued it to the back of, and level with the top of, the canopy frame arch, then filled the bottom gaps with Krystal Kleer. The main wheels were featureless, but I’m gambling that they aren’t too visible under the plane on the ends of their short legs. For some reason, the kit provides an antenna mast, but none of the P.39 models here in MM have one. I put it on anyway.
Now the kit compelled me to use the underwing gun
gondolas, and the painting diagrams show both the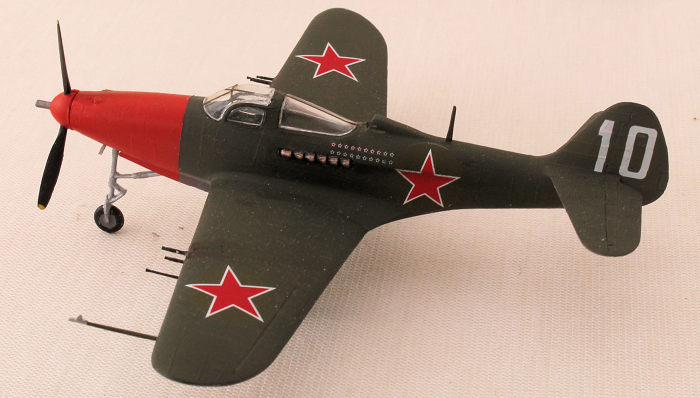 American and Russian P.39s
with their four wing guns. Now I know that probably neither Air Force had P.30Qs
in this configuration, but who am I to argue with the instructions – or Airfix
for that matter. So I resolved to bite the bullet and to do it all. My weapon of
choice (pardon the pun) was a set of absolutely-beautiful, petit, turned-brass
gun barrels (for a FW.190) from Masters. I dunno how they really make them
(probably they are turned by tiny elves working on itty-bitty lathes), and Hey,
they even have hollow tips. Every time I buy something from my local internet
supplier, I request some packets of gun barrels (& German nightfighter radar
arrays) because they don’t cost a lot, and they really don’t add to the postage.
American and Russian P.39s
with their four wing guns. Now I know that probably neither Air Force had P.30Qs
in this configuration, but who am I to argue with the instructions – or Airfix
for that matter. So I resolved to bite the bullet and to do it all. My weapon of
choice (pardon the pun) was a set of absolutely-beautiful, petit, turned-brass
gun barrels (for a FW.190) from Masters. I dunno how they really make them
(probably they are turned by tiny elves working on itty-bitty lathes), and Hey,
they even have hollow tips. Every time I buy something from my local internet
supplier, I request some packets of gun barrels (& German nightfighter radar
arrays) because they don’t cost a lot, and they really don’t add to the postage.
With a pair of tech-drawing dividers, I marked the positions of the guns so that the spacings are all the same, then I deepened the pin-pricks with the tip of a straight knife blade. Across the front of each gondola I razor-sawed a slit the same distance down from the wing. Into each of these cuts and dimples I drilled a fine hole and superglued a gun barrel into each. By using a slow-setting superglue gel I got the holes fully plugged, and it gave me some wriggle-room to get all the barrels embedded into the wings to the same depth and orientation (or close to it). They were all painted chaos black.
I’d pre-painted the exhaust pipes then had to do a fair bit of scraping to get them to sit all the way into their recesses. The last job was to paint the canopy frame lines, but I took the intelligent cowards way out and used skinny strips of painted masking tape. Touch-up the staining with some pastels, and I declare this one complete.
| CONCLUSIONS |
In all, this model took me about 10 days to build, but I didn’t keep a check on the number of hours (I never do – less fun that way). As a build, it was quite relaxing, and the end-product looks basically like an Airacobra (OK – one with too many guns), so I’m happy to recommend it to young modellers. There ARE better P.39 kits out there - I have an Academy one 80% complete, but this one got in front of it. I’m happy that I got it finished before another project beckoned me (back?). And yes – I love its red nose and its lots-of-guns. As usual, when there is conflicting information in multiple references, I pick one (see below) and stick with it.
| REFERENCES |
Just the instructions and the boxart.
12 June 2017
Copyright ModelingMadness.com
If you would like your product reviewed fairly and fairly quickly, please contact the editor or see other details in the Note to Contributors.
Back to the Main Page Back to the Review Index Page Back to the Previews Index Page