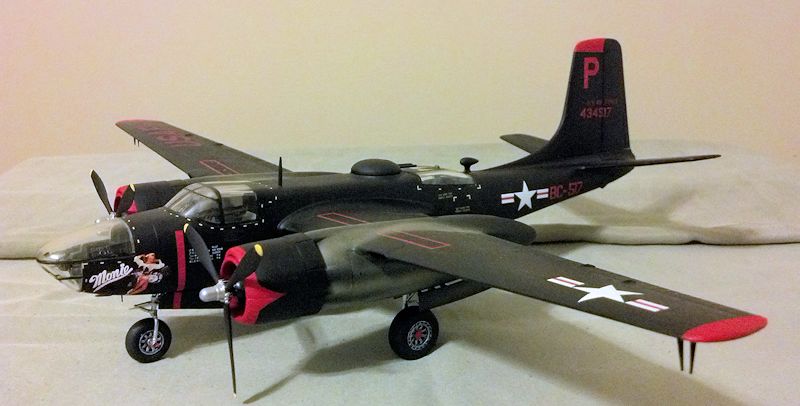
Monogram 1/48 A-26 Invader
| KIT #: | 5508 |
| PRICE: | $ |
| DECALS: | Two options |
| REVIEWER: | Lee Fogel |
| NOTES: |
A terrific kit even after all of these years! |
| HISTORY |
The A-26 Invader had a rather remarkable history and a few are still flying to this day. From WWII to Korea and later in the Vietnam War the Invader proved to be rugged and very capable of all the missions assigned to it.
| THE KIT |
 This kit
came to me as a freebie about two and half years ago.
It had been started and then sat in around for years.
I got it, complete, in a Ziploc bag.
The bomb bay, cockpit and starboard wing had all been started with the
fuselage halves being glued together.
I set it aside and figured I would get to it down the line.
For those unfamiliar with the kit it is molded in black and has two decal
options.
Anyhow, last fall Tom
Cleaver asked if I would be interested in using a set of Bombshell Decals
(Invading Esquire Girls Pt.I) for an A-26.
I jumped at the chance and once the decals showed up I pulled the kit
from my ‘bagged stash’.
This kit
came to me as a freebie about two and half years ago.
It had been started and then sat in around for years.
I got it, complete, in a Ziploc bag.
The bomb bay, cockpit and starboard wing had all been started with the
fuselage halves being glued together.
I set it aside and figured I would get to it down the line.
For those unfamiliar with the kit it is molded in black and has two decal
options.
Anyhow, last fall Tom
Cleaver asked if I would be interested in using a set of Bombshell Decals
(Invading Esquire Girls Pt.I) for an A-26.
I jumped at the chance and once the decals showed up I pulled the kit
from my ‘bagged stash’.
| CONSTRUCTION |
With the
fuselage glued together I realized I had no way to make this one sit on her
landing gear properly.
So, I
cleaned up the seams on the fuselage and made sure to leave the hole for the
clear balance peg. I also noticed at
this time that the completed tail assembly had been glued slightly cock-eyed to
the fuselage.
Try as I might I
could not get it to break free.
So it is
what it is.
Looking things over I
was not interested in displaying the bomb bay open so I clipped the bay door’s
hinges and then
 sanded the middle of the doors (where they meet) until the pair
would fit flush with the opening.
This took a bit of work to get ‘right’ as the curvature of the doors is not
quite right to match the Bombay opening.
Still, I am happy with the overall results.
Once this was done I turned my attention to the cockpit.
As the cockpit was already painted and in place I just went thru and
added some additional details and repainted some of the areas to my liking.
sanded the middle of the doors (where they meet) until the pair
would fit flush with the opening.
This took a bit of work to get ‘right’ as the curvature of the doors is not
quite right to match the Bombay opening.
Still, I am happy with the overall results.
Once this was done I turned my attention to the cockpit.
As the cockpit was already painted and in place I just went thru and
added some additional details and repainted some of the areas to my liking.
With this
done I moved on to the wings.
As
stated one of them had been glued together and just needed to be sanded and
cleaned up.
I glued the other wing
together at this time.
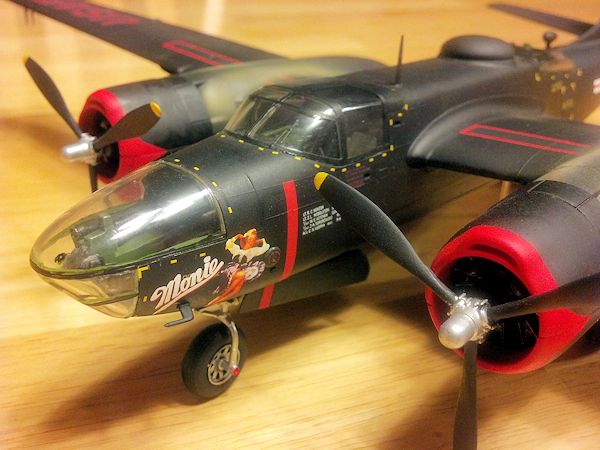
I noticed
that ‘Monie’, the aircraft I was modeling, did not have the rocket rails
installed.
So, I filled the holes
(the prior builder had opened them up), added the bomb racks, and the set the
wings aside.
At this time I went to
assemble the nacelles/gear bays and discovered to my astonishment that one set
was missing!
Having
inventoried the kit when I first got it (and then again when I pulled it out for
this build) I knew they were around somewhere.
Good fortune initially eluded me though and I disappointedly set the A-26
aside.
A few months passed by and I
had gone down to meet up with a few
 friends at one of our clubs ‘Friday night
Fights’ build-offs.
One of the kits
I had brought along was the Tamiya He 219 kit…and when I opened it up there were
the missing A-26 parts!
Soon
thereafter I commenced to continuing the A-26 build with no real headaches.
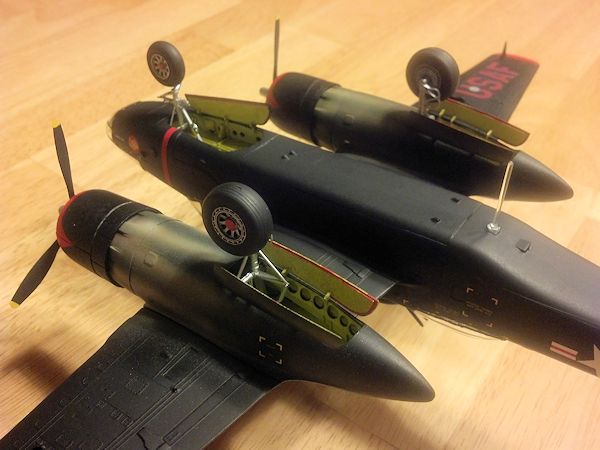
The fit of the nacelles was less than stellar though…you will need some
putty here.
I had a hard time
finding any references for the colors used in the gear bays so after much
deliberation I went with YZC and these areas were painted and weathered
appropriately.
Once painted and
glued I place I painted the engines and props Testors Flat Black and set aside
the props for later.
Then I used
Flat Grey for the crankcases and a dry-brushing of silver finished the engines
off.
The inside of the
cowlings were painted yellow zinc chromate and weathered.
Once this was done I glued the engines into their respective cowlings and
set them aside.
friends at one of our clubs ‘Friday night
Fights’ build-offs.
One of the kits
I had brought along was the Tamiya He 219 kit…and when I opened it up there were
the missing A-26 parts!
Soon
thereafter I commenced to continuing the A-26 build with no real headaches.
The fit of the nacelles was less than stellar though…you will need some
putty here.
I had a hard time
finding any references for the colors used in the gear bays so after much
deliberation I went with YZC and these areas were painted and weathered
appropriately.
Once painted and
glued I place I painted the engines and props Testors Flat Black and set aside
the props for later.
Then I used
Flat Grey for the crankcases and a dry-brushing of silver finished the engines
off.
The inside of the
cowlings were painted yellow zinc chromate and weathered.
Once this was done I glued the engines into their respective cowlings and
set them aside.
The wings
were then mated to the fuselage.
Wing root fit was excellent and required no filler.
| COLORS & MARKINGS |
At
this point the model was ready for paint.
I took a slightly different approach since there was no camouflage
pattern and decided to paint the canopy frames by hand.
Did this using Model Master Interior Green first on the frames and then
went over them a 2nd time with Testors Flat Black.
Overall this turned out pretty well…at least its good enough for me.
I then masked off the areas that were exposed (gear bays, cockpit, etc.)
and used Testors Flat Black right out of the rattle can.
No surprises here as it laid down smooth, looks spot-on flat, and dried
fast.
One thing to keep in mind is
that the kit
 is molded in black so you have to double-check and make extra sure
that you achieved 100% paint coverage.
is molded in black so you have to double-check and make extra sure
that you achieved 100% paint coverage.
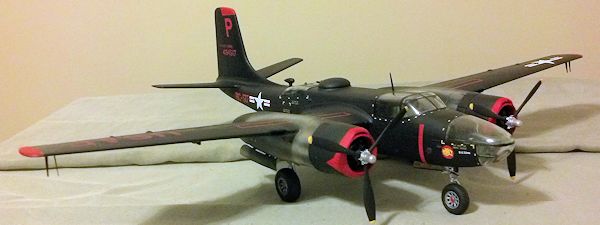
After the
flat black had dried for two days I masked off the airframe, removed the
cowlings (they were in place with Blu-Tac) and then shot Testors Flat Red on the
wing tips, vertical stab and cowlings.
The pattern on the cowlings was free-handed using Tamiya masking tape.
Once this was done the model was set aside for a day and then I coated it
with Testors Gloss Cote (again, straight from the rattle can).
The
Bombshell decals are printed very cleanly and look terrific.
Nice instructions too although a few more pictures of each respective
airframe would have been helpful.
Anyhow, these decals take pushing/prodding just fine and reacted safely to
Solvaset.
There were no surprises
at all and the decals are both opaque and finely detailed.
However one area of the instructions could stand some help.
The placement for the yellow dashes that surround the canopies and such
are not 100% clear.
So there was a
bit of educated guessing on my part to put some of these decals in their proper
place.
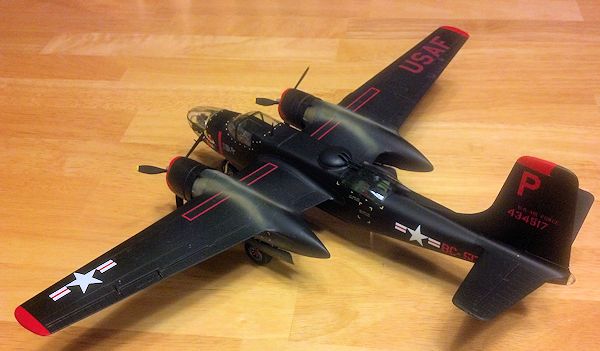
Furthermore, the sheet comes
with the decals to represent both aircraft EXCEPT for the ‘USAF’ on the wings.
I’m at a bit of a loss as to why they would not simply include a pair of
these decals.
As I plan on
eventually using the 2nd option on this sheet I figured I would use
the ‘USAF’ from the original
 Monogram sheet.
The kit decals looked good on the paper but suffered from an
overabundance of glue.
I had to
rinse and re-rinse both of these decals for a few minutes to remove most of the
whitish haze of glue from them.
And, initially placing them on the model, I could still see some of the haze.
I also noticed that the red color was slightly duller than the Bombshell
Decal sheet.
However, once dried
and then flat coated they blend in nicely with the aftermarket sheet.
Monogram sheet.
The kit decals looked good on the paper but suffered from an
overabundance of glue.
I had to
rinse and re-rinse both of these decals for a few minutes to remove most of the
whitish haze of glue from them.
And, initially placing them on the model, I could still see some of the haze.
I also noticed that the red color was slightly duller than the Bombshell
Decal sheet.
However, once dried
and then flat coated they blend in nicely with the aftermarket sheet.
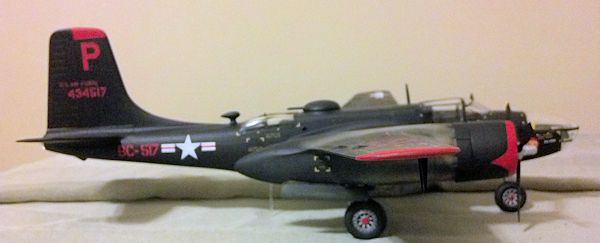
Most pictures that have seen of A-26s show a fair amount of weathering
especially with regards to exhaust staining.
I did some very light scrapes/chipping on the gear door edges and other
‘wear’ areas.
For extremely heavy
exhaust stains I have a bit of a method to my madness.
I use (in order, first to last) Tamiya Flat Brown,
| CONCLUSIONS |
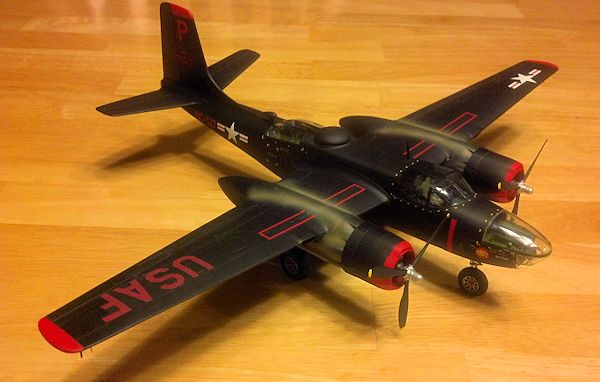
 This kit still goes together very well (even when partially started!) and looks
terrific when completed.
There are
no real surprises and I heartily recommend it to both novice and aged builders.
The only real annoyance is the plastic being molded in black…you really
have to double-check your paint coverage.
As for the Bombshell decals they were very nice and behaved quite well.
They were opaque and took more abuse than I should have given.
Really only the instructions could be a bit improved.
Or perhaps if I had better A-26 references I would not have had the
issues I did.
The Monogram decals
actually did very well too once all of the excess glue was washed off.
Matter of fact I’d have no qualms about using them if that was all that
you had (although there are questions about the nose art colors on the kit
decals IIRC).
Overall this was a
very enjoyable build and it really has garnered quite a bit of favorable
attention.
This kit still goes together very well (even when partially started!) and looks
terrific when completed.
There are
no real surprises and I heartily recommend it to both novice and aged builders.
The only real annoyance is the plastic being molded in black…you really
have to double-check your paint coverage.
As for the Bombshell decals they were very nice and behaved quite well.
They were opaque and took more abuse than I should have given.
Really only the instructions could be a bit improved.
Or perhaps if I had better A-26 references I would not have had the
issues I did.
The Monogram decals
actually did very well too once all of the excess glue was washed off.
Matter of fact I’d have no qualms about using them if that was all that
you had (although there are questions about the nose art colors on the kit
decals IIRC).
Overall this was a
very enjoyable build and it really has garnered quite a bit of favorable
attention.
| REFERENCES |
Wikipedia
A-26 In
Action, Squadron/Signal Publications, ISBN#0897470931
Lee Fogel
September 2013
My thanks to
Tom Cleaver for the Bombshell decals.
If you would like your product reviewed fairly and fairly quickly, please contact the editor or see other details in the Note to Contributors.