| KIT #: | 92125 |
| PRICE: | $35.00 SRP |
| DECALS: | Five options |
| REVIEWER: | Ryan Grosswiler |
| NOTES: |
| HISTORY |
The story of the Lockheed P-38 is well-known to readers of sites such as this one. The mount of America's greatest fighter ace, its twin-boom silhouette was as distinctive to friend and foe during the war as it is to us aero-buffs ever since.
What is less known is its uniqueness beyond the shape: The Lightning was the
only WWII fighter of its class to actually succeed in its design role. While the
concept of a 'heavy escort'--a twin-engine aircraft packing significant punch
not to defend a single point on the ground but possessing the range to instead
hang with vulnerable bombers all the way to and from their targets--was very
much in vogue in the late
 1930s, only the P-38 would actually be successful as a
daytime 'scrapper'. This was on account of its single-seat, high-wing-loading
design formula, and a good set of supercharged engines. In contrast, its
contemporaries in other air forces, the Beaufighter, Ki-45, Bf-110, Potez 630,
and the like, saddled with multiple crewmembers and more conservative
aerodynamics, would only achieve greatness by being adapted to other roles. Only
the RAF's rakish Westland Whirlwind might have achieved similar success as a
pure fighter, but was never really given the chance with a proper development
program.
1930s, only the P-38 would actually be successful as a
daytime 'scrapper'. This was on account of its single-seat, high-wing-loading
design formula, and a good set of supercharged engines. In contrast, its
contemporaries in other air forces, the Beaufighter, Ki-45, Bf-110, Potez 630,
and the like, saddled with multiple crewmembers and more conservative
aerodynamics, would only achieve greatness by being adapted to other roles. Only
the RAF's rakish Westland Whirlwind might have achieved similar success as a
pure fighter, but was never really given the chance with a proper development
program.
A minor point of nomenclature: there were no A through C -series aircraft, the first production model being the D, which was still effectively a development batch. Only with the E , which began trickling out of Lockheed's factory doors in Burbank two months before Pearl Harbor, would an actual combat-ready product finally reach the squadrons. While the many imperfections were being wrassle'd out in dozens of these prototype aircraft which had meanwhile been spurting off the line in fits and starts, the basic excellence of the design was never in doubt, the wing even being scaled up to serve as the basis for the Constellation airliner--another classic Lockheed product.
While produced in six major lettered variants, the basic airframe remained unchanged throughout. Differences were mostly in minor improvements, and can be generalized as 'late' with the functionally-definitive blunt oil/intercooler combination intakes behind the propellers and 'early' with the sleeker, prettier engine cowlings.
| THE KIT |
These 'early' versions--the E thru H--have not been well-served in any scale. In
1/72, we had the old Revell and Airfix offerings. These weren't bad, but were
products of their time with boiler-plate rivets on the Airfix offering and
opened engine and gun bay panels on the Revell kit that were hard to model
closed. Worse,
 both featured incorrectly the 'late'-style bulbous radiator
housing on the aft booms, a more subtle goof. Hasegawa in the mid-70s made a
brave attempt to cover both early and late versions with a kit featuring
optional canopies and lower cowls, but again missed the different radiators aft.
both featured incorrectly the 'late'-style bulbous radiator
housing on the aft booms, a more subtle goof. Hasegawa in the mid-70s made a
brave attempt to cover both early and late versions with a kit featuring
optional canopies and lower cowls, but again missed the different radiators aft.
About 2009, RS Models of the Czech Republic changed all that with this
release. At least eight different boxings cover all early versions plus the
recon F-4/5. A soft-mold short run kit, three sprues of matte grey parts, a
little baggie of resin, instructions, decals, and an injection molded canopy
greet you upon popping open the flimsy end-opening box and spilling the
contents. Two of the cowlings suffer from apparently damaged molds and
replacements are supplied. Surface detail is beautifully recessed, petite, and
consistent. Booms are split for some reason not only laterally but also for some
malevolent reason fore and aft. Kit is otherwise engineered like Hasegawa's, and
comparing the parts revealed an almost perfect match. Might we have a derivative
on our hands?
I had read a review or two absolutely slamming this kit for its "unbuildability"
shortly after its release. Wanting an early Lightning in my lineup and seeing
that this was nonetheless probably my best option, I ordered one to see if it
was as bad as all that.
| CONSTRUCTION |
Spoiler alert: it turned out to be a good kit in the end. But a
thorough inspection and test-fit revealed three problems which I believe were
the genesis of said reviewers' Tragic Modeling Experiences: 1) Cowl parts are
reverse-numbered in the instructions and "handed", 2) an illogical assembly
sequence virtually guaranteeing failure, and 3)--discovered as assembly
commenced--a cockpit vs. nose wheel well conflict of nearly 3/16". These are in
addition to the inherent challenge already organic to modeling any pod-and-boom
 aircraft, threatening alignment
issues!
aircraft, threatening alignment
issues!
Therefore, follow my recommended assembly sequence:
1) The nose wheel well and cockpit were assembled and detailed (the kit's
cockpit is reasonably represented, but a bit more effort adding wiring to the
radio boxes aft and seatbelts up front goes a long way). I shaved a little off
the cockpit sidewalls to reduce the assembly's height by 1/16". The nose wheel
well halves were glued together and that assembly's
height was reduced by 1/8". After test fitting, both were glued in place and
test fit once more before being set aside to cure. This killed Problem #3 right
out of the gate.
2) The left forward segments of the booms were glued to the left aft portions
and allowed to fully cure taped to a flat surface. This gave me two left-hand
boom halves. I did so over 1/72 plans to ensure nothing angled funny up or down,
but you can achieve the same end by keeping in mind that the boom's upper
surface was a straight line from the vertical fins almost to the propeller
spinner. The right-hand pieces were similarly assembled against the
left halves, but not to
them
at this time, taped, and allowed to cure. This gave me two sets of boom halves.
3) The boom halves were then glued together, but only aft of the main wheel
wells at this time. Note that you'll
need to eliminate a bunch of ejection-tower 'nubs' inside the boom
halves to get the main wheel-well inserts to fit.
This allowed me to deal with the fit against the wing
fairings in a separate operation. The boom fronts were then glued t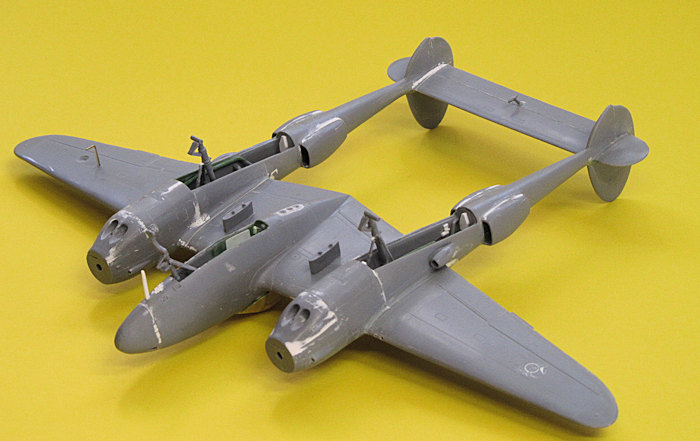 o deal with
the fit against the front wing fairings, checking the fit of the cowl 'chin'
pieces which were glued at the same time.
o deal with
the fit against the front wing fairings, checking the fit of the cowl 'chin'
pieces which were glued at the same time.
I know this is all horribly pedantic reading, but do you see my tactic? By
dealing with only one joint area per session, I isolated the fit and
alignment problems and dealt with them one at a time, which kept them all from
ganging up on me later. Divide and conquer!
4) I finished this search-and destroy sweep by then dry-fitting the completed
booms to the wing/cockpit assembly, then test-fitting the horizontal stab
between them. This only required a bit of sanding to be perfect. The lower pod
half was dry-fit under the wing, squeezing the sides to achieve an almost
perfect fit, then glued (Oh, yeah--and don't forget to pack as much bird-shot
into that nose as you can manage! I underestimated and had to drill and insert
some more after painting and finishing was done). Outer wing lowers were
dry-fit. Canopy was glued and masked at this time.
5) Before general assembly, the radiators aft were fit and glued. This was the
only area which required filler along the whole joint, and also I'd recommend
sanding their widths down about 1/16": nothing major, but their intakes are a
bit yawning compared to photos of the real thing.
 6) Steps 1-5 above had sucked up about 20 hours of my life, but general assembly
could now be done almost all at once, and it occurred without further draaama.
Booms were glued to the wing and stab glued to the booms. This was allowed to
cure before the outer wing lowers went on, also left to cure.
6) Steps 1-5 above had sucked up about 20 hours of my life, but general assembly
could now be done almost all at once, and it occurred without further draaama.
Booms were glued to the wing and stab glued to the booms. This was allowed to
cure before the outer wing lowers went on, also left to cure.
To make a correct "H" you need to add the colored signal lamps on the bottom of the fuselage pod. I also added a landing light under one wing, using an MV Products lens, following somewhat ambiguous information that H-models didn't always have them under both.
It all followed standard model-building procedure
| COLORS & MARKINGS |
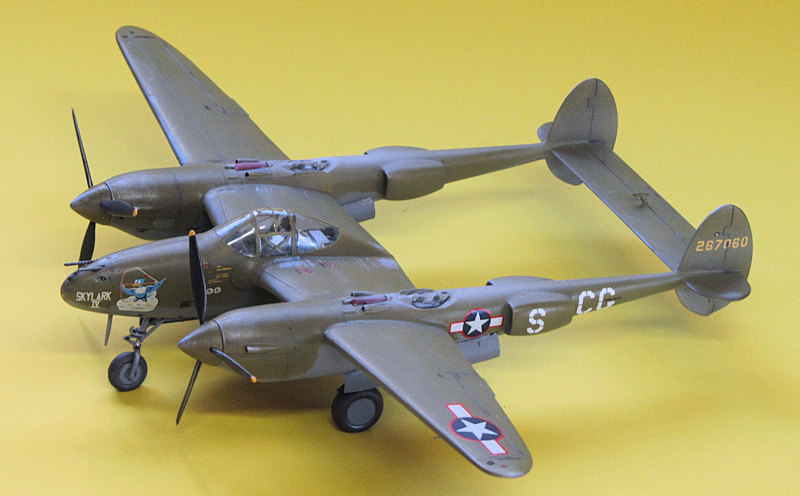
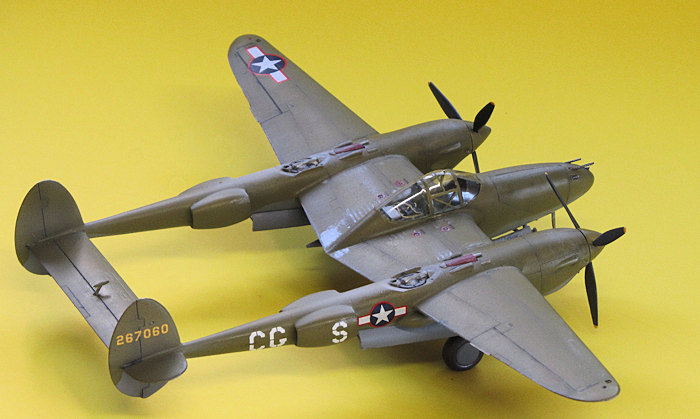
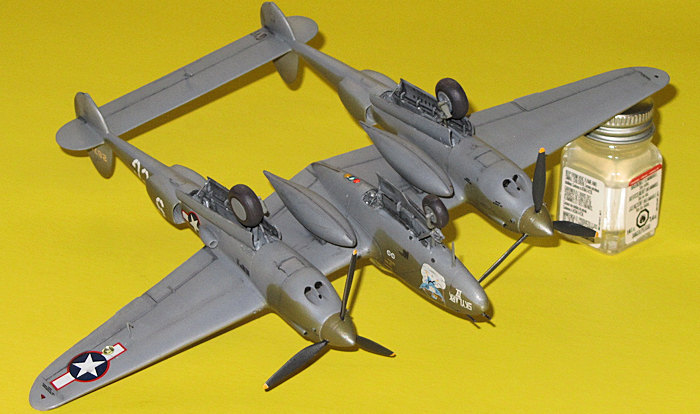
White primer was applied, followed with a preshading. The effect of technique is somewhat lost in 1/72 owing to the P-38's petite proportions. Standard USAAF OD/Medium Grey camouflage then was sprayed using Testor's square-bottle enamels, lightened with a bit of white. Remember that USAAF underside grey was a much darker color than most modelers realize, being really close in shade to the OD. Two coats of Future prepped the surface for decals.
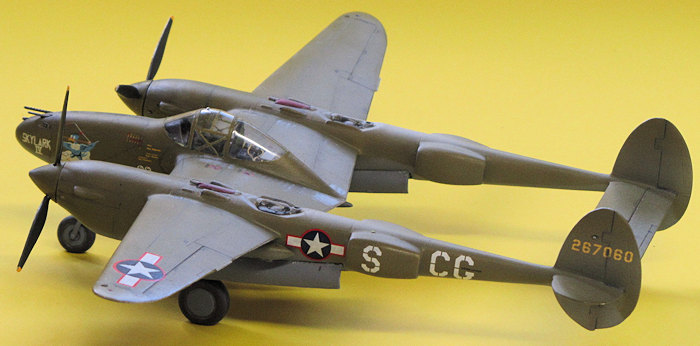 Five attractive marking options are supplied with the kit, one of these actually
being a "G". The decals are among the best I've ever used out of the box. I
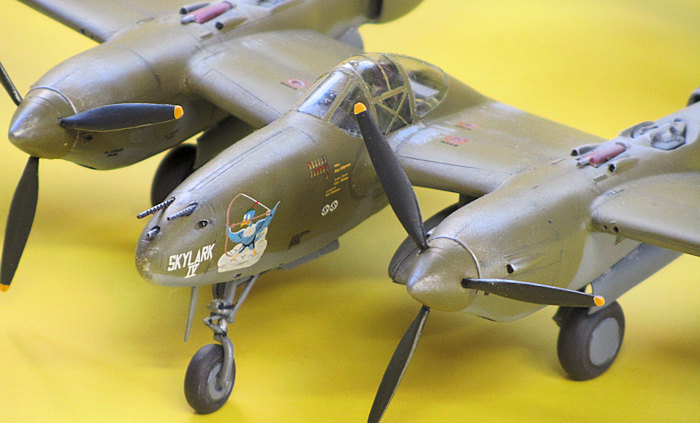
selected Maj. Mark Shipman's Skylark IV because
I didn't have a red-bordered US insignia in my lineup and liked the nose-art.
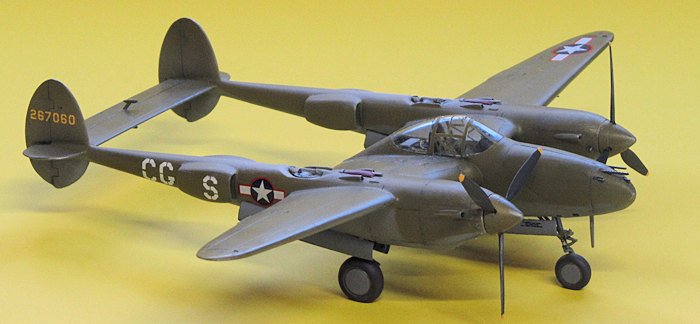
Another coat of Future sealed these in, and I applied a wash of dark-grey
enamel. I then finely shot a little off-white behind the superchargers to
simulate the prominent exhaust staining the P-38 acquired very quickly in
service.
Five attractive marking options are supplied with the kit, one of these actually
being a "G". The decals are among the best I've ever used out of the box. I
selected Maj. Mark Shipman's Skylark IV because
I didn't have a red-bordered US insignia in my lineup and liked the nose-art.
Another coat of Future sealed these in, and I applied a wash of dark-grey
enamel. I then finely shot a little off-white behind the superchargers to
simulate the prominent exhaust staining the P-38 acquired very quickly in
service.
Wheels, doors, drop tanks, and guns were then painted and attached. The resin .50 barrels are nice, but the longest one snapped off during my last finishing session. I replaced it with a milled-brass item from Master Models that I happened to have on hand, and you can just discern the superiority of this Polish company's product in the close-up shot.
| CONCLUSIONS |
I'm really pleased with the result. But don't try this one unless you've had a
few limited-run kits under your belt!
One other thing: besides the aforementioned radiator
Highly recommended to the incorrigible among us.
| REFERENCES |
P-38 Lightning in Detail and Scale (Part 1) Bert Kinzey. Squadron Signal Publications, 1998
The Internet
Ryan Grosswiler
April 2016
Copyright ModelingMadness.com If you would like your product reviewed fairly and fairly quickly, please
contact
the editor or see other details in the
Note to
Contributors.