Hasegawa 1/48 P-47M Thunderbolt
| KIT #: | 09572 |
| PRICE: | Around $40.00 MSRP |
| DECALS: | Two options |
| REVIEWER: | Patrick Grué |
| NOTES: |
Techmod 48012S |
| HISTORY |
When
Republic Aviation conceived the Thunderbolt in 1940, it seemed to go against all
the current norms in term of design, which called for light weight and
streamlined fighters. The “Juggernaut” was certainly the largest and heaviest
single-engine aircraft during WWII, and also the most produced fighter in
Early Thunderbolts suffered many problems such as stability until the engine was
shifted forward, unsatisfactory control surfaces, and also problems of canopy
opening and tire bursting at landing. These teething troubles were progressively
corrected on the P-47C and finally overcome with introduction of the P-47D. This
most produced version introduced a new water-methanol injection system, a better
turbo-supercharger unit, stronger tires and a universal wing allowing the Jug to
carry both bombs and drop tanks.
Though these improvements did significantly increase its range, the Jug was
unable to escort US bombers all the way over
 In
July 1943 the P-47D received its most significant and visible modification, the
adoption of a bubble canopy instead of the framed glass canopy so-called
“razorback”. The P-47D-25 sub-versions were the first to receive this
improvement which became very appreciated by the pilots due to the excellent
rear visibility. The reshape of the fuselage aft section introduced another
problem of lateral stability at low speed that was corrected by addition of a
dorsal fin on the P-47D-30 sub-versions.
In
the summer of 1944, Republic was informed of the British request for a high
speed interceptor specifically to chase down and destroy the V-1 flying bombs.
Republic already had a solution in hand one year before with the XP-47J (one
demonstrator built) and the YP-47M. Based on the P-47D-27/ -28/ -30 airframes,
the YP-47M was developed for superior speed and rate of climb over standard
Jugs. In fact it was a coincidence that the YP-47M was available when the V-1s
began to fall on
The
P-47M was fitted with
a
high output version of the Pratt & Whitney R-2800 engine, the R-2800-57. This
engine could reach 2,800 hp at 2,800 rpm over 30,000 feet in war emergency power
and, coupled with the new Curtiss Electric C642S-B40 propeller (13 feet
diameter), could give the P-47M a top speed of 470 mph (756 kph).
It
was originally developed without wing pylons unnecessary to chase the V-1s, but
once free of that duty refitted them to carry bombs or drop tanks. Because of
its short range (530 miles), the
P-47M should carry drop tanks to give it a comparable range to the late P-47Ds
without drop tanks (1030 miles).
However the M-type was developed too late in the war to make much of a combat
contribution in the European Theater Operation. It entered into service in
January 1945 and only with the 56th
Fighter Group which was in a way the sole test unit of the P-47M.
Republic Aviation built 130 P-47Ms at Farmingdale plant (Long Island, N.Y.).
| THE KIT |
This kit was a
limited-series released in 2004. It features 113 parts: 102 parts in grey
plastic, 8 in transparent plastic, 2 in photo-etched for the airbrakes, 1 i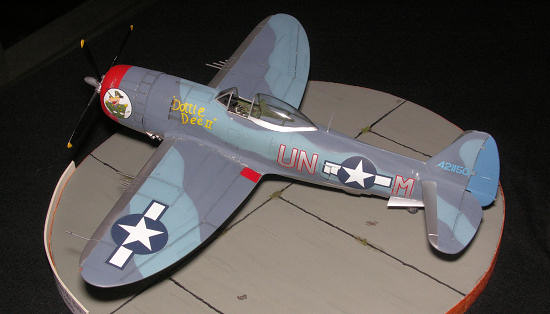 n
resin for the additional “N type” dorsal fin. There is one decal sheet for two
options:
n
resin for the additional “N type” dorsal fin. There is one decal sheet for two
options:
When looking at
the sprues, it is funny to note that one is dedicated to the F4U Corsair. Among
the 20 parts of the F4U sprue, only 3 are used for the P-47 engine parts, the
other parts are for F4U cockpit and tail wheel. Well, some spare parts for a F4U
project…
There are 48 parts in the Eduard p-e sheet; some of them are painted. This p-e sheet is dedicated to the Tamiya kit and seems necessary since the Hasegawa cockpit is poorly detailed.
| CONSTRUCTION |
Cockpit:
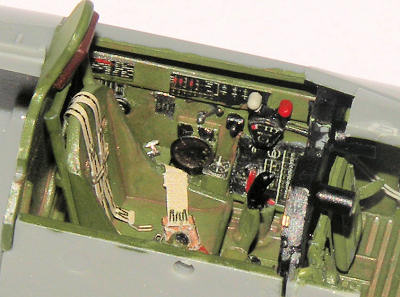 I noticed
that some original Hasegawa parts such as the breakers panel (LH console) and
the storage box (RH console) were very undersized and closer to 1/72 than 1/48
if compared with p-e parts. Obviously the photo-etched sheet is necessary here.
Originally the cockpit floor doesn't feature ridges since the P-47D. It is
smooth. However I decided not to modify it.
I noticed
that some original Hasegawa parts such as the breakers panel (LH console) and
the storage box (RH console) were very undersized and closer to 1/72 than 1/48
if compared with p-e parts. Obviously the photo-etched sheet is necessary here.
Originally the cockpit floor doesn't feature ridges since the P-47D. It is
smooth. However I decided not to modify it.
The p-e instrument
panel needs to be filed on LH and RH wedges to fit correctly inside the
fuselage. I added some details on the aft bulkhead such as a stiffener (lozenge
shape) and a recessed horizontal line on the shoulder position. Some electrical
wires 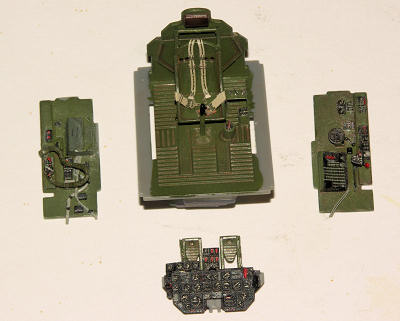 and
the oxygen hose are also added.
and
the oxygen hose are also added.
Don’t use the
ridiculous transparent sight (part #U1) which is too small. Use the grey sight
(part #N1) and identified as “part not for use” that suits in fact better.
Most of the parts
are painted in interior green (Hu #158) with a wash of dark earth/ black
acrylics in the recessed lines and a final silver dry-brush.
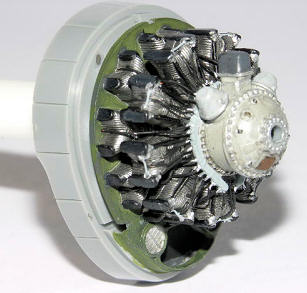
Engine:
There are only 7
parts for the engine. The rear cylinders row is half-cut and molded with its
fire-wall bulkhead. Tamiya made the rear cylinders row separately which is
better, but it is not important as you can’t see all details behind the first
cylinders row when the engine is inside the cowling.
The engine could
be a kit itself if you try to add all the ignition wires to the huge 18-cylinder
radial engine. To have a more detailed engine at this scale, I cut 36 copper
wires of 0.75 inch long. Then I drilled 36 little holes in the ignition wire
sleeve ring and 36 more in the 18 cylinders (one hole in front face and another
in rear face). Then I glued all the wires.
 Engine
painting:
Engine
painting:
Hasegawa suggests two types of Curtiss-Electric
prop: the paddle blades model
C642S
(the big ones to choose here) and the standard
blades
(maybe the model C542S).
The blades are independent so as you can adjust the pitch. I drilled
dozens of holes on each blade basement to represent the cuff fittings. I also
drilled four holes on the spinner.
Fuselage and wings:
The two fuselage halves fit correctly
with the cockpit inside. However there is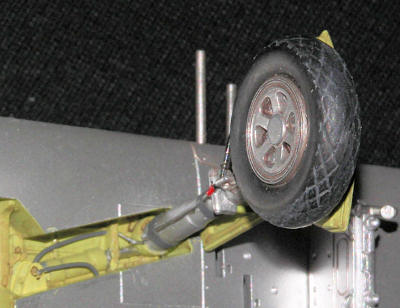 a flaw when the wings are glued on the fuselage: the front seam between wings
and belly needs a lot of putty and sanding.
a flaw when the wings are glued on the fuselage: the front seam between wings
and belly needs a lot of putty and sanding.
Landing gear and wheel well:
All landing gear
parts are correct except the torque link which must be replaced by the p-e
parts. I added the brake wires as usually. Note that there is a molding mistake
in the wheel well: Hasegawa reversed the position of the L/G actuator in such a
way that the actuator rod can’t act on the leg (can’t work that way!).
I discovered that when my Jug was quite finished (damned flaw!). So I removed the wrong molded part in each well and put a new rod in the right position. I added also some hydraulic pipes on the actuators.
Yellow zinc
chromate color is obtained by mixing “Linen” yellow (Hu #74) with a touch of
bright green.
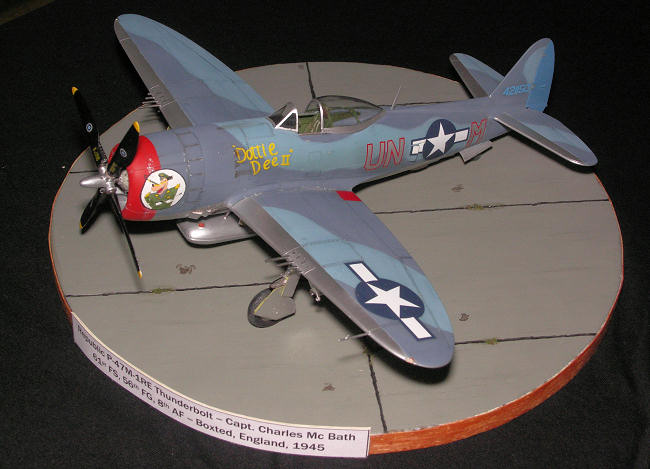
| COLORS & MARKINGS |
 Techmod
decal sheet suggests two nose art options: one for a 56th
FG/ 61st FS a/c nicknamed “Dottie
Dee II” (my choice), and the other for a 56th
FG/ 63rd FS a/c nicknamed “Ugly
Ducking”. Both wear the lovely two shades of blue camouflage.
Techmod
decal sheet suggests two nose art options: one for a 56th
FG/ 61st FS a/c nicknamed “Dottie
Dee II” (my choice), and the other for a 56th
FG/ 63rd FS a/c nicknamed “Ugly
Ducking”. Both wear the lovely two shades of blue camouflage.
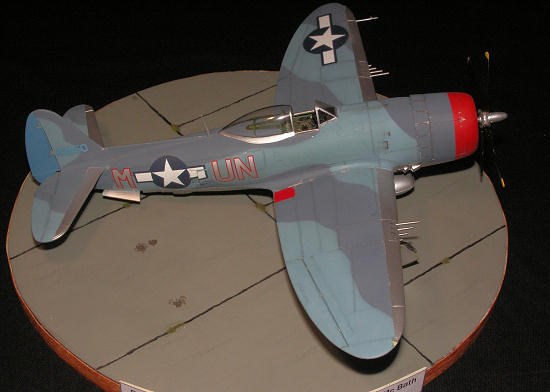
The camouflage scheme is made of intermediate blue/
azure blue over natural metal
finish. I started to
airbrush the lower surfaces including the wing & stab leading edge upper
surfaces using Hu #27002. Then I put the masks for the camo pattern; the lighter
color (azure blue Hu #89) airbrushed first then the darker color (intermediate
blue Hu #157).
The decals are correctly printed but are subject to silvering, which needs some cut out around the identification codes. The big nose art can't fix on the cowling without crumpling. So you have to cut it out from its white disk, paint the disk directly on the cowling using a circular mask and then put the nose art.
Weathering of my Jug has been made using a mixture of midnight blue acrylics with water on a sharp brush, with additional touch of dark earth/ black acrylics on greasy & smoky parts.
| CONCLUSIONS |
On what I read,
Tamiya 1/48 P-47D is better. Nevertheless this Hasegawa kit is cheaper and
finally a good base with some corrections and improvements.
| REFERENCES |
 Hasegawa
1/32 P-47D by Tom Cleaver, November 2007
Hasegawa
1/32 P-47D by Tom Cleaver, November 2007
Tamiya 1/48 P-47M by Oishi
YP-47M-1-RE of the Yanks Air Museum
P-47D photos
Curtiss-Electric web site
April 2010
Copyright ModelingMadness.com. All rights reserved. No reproduction in part or in whole without express permission from the editor.
If you would like your product reviewed fairly and quickly, please contact the editor or see other details in the Note to Contributors.