Tamiya 1/48 P-51D '8th Air Force'
| KIT #: | 61088 |
| PRICE: | $23.00 SRP |
| DECALS: | Four options |
| REVIEWER: | Dave Cummings |
| NOTES: | Decals: Eagle Strike “4th fighter Group in WWII” EP48274 |
| HISTORY |
On induction into the
USAAF in September, 1942, 71 Eagle Squadron, RAF, became the 334th
Fighter Squadron, 121 Eagle Sqn was re-designated the 335th FS and
133 Sqn became the 336th FS. These formed the new 4th
Fighter Group which remained at the Eagle Squadron’s RAF home station at Debden
Aerodrome. They would also retain the established RAF Mess, cooks, and club. It
was a cushy existence compared to new USAAF units swarming into England to be
greeted by hastily constructed airstrips, tents, and outhouses. They flew their
beloved Spitfires into 1943 when they were mandated to begin equipping with the
USAAF’s new wonder fighter, the P-47. The pilots had an immediate dislike for
the “Jug” as it was
 nicknamed.
They were used to their light highly maneuverable Spits. They viewed the
difference as giving up great handling British sports cars for a big, heavy,
though powerful Buick. The P-47 was nearly twice the weight of a Spit.
Eventually they learned to make good use of the Thunderbolt’s strengths of good
high altitude performance, ruggedness, and devastating firepower. In April the
few remaining Spitfires made their last mission and the first kills were scored
with the P-47. The P-47 shared one drawback with the Spitfire, relatively short
range. Even with drop tanks it could not escort the bombers into Germany and
bomber losses mounted. Later the new P-51 began to enter the scene and the 4th
looked enviously at the Mustang squadrons which did have the needed long range.
The 4th began receiving Mustangs in February 1944. In addition to
long range the new plane was smaller and lighter than the Thunderbolt, having
the same Merlin engine as the Spitfire. With the P-51 the 4th wreaked
havo
nicknamed.
They were used to their light highly maneuverable Spits. They viewed the
difference as giving up great handling British sports cars for a big, heavy,
though powerful Buick. The P-47 was nearly twice the weight of a Spit.
Eventually they learned to make good use of the Thunderbolt’s strengths of good
high altitude performance, ruggedness, and devastating firepower. In April the
few remaining Spitfires made their last mission and the first kills were scored
with the P-47. The P-47 shared one drawback with the Spitfire, relatively short
range. Even with drop tanks it could not escort the bombers into Germany and
bomber losses mounted. Later the new P-51 began to enter the scene and the 4th
looked enviously at the Mustang squadrons which did have the needed long range.
The 4th began receiving Mustangs in February 1944. In addition to
long range the new plane was smaller and lighter than the Thunderbolt, having
the same Merlin engine as the Spitfire. With the P-51 the 4th wreaked
havo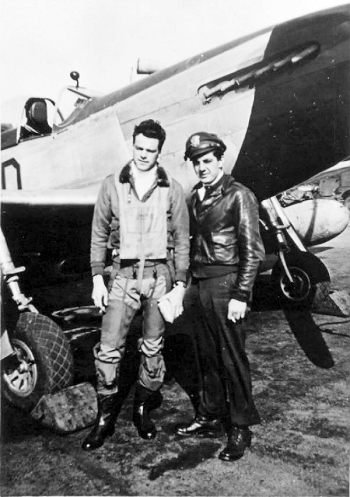 c
over the continent becoming the highest scoring Fighter Group in the European
Theater with a claimed 1,000 enemy aircraft destroyed in the air and on the
ground.
c
over the continent becoming the highest scoring Fighter Group in the European
Theater with a claimed 1,000 enemy aircraft destroyed in the air and on the
ground.
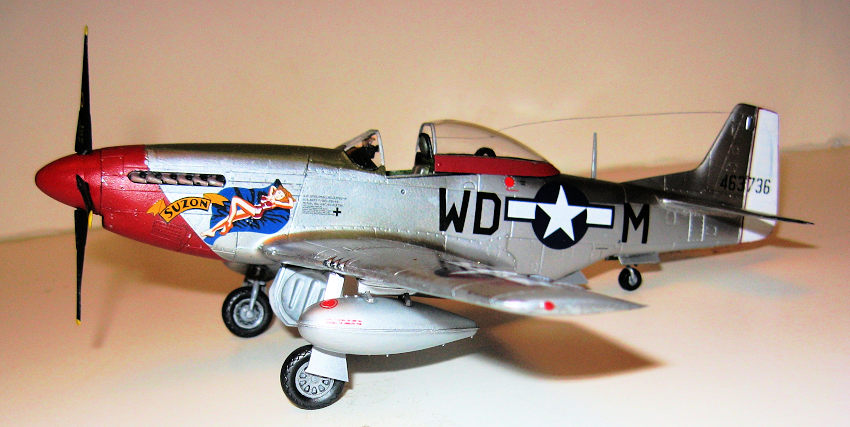
By 1945 the 335th FS C.O., Major Pierce McKennon, was one of the few original Eagle Squadron members still remaining in the 4th FG. Among his new pilots was CPT George Green whom he found to be a bit troublesome. He was a bit of a hotshot and prone to breaking regulations and the C.O. threatened to ground him several times. He would be glad he changed his mind. On March 8, 1945, McKennon led his squadron deep into Germany. While strafing an airfield his P-51 was hit by AA fire and he was forced to bail out. The squadron circled over him as he came down in a farm field. Disregarding strict regulations (as usual), Green landed his Mustang, WD-M “Suzon,” in the field which was really too small to safely do so. As German Soldiers approached Green radioed the Squadron to keep them off him. The Mustangs came down and made short work of the German patrol. The two men shed parachutes and life preservers in order to cram into the tiny cockpit. With Green sitting in McKennon’s lap he got the Mustang into the air in half the distance normally required. 2 ½ hrs later they were safely back at Debden. Photo: McKennon (L) and Green (R).
| THE KIT |
It’s the Tamiya Mustang, `nuff said. Though 20 something years old now it’s still one of the best model airplane kits I have built. If you are building for a contest you may want to spruce it up with some aftermarket stuff. But if, like me, you are just going to park it in the display case the Tamiya kit is just fine out of the box.
| CONSTRUCTION |
 Remove
parts from sprue trees. Squirt glue in box and replace lid. Shake gently for
ten seconds. Remove finished model. Ok, so it’s not really that easy, but if
you follow the well laid out instructions and apply rudimentary modelling
skills and patience it would be hard to screw this kit up. However, If you
are doing a NMF finish you will have to take extra care with those fuselage
and wing join seams. Silver paint will highlight every seam and sanding
scratch. My collection of WWII aircraft is all camo finishes and I had a
hankering to try something different and brighten things up a bit with a
Natural Metal Finish. I also had the Eagle Strike decals with Green’s
Mustang which had caught my eye.
Remove
parts from sprue trees. Squirt glue in box and replace lid. Shake gently for
ten seconds. Remove finished model. Ok, so it’s not really that easy, but if
you follow the well laid out instructions and apply rudimentary modelling
skills and patience it would be hard to screw this kit up. However, If you
are doing a NMF finish you will have to take extra care with those fuselage
and wing join seams. Silver paint will highlight every seam and sanding
scratch. My collection of WWII aircraft is all camo finishes and I had a
hankering to try something different and brighten things up a bit with a
Natural Metal Finish. I also had the Eagle Strike decals with Green’s
Mustang which had caught my eye.
| COLORS & MARKINGS |
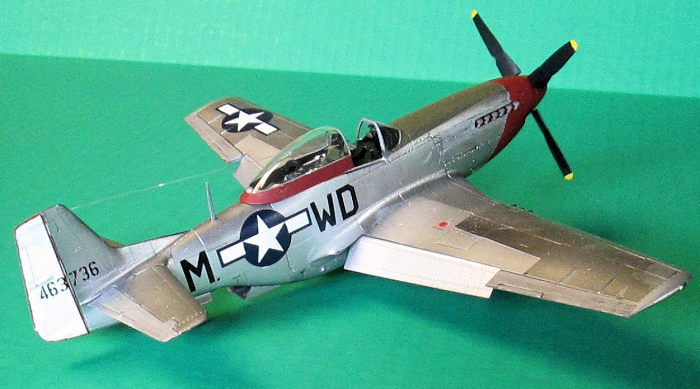
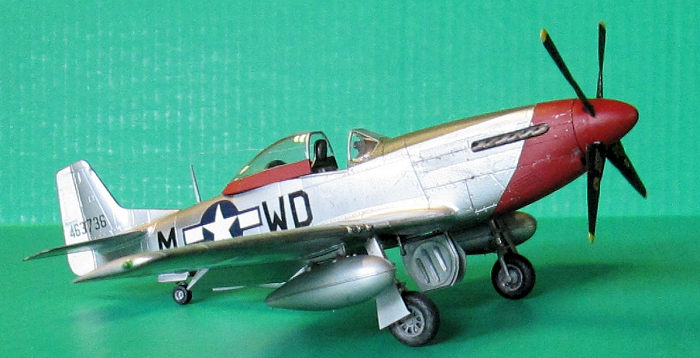
Now the truth is, much as
you want to build a shiny polished aluminum Mustang, those only exist in post
war warbirds and racers. The wings of wartime P-51Ds were actually coated in
aluminum paint. You just don’t find many highly polished NMF WWII warplanes.
Still, I was itching to try the AlClad II Polished Aluminum that had been
sitting in my drawer too long because of that fact. Also, as the 4th
FG continued to operate from England in 1945 these planes were very well
maintained. With the hardest part of the war behind them pilots and crews began
to give more attention to the looks of their personal mounts. At Debden, fancy
highly polished paint jobs became more the norm. All young men take pride in
their hot rods. I f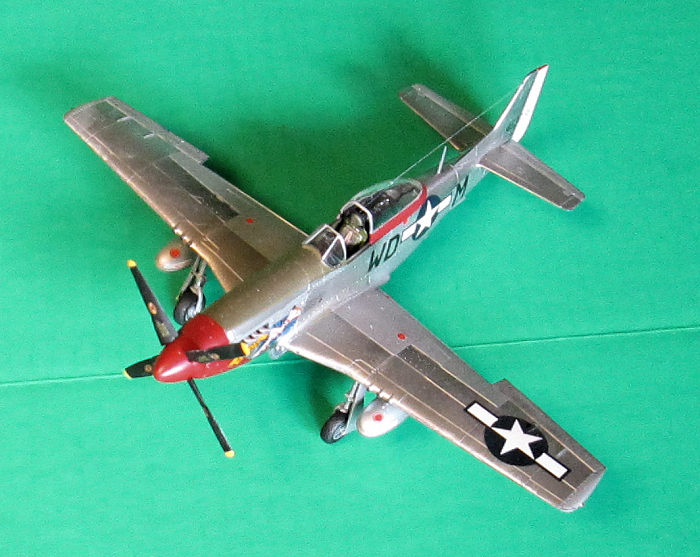 igured
a coat of matt clear would tone it down some. So there, I had just justified an
alternate reality to myself. Just the excuse I needed to try one of those shiny
NMF schemes with contrasting panels. In addition to the AlClad, I selected the
ever popular Testor’s non-buffing aluminum. To get the promised mirror finish
from the AlClad you must first give the model a base coat of gloss black. Before
doing so I painted the rudder white and masked when thoroughly dry. Then the
anti-glare panel on the nose was painted Testor’s Model Master OD and masked.
Then I painted the airframe with a rattle can of Testor’s Gloss Black. Don’t
forget the landing gear doors and stuff. Take care to protect the finish as it
dries from the dust and hair floating in the room. The AlClad lacquer sprays
like a dream and dries quickly. I masked various panels with Tamiya tape and
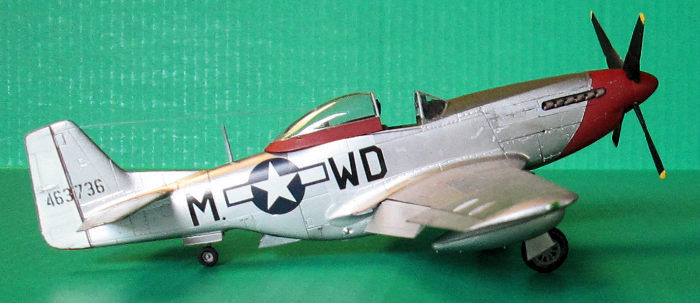
sprayed the Testor’s aluminum. The curvy red nose area was outlined with a soft
pencil to guide the masking tape. Narrow width Tamiya tape worked well for
following the lines then wider tapes to cover. I sprayed the nose and spinner
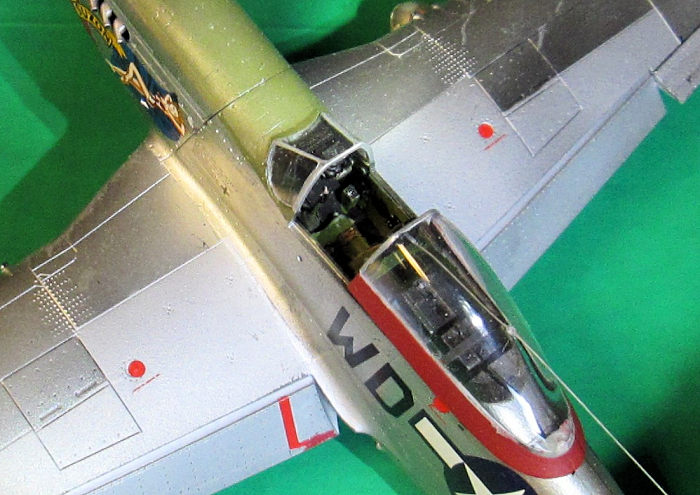
with Model Master Insignia Red. The cockpit frame is also red. Painting is made
easier here as Tamiya makes this a separate part from the canopy. The most
challenging part was that tricky red outlining of the white rudder. Some thin
decal stripes worked for the interior part on the hinge line but would not be
suitable for the outer edges. I just ran the flat sides of a brush with red
paint around the outer edges of the ridder and thankfully that worked for me.
igured
a coat of matt clear would tone it down some. So there, I had just justified an
alternate reality to myself. Just the excuse I needed to try one of those shiny
NMF schemes with contrasting panels. In addition to the AlClad, I selected the
ever popular Testor’s non-buffing aluminum. To get the promised mirror finish
from the AlClad you must first give the model a base coat of gloss black. Before
doing so I painted the rudder white and masked when thoroughly dry. Then the
anti-glare panel on the nose was painted Testor’s Model Master OD and masked.
Then I painted the airframe with a rattle can of Testor’s Gloss Black. Don’t
forget the landing gear doors and stuff. Take care to protect the finish as it
dries from the dust and hair floating in the room. The AlClad lacquer sprays
like a dream and dries quickly. I masked various panels with Tamiya tape and
sprayed the Testor’s aluminum. The curvy red nose area was outlined with a soft
pencil to guide the masking tape. Narrow width Tamiya tape worked well for
following the lines then wider tapes to cover. I sprayed the nose and spinner
with Model Master Insignia Red. The cockpit frame is also red. Painting is made
easier here as Tamiya makes this a separate part from the canopy. The most
challenging part was that tricky red outlining of the white rudder. Some thin
decal stripes worked for the interior part on the hinge line but would not be
suitable for the outer edges. I just ran the flat sides of a brush with red
paint around the outer edges of the ridder and thankfully that worked for me.
 The Eagle
Strike decals are very nicely printed, opaque, and easy to use. Once the decals
were on I settled them down with some Micro-Sol. I applied a little black
acrylic wash here and there on panel lines but kept things mostly clean. Then I
used a nail to scrape paint off cowling fasteners around the nose area. I
scuffed up a few places and dinged the prop blades some. I kept the weathering
understated but, still, it doesn’t look like it just rolled out of the paint
shop either. Lastly, and hesitantly I might add, I dulled up that brilliant
shine with a coat of Testor’s flat acrylic.
The Eagle
Strike decals are very nicely printed, opaque, and easy to use. Once the decals
were on I settled them down with some Micro-Sol. I applied a little black
acrylic wash here and there on panel lines but kept things mostly clean. Then I
used a nail to scrape paint off cowling fasteners around the nose area. I
scuffed up a few places and dinged the prop blades some. I kept the weathering
understated but, still, it doesn’t look like it just rolled out of the paint
shop either. Lastly, and hesitantly I might add, I dulled up that brilliant
shine with a coat of Testor’s flat acrylic.
The exhausts were painted Testor’s Steel enamel and when dry painted over with a thinned rust that allowed the metal sheen to show through. All the final bits were assembled; prop, landing gear, drop tanks, etc. I drilled a hole in the canopy with a pin vise to pass a fishing line antenna wire through.
| CONCLUSIONS |
 The Tamiya
Mustang is a fun build, free of surprises, and looks great out of the box. Not
sure just how historically accurate my paint job is but it allowed me to try my
hand at the AlClad NMF I have been wanting to do. It came out pretty good, but
were I to do it again I would give it a couple more coats of AlClad which spays
very thin. I was happy with all of it, kit, paints, and decals.
The Tamiya
Mustang is a fun build, free of surprises, and looks great out of the box. Not
sure just how historically accurate my paint job is but it allowed me to try my
hand at the AlClad NMF I have been wanting to do. It came out pretty good, but
were I to do it again I would give it a couple more coats of AlClad which spays
very thin. I was happy with all of it, kit, paints, and decals.
| REFERENCES |
1,000 Destroyed, The Life and Times of the 4th Fighter Group by Grover Hall; 4th Fighter Group in WWII by Larry Davis, Squadron/Signal #6181.
29 September 2017
Copyright ModelingMadness.com.
If you would like your product reviewed fairly and fairly quickly, please contact the editor or see other details in the Note to Contributors.
Back to the Main Page Back to the Review Index Page Back to the Previews Index Page