Revell 1/72 P-51D Mustang
| KIT #: | H-619 |
| PRICE: | $5.00 |
| DECALS: | One option |
| REVIEWER: | Chris Mikesh |
| NOTES: | Out of the box |
| HISTORY |
(Quote from the instruction sheet) Undoubtedly one of the finest fighting machines to emerge from World War II was the North American P-51 Mustang.
 The
Mustang was actually the American answer to a British fighter requirement. The
immediate success of the P-51 was due in part to experience being gained by
British fighters already in combat, and was one of the first airplanes to use
the new laminar flow airfoil on the wings. The performance of the Mustang was
such that the US Army Air corps could not help but take notice and after testing
two British models as XP-51s the plane was ordered into the ranks of the United
States.
The
Mustang was actually the American answer to a British fighter requirement. The
immediate success of the P-51 was due in part to experience being gained by
British fighters already in combat, and was one of the first airplanes to use
the new laminar flow airfoil on the wings. The performance of the Mustang was
such that the US Army Air corps could not help but take notice and after testing
two British models as XP-51s the plane was ordered into the ranks of the United
States.
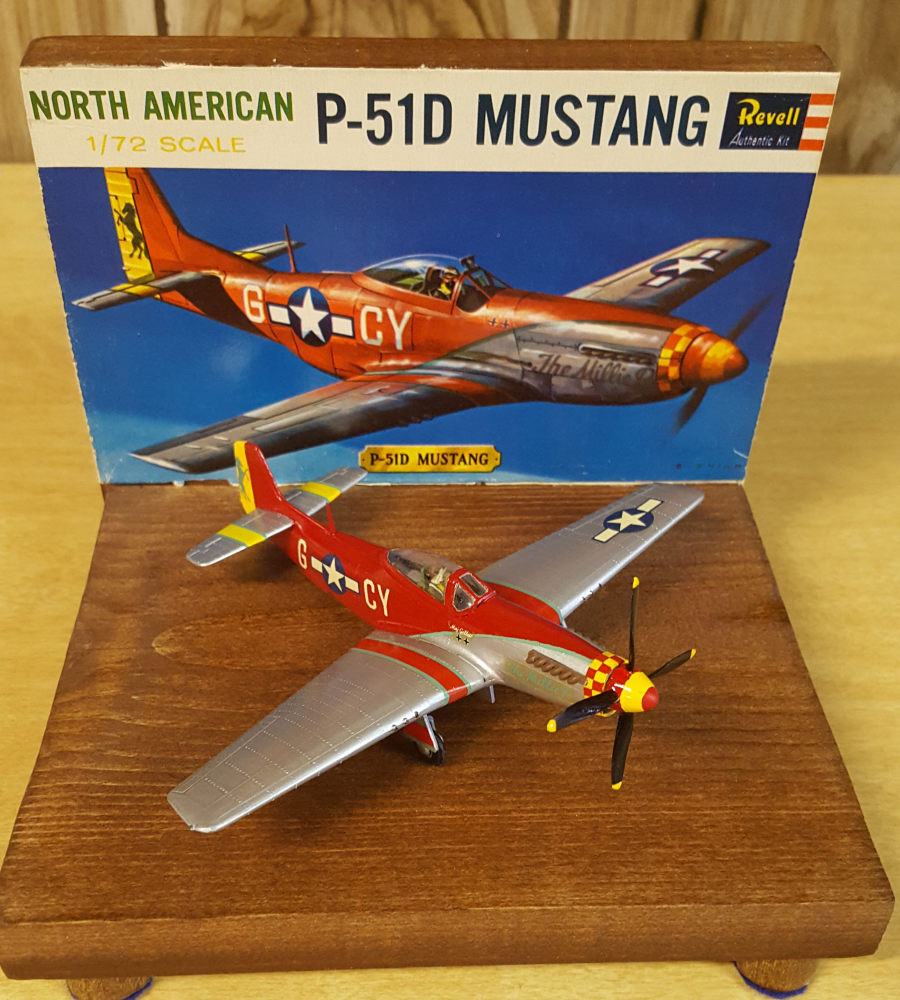
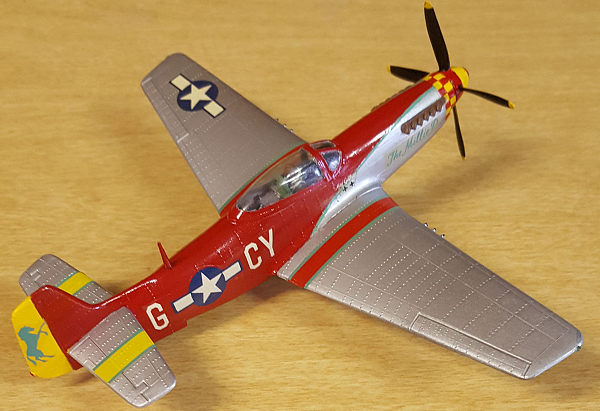
The ‘D’ version of the famous aircraft was produced in the greatest quantities a total of ~7956 P-51 D's being completed. As the tide of the war changed and the Allies gained the upper hand, the dull, uninspiring camouflage paint gave way to brighter markings. The Revell model of the P-51D 5NA Mustang reproduces one of the more colorful examples of this type. The “Milly P” was a part of the 357th fighter Interceptor Squadron and flown by Major Giler. Following the end of World War II, Mustangs continued to serve actively in the National Guard and some served additional combat in Korea.
| THE KIT |
Years ago, my father had a huge collection of models in the basement. The Revell 1/72 WWII “H” series kits – specifically the fighters, (24 of them) were a favorite of mine and I always wanted to build them.
Caution – readers with AMS should take your blood pressure medication before continuing.
 The P-51
kit is of hard plastic silver and brittle. My 1963 kit had minor flash (as did
many from that era), but dry fit was good. Typical, is the thick “bullet proof”
clear plastic canopy. The external rivet patterns were substantial, and too much
for a model that size. Interior has a floor, instrument panel w/ gunsight, and
side panels to a limited degree (not bad for 1963).
The P-51
kit is of hard plastic silver and brittle. My 1963 kit had minor flash (as did
many from that era), but dry fit was good. Typical, is the thick “bullet proof”
clear plastic canopy. The external rivet patterns were substantial, and too much
for a model that size. Interior has a floor, instrument panel w/ gunsight, and
side panels to a limited degree (not bad for 1963).
But the rest of the model and box art is FUBAR. Experienced model builders know that this kit rates up near the top of the list of models you should not build. I was attracted to the box art as a child, and looking at it 50+ years later, I’m still attracted to it. The kit is slightly out of scale, thick wings, short tail, landing gear is all wrong, and just about everything else. The red on the fuselage is color-blind wrong (should be OD Green) as is most other colors except black, yellow, and silver. Most of the marking are incorrect or incorrectly placed. (It’s “Millie G”, not Millie P) (Note: Brian Knight – Artist, was not color blind. He was possibly working from a Black and White photo and did the best he could without additional resources. Perhaps he was against a dead-line.)
But, for me, it is part of a series, and needs to be built. I’ve built a few of this kit in the past – and is not difficult to do.
| CONSTRUCTION |
 My
example of the P51 model did not come with a canopy. But fortunately I had built
the model before in the past and had extra canopies in my spares drawer. If
anybody ever wanted to see the difference between a canopy that has been treated
with future floor finish and not, this is one of the best examples.
My
example of the P51 model did not come with a canopy. But fortunately I had built
the model before in the past and had extra canopies in my spares drawer. If
anybody ever wanted to see the difference between a canopy that has been treated
with future floor finish and not, this is one of the best examples.
Aside from the Myriad of technical flaws in the model such as, antenna placement, rudder, engine, landing gear, canopy, and a host of other things, the assembly fit was actually pretty good. The silver plastic, exaggerates the seam lines, and gives the illusion of a poor fit – but actually is good.
Fuselage: Interior was painted with Testors Flat
Black, Silver Sharpie and Testors Zinc Chromate – but you can’t se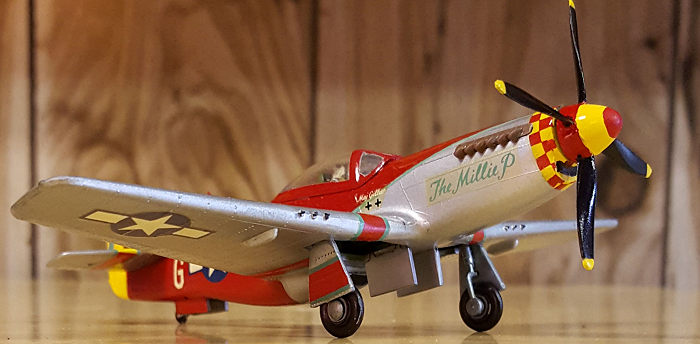 e
much of it. Pilot was primarily Hobby Color H-81 Khaki, Testors Yellow, Tamiya
XF-64 Brown and Tamiya white – all as needed. You will need to balance the
cockpit assembly, elevator, tailwheel, and propeller hub, and keep them aligned
as you close the fuselage halves.
e
much of it. Pilot was primarily Hobby Color H-81 Khaki, Testors Yellow, Tamiya
XF-64 Brown and Tamiya white – all as needed. You will need to balance the
cockpit assembly, elevator, tailwheel, and propeller hub, and keep them aligned
as you close the fuselage halves.
Other assembly: Be aware that the elevators have some pretty severe sinkholes should be filled. I did not fill them due to the volume of other things that I would need to correct, and I would have lost the rivet detail. Also the radiator attachment had a pretty large gap and it needed to be filled. Wing fit had no issues – basic and lacking detail. At the wing/fuselage joint, there is a sizable gap surrounding the radiator. Again, I did not fill it because if I started down that path, I would need to do many more corrections.
Before painting, I closed the wheel well doors and used white Elmer’s glue to hold the doors in place. This is to prevent paint spray from going into the cockpit. I masked the canopy with Tamiya Masking tapes.
| COLORS & MARKINGS |
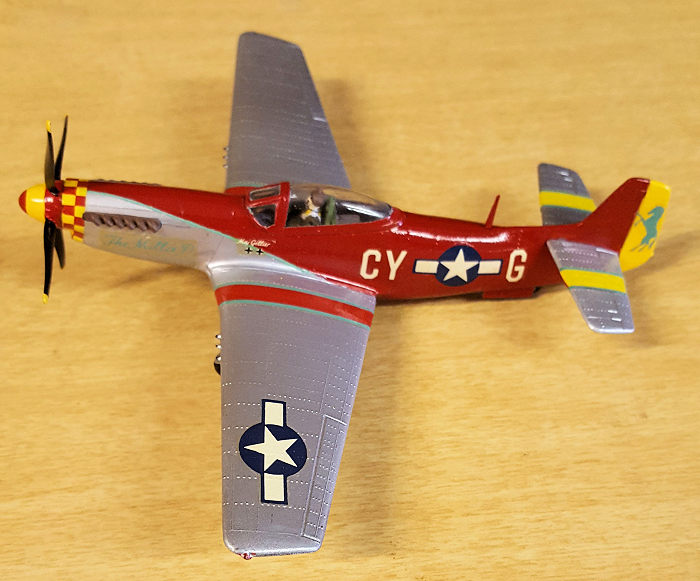
Tamiya spray Gloss Aluminum TS17 was applied overall on the entire plane. That eliminated the silver plastic illusion of seam gap. Minor seam corrections and another coat of Aluminum paint – hmmm…not bad.
Red fuselage: Now for the
hard part. Tamiya makes a wonderful white plastic flexible tape just for curves
and round surfaces. It really sticks and makes a pretty good seam – but some
paint will draw under with capillary attraction – usual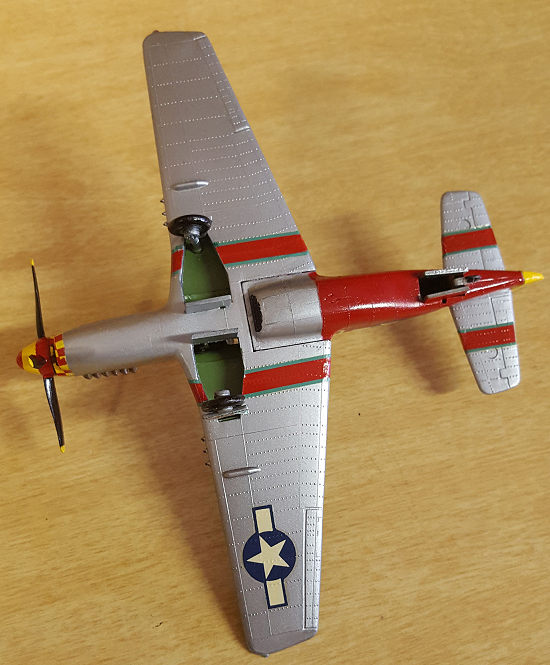 ly
minor and easily fixed. For this plane, I needed to ‘eye-ball’ the curve based
on the box art and instruction sheet. The tape actually made it easy.
ly
minor and easily fixed. For this plane, I needed to ‘eye-ball’ the curve based
on the box art and instruction sheet. The tape actually made it easy.
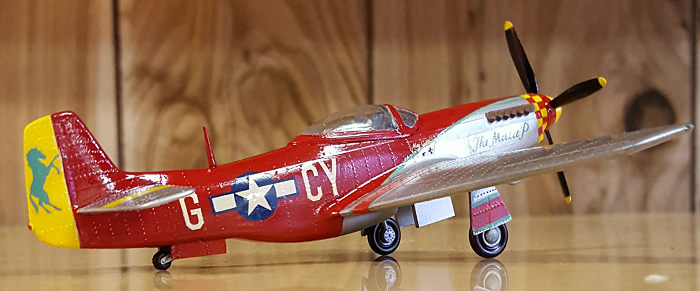
The decals for the Mustang on the rudder and the wing stripes were a non-standard green. I needed to match that green for the red/silver interface on the fuselage. Tamiya White (X-2) and Green (X-5) were mixed in small proportions to closely match the decal green of the horse and stripes. The line is so fine on that interface, I had to hand-brush it. Hard part is over. Whew!
I noticed that the 1963 decals for this model looked okay from the surface, but as I examined it with a magnifying glass, I saw what I had feared the most. I saw very small cracks very close together. That meant that this irreplaceable decal sheet was going to have some severe problems. So, I mopped on some liquid decal film. Recommended with any aged decal sheet.
Of course the decals have yellowed slightly – nothing I can do about that except to trim as much as I can away. When I applied them to the model they only curled just a little bit. The adhesive on the decal sheet was actually in good shape. I used mostly Micro Sol and Micro Set to assist the decals. The decals laid down reasonably good and only a little Elmer’s glue (dries mostly clear) was needed on stubborn corners and trailing edges.
Note: Elmer’s Glue when thinned a little with water can hold stubborn decals from curling. Apply under the decal, press it like regular decals but blow on them gently to encourage evaporation. Micro Sol really helps the flexibility of the decals on round surfaces. After the decals are dry and cured, gently rubbing a moist paper towel on surrounding areas will lift glue residue that bled out. Water soluable.
Details: I opened the wheel wells and trimmed the dried glue off, then assembled the landing gear. Interior of the wells are Zinc Chromate green and wheel doors are Sharpie Silver (same color as Tamiya Gloss Aluminum). Add the propeller, radio mast, navigation light color and forgotten details like painting the tail wheel.
Finally, a mist of Future Floor finish overall, let dry, and unmask the canopy. AMAZING! A perfectly inaccurate P-51D! …but looks pretty cool.
| CONCLUSIONS |
 Is this a
great kit? It depends on your end goal. Compared to more modern kits of
different brands…no. For a 1963 vintage model…also no. Basic research was
clearly not done. External details and fit are very good for a raised detail
kit. Internals are the instrument panel and pilot only – but you can’t see much
anyway. It’s a great kit to re-live your past. Externally, it’s pretty tough – I
dropped it twice with no damage.
Is this a
great kit? It depends on your end goal. Compared to more modern kits of
different brands…no. For a 1963 vintage model…also no. Basic research was
clearly not done. External details and fit are very good for a raised detail
kit. Internals are the instrument panel and pilot only – but you can’t see much
anyway. It’s a great kit to re-live your past. Externally, it’s pretty tough – I
dropped it twice with no damage.
But re-consider what the end goal was in building this model. It is part of a series of 24 Revel Fighters of WWII kitted in the ‘60s. Granted, ‘builder prerogative’ can take precedence over the model as he sees fit, so minor changed were done. This model is not contest competitive. But a completed kit always graduates to a good model.
| REFERENCES |
Large Scale Planes web site. https://forum.largescaleplanes.com/index.php?/topic/22558-lf-info-on-p-51d-the-millie-p-colors-etc/
“Remembering REVELL Model Kits” – Thomas Graham (2nd Edition) 2004. Page 67.
Link to model stand. https://modelingmadness.com/review/allies/gb/fighters/miktem.htm
25 April 2019
Copyright ModelingMadness.com
If you would like your product reviewed fairly and fairly quickly, please contact the editor or see other details in the Note to Contributors.
Back to the Main Page Back to the Review Index Page Back to the Previews Index Page