Hobby Boss 1/72 P-47D Thunderbolt
| KIT #: | 80283 |
| PRICE: | $15.99 SRP |
| DECALS: | Two options |
| REVIEWER: | Kevin Powers |
| NOTES: | Easy Assemble Kit |
| HISTORY |
Instead of the usual 'history of' which has probably been done quite a few times, I am presenting my personal impressions and feelings of the P-47. Also known as the 'Thunderbolt' officially and 'The Jug' unofficially, I had always liked the practically and looks of the P-47. Big, stout and strong, adjustable to any and all tasks it was created for, kind of reminds me of if I was re-incarnated from a object, it would be this aircraft.
I have read that the P-47 was sometimes mistaken for a Fw 190, I myself don't
see it. However, not ever having to face the 'Butcher bird' in aerial
 combat or
shooting at it with a anti-aircraft gun, I cannot speak for those in combat at
the time.
combat or
shooting at it with a anti-aircraft gun, I cannot speak for those in combat at
the time.
Never have seen one up close, even though I have been to numerous air shows over
the years, or even the fact I have been at the Air force museum a couple times,
if it had one, I don't remember seeing it.
The experience I have had with them, has either been through the several
builds I have had of them, through Testors, Academy, Hasegawa, and now, the
Hobbyboss version, seen through you tube videos or combat footage.
In video, the coughing, wheezing, and sputtering of the Pratt and Whitney R2800 radial engine, turning it's massive propeller ever so slow, and then with a rush, full speed. The belching of smoke, then, the throaty roar of the aircraft as it taxis it's way off the tarmac to the runway as it gently lifts it's massive frame off into the wild blue yonder.
Laden with 500 lb bombs, or extra long range tanks, it defies logic that something so, ungainly, could make it's way into the air with such gossamer wings. Gun camera footage what a devastating fire the 8 .50 caliber machine guns can produce, maybe even some HVAR rockets thrown in.
From trains blowing up, to Fw190's going down in flames from a aerial combat, maybe even a couple of nicely lined up Betty bombers sitting on some grassy field waiting for a mission that will never come, on some island in the south Pacific, the P-47 has shown it's iron fist around the world. Both the Germans and the Japanese has felt it's wrath.
| THE KIT |
 Upon seeing the kit for the first time after opening the box, the kit was simple
enough, but, full of detail. The only thing I was concerned about, was the way
they had designed the lower fuselage to join the upper half. Being this was the
only the second time I had built a Hobbyboss kit, the first being the MiG 3, I
didn't know what to expect in it's construction.
Upon seeing the kit for the first time after opening the box, the kit was simple
enough, but, full of detail. The only thing I was concerned about, was the way
they had designed the lower fuselage to join the upper half. Being this was the
only the second time I had built a Hobbyboss kit, the first being the MiG 3, I
didn't know what to expect in it's construction.
Since the kit was supposed to be a "Easy build" kit, I decided to use a method of building that would require minimal tools and little to no filler what-so-ever.
| CONSTRUCTION |
The instructions was filled just enough to do a job on it reasonably well. Being a US aircraft, the colors were simple enough, which I get to later on. Most of the parts I dry fitted before mounting. The problem I saw with the fuselage halves, I solved with a ample portion of Gorilla crazy glue, and several clamps to get the right squeeze out.
 Most of the other parts were pretty well mold flash free, with minimal sanding
needed to get rid of them.
Most of the other parts were pretty well mold flash free, with minimal sanding
needed to get rid of them.
No injector pin marks to contend with, the few it had, was always on a part
that either didn't show or was in a spot no one except maybe Steve Austin with
his bionic eye, or a annoying model contest judge with his pen light or
magnifier would see. Except for the gear doors, landing gear, canopy and
propeller, I left off to be paint separate and installed during finishing. After
I had removed the clamps of the two halves, the line seemed to have mostly
disappeared. A little light sanding took care of the squeeze out and did not
damage the panel lines.
The gear doors had to be scratch built, due to fumbling fingers and the dreaded 'carpet gremlins'. The upper narrow part which the gear doors comes in 3 separate pieces, one got lost, so, I used the other one as a template and made two out of thin styrene strips layered 3 times came to the right thickness of the actual kit ones. I clamped them and let them dry for a day, and then with a sharp exact o knife, cut out the patterns. With some minor sanding, they were very hard to tell the difference between the kit supplied doors and the scratch built ones.
| COLORS & MARKINGS |
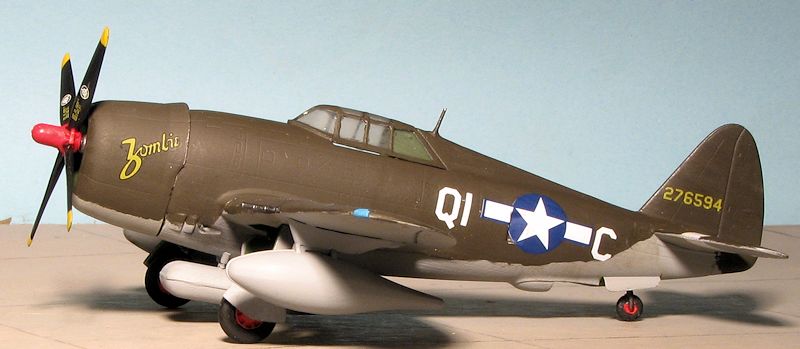
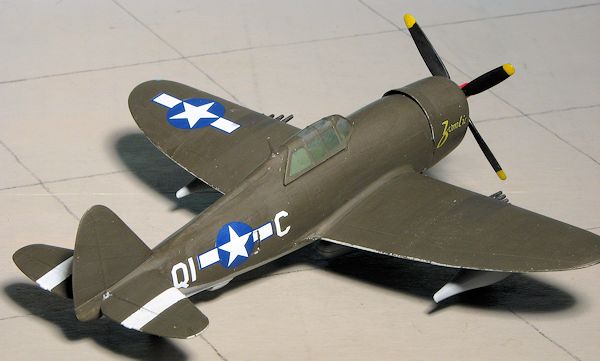
I chose the two tone standard Army Air-force colors of Olive Drab over Neutral grey. I sprayed the lower half with Testors Model Master neutral grey, after drying for a few hour, I masked off the tail fins and sprayed two strips of Vallejo flat white. I then painted the interior with Testors Interior green.
I thinned out some Vallejo olive green, which to me anyway, appeared to be a
little too brown, and with a wide fine haired brush, hand painted the upper
surface and the canopy with a r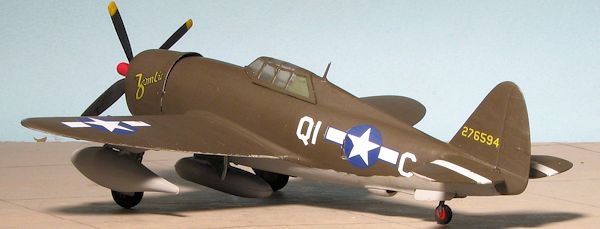 eal fine detail brush from Micro brush. Added a
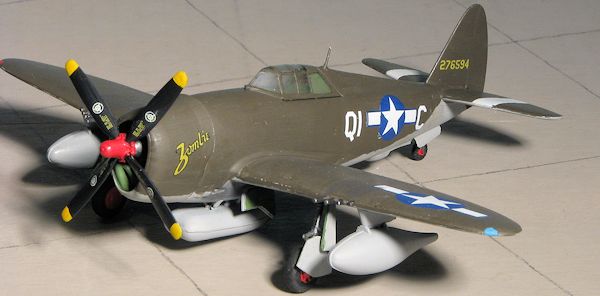
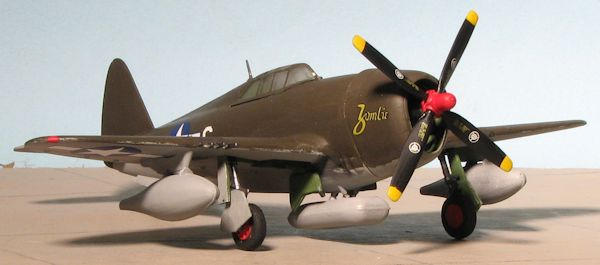
little red to the propeller hub for some color, and hand painted the prop with
Vallejo black. The wheel wells and the inner part of the landing gear doors, I
hand painted with interior green. Wheels with flat black. Wheel hubs with Model
Master insignia red.
eal fine detail brush from Micro brush. Added a
little red to the propeller hub for some color, and hand painted the prop with
Vallejo black. The wheel wells and the inner part of the landing gear doors, I
hand painted with interior green. Wheels with flat black. Wheel hubs with Model
Master insignia red.
After everything dried for a day, I followed up with some Future floor polish so the decals will have a smooth surface to stick to. The decals needed no setting solution, however, as the pictures show, one of the tail numbers curled up to never be recovered, so, I just left that one off. After drying in place, I followed up with future, then used a Vallejo matte varnish to get rid of the glossy look of the a/c. The kit prop is a Hamilton Standard, but, the kit decals were for a Curtis Electric prop.
I followed up using some black pastel chalks on the machine gun barrel flash and the exhaust stacks in the engine cowling and under the fuselage by the turbo charger. The engine was painted gunmetal followed by metalizer aluminum dry brushing to bring out the engine details and the machine gun barrels.
| CONCLUSIONS |
Except for having to scratch build the vertical gear doors, the kit took less than a week to complete, and I would recommend this kit to both beginners and semi-experienced modelers like myself who would take a break from those month long parts filled projects. The kit has just enough detail to fit in with the more higher end kits in the market.
| REFERENCES |
Squadron walk around
The internet
and Various YouTube videos
Kevin Powers
August 2013
Thanks to Squadron Products for the review kit. You can find this kit at your favorite hobby shop or on-line retailer.
If you would like your product reviewed fairly and fairly quickly, please contact the editor or see other details in the Note to Contributors.