
Monogram 1/48 XP-47H Hemibolt (Conversion)
| KIT #: | ? |
| PRICE: | $ |
| DECALS: | None provided |
| REVIEWER: | Russell Riggle |
| NOTES: | Koster conversion set used |
| HISTORY |
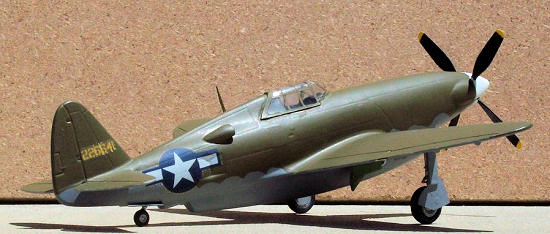
Two Republic P-47D airframes were converted to test this new motor. The resulting XP-47H achieved a top speed of 414 mph, well short of the projected 490 mph. Who knows what could have been with further development to the Chrysler Hemi, as it was still not out of its teething stage. Due to Thunderbolts already in production having better performance and the promise of jet technology no further development was done.
| THE KIT |
The Koster XP-47/H kit is vacuum formed conversion kit.
The ‘vacuform’ parts consist of two fuselage halves and a jig, to help with
proper alignment to the spinner. The prop blades, spinner, chin intake, and rear
intake scoops are resin. The parts are well molded and have very little flash.
Also provided is a vac canopy.
Another kit is needed for this project. Koster
recommends either the Monogram or Academy P-47D, a bubbletop or razorback kit
can be used. I used a Monogram bubbletop kit. The wings, horizontal stabs,
cockpit, landing gear and doors will all be needed.
| CONSTRUCTION |
Painting and installation of the cockpit is next. There
are no mounting posts or alignment points for it. I made my own mounting posts
using sprue from the Monogram kit. Gluing in the headrest first helped to center
the cockpit. The fuselage halves do not have any alignment tabs either so I
crafted my own using cardstock.
The tabs were then trimmed down and the fuselage halves
test fit until they lined up. A toothpick was then used to run CA glue in to the
center gap of the two halves to join them together.
 From pictures that I have seen of the prototype, it did
not carry guns or wing pylons, so off they came. Removal of the pylons will
leave a hole in the wing that can be remedied by the use of cardstock. The shell
ejector chutes were also filled in at this time.
From pictures that I have seen of the prototype, it did
not carry guns or wing pylons, so off they came. Removal of the pylons will
leave a hole in the wing that can be remedied by the use of cardstock. The shell
ejector chutes were also filled in at this time.
Wing, tail fit and alignment were surprisingly good.
Only a small amount of filler is needed at these joints.
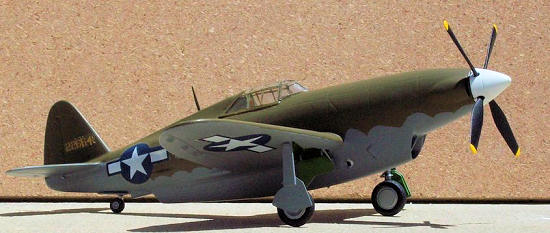
At this time, the intake, rear wheel well and rear side
scoop were attached. The fit of these parts were good, only a little sanding and
filler was needed.
One of the side scoops had a small sink hole that was
filled. Mistakenly,
I opened the tail wheel bay a little too much.
Cardstock was used to fill in this gap.
After sanding and filling, primer was applied to access minor defects and flaws. Surprisingly enough only minimal sanding would be needed on the fuselage joint. Afterwards, one more coat of primer was applied prior to painting.
| COLORS & MARKINGS |
 The two prototypes were painted with olive drab upper
surfaces and neutral gray undersides. I used Model Master’s olive drab (FS34087)
and neutral gray (FS36270).
The two prototypes were painted with olive drab upper
surfaces and neutral gray undersides. I used Model Master’s olive drab (FS34087)
and neutral gray (FS36270).
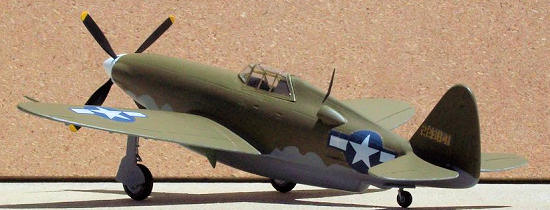
After a coat of clear gloss it is time for decals. No decals are provided in the Koster XP-47H kit, all that is needed though is National Insignias and the tail number. I used the insignias from the Monogram kit, although after market ones maybe a better option. The tail numbers will be a little more difficult. From what I could gather they were painted in yellow. The Monogram kits tail numbers were close and also in yellow. I used these even though they are not correct for either prototype. A coat of flat clear was then applied.
| FINAL CONSTRUCTION |
Now it is time for the last of the Monogram kit parts.
The landing gear and doors were painted and then glued on, as well as the radio
mast. Koster provides a single vac canopy.
I mangled the cano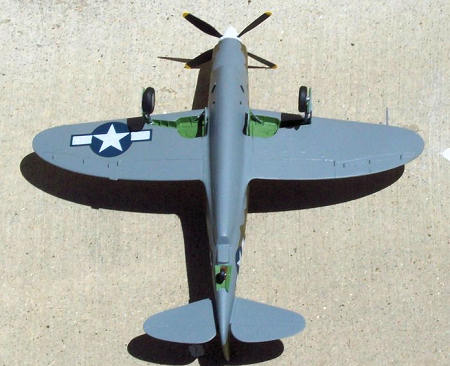 py beyond all recognition.
Don’t know what happened.
I cut it three times and it was still to short.
So in the trash it went.
I then turned to the Monogram kit canopy.
That did me no good as I used the bubbletop kit.
As luck would have it I had a Monogram razorback kit in
the stash to be used with the Koster XP-72 kit.
A quick test fit showed promise. Some trimming of the
fuselage had it fitting well enough. After a little touch up painting it was
glued into place with Elmer’s white glue.
py beyond all recognition.
Don’t know what happened.
I cut it three times and it was still to short.
So in the trash it went.
I then turned to the Monogram kit canopy.
That did me no good as I used the bubbletop kit.
As luck would have it I had a Monogram razorback kit in
the stash to be used with the Koster XP-72 kit.
A quick test fit showed promise. Some trimming of the
fuselage had it fitting well enough. After a little touch up painting it was
glued into place with Elmer’s white glue.
Lastly,
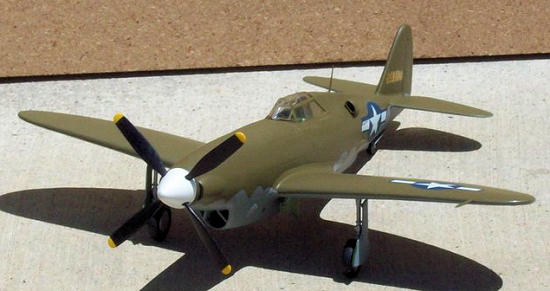
the prop/spinner was built.
An alignment jig was provided allowing a smooth
assembly. All the pictures I have seen are in black and white, but from what you
can tell the spinner is a lighter color than the rest of the plane.
Koster instructs painting it white, so that is what I
did.
| CONCLUSIONS |
Being both a Mopar and P-47 fan I just had to have this
kit in my collection. This was my first vacuform kit and I found it to be a
challenging, yet fun build. The Koster parts fit well not only to each other,
but also to the Monogram kit. This is by no means a wonder kit though. Do to the
extra work and skill involved with fashioning the vac parts to line up, I would
recommend this kit to experienced modelers only.
| REFERENCES |
The internet
Squadron Signal P-47 in Action
June 2011
Copyright ModelingMadness.com. All rights reserved. No reproduction in part or in whole without express permission from the editor.
If you would like your product reviewed fairly and fairly quickly, please contact the editor or see other details in the Note to Contributors.