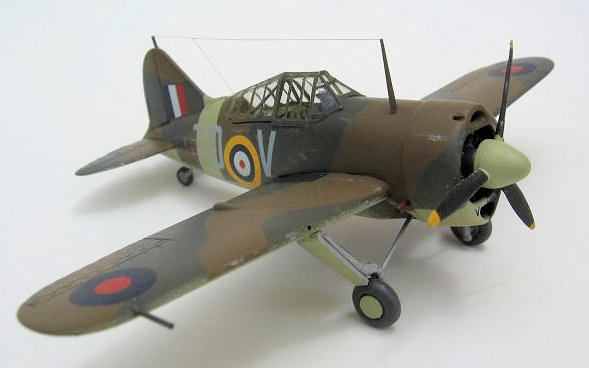
Airfix 1/72 F2A-1 Buffalo
| KIT #: | A02050 |
| PRICE: | $7.50 MSRP |
| DECALS: | Two options |
| REVIEWER: | Brian Baker |
| NOTES: | Old kit, but can be built into several variants. |
| HISTORY |
The Brewster Buffalo has
been badmouthed for years, so I’m not going to continue the process.
In fact, it is one of my favorite airplanes, and I actually knew a Marine
Corps pilot who trained in them in
 Grumman F3F biplane series,
Brewster’s XF2A-1 seemed just the thing, and the Navy ordered it into
production.
Only 11 were
accepted by the Navy; the remainder were sold to
Grumman F3F biplane series,
Brewster’s XF2A-1 seemed just the thing, and the Navy ordered it into
production.
Only 11 were
accepted by the Navy; the remainder were sold to
| THE KIT |
The Airfix Brewster F2A-1
 nose up to the firewall, forward of the wing leading edges,
is approximately the correct length
(perhaps a few inches too short), and by replacing the cowling, a reasonably
accurate F2A-1 and F2A-2 can be made.
Otherwise, the outline is very close for a kit of this vintage, and if
the boiler plate rivets are removed, a degree of realism can be achieved. The
engine is very good, although the prop is useless.
nose up to the firewall, forward of the wing leading edges,
is approximately the correct length
(perhaps a few inches too short), and by replacing the cowling, a reasonably
accurate F2A-1 and F2A-2 can be made.
Otherwise, the outline is very close for a kit of this vintage, and if
the boiler plate rivets are removed, a degree of realism can be achieved. The
engine is very good, although the prop is useless.
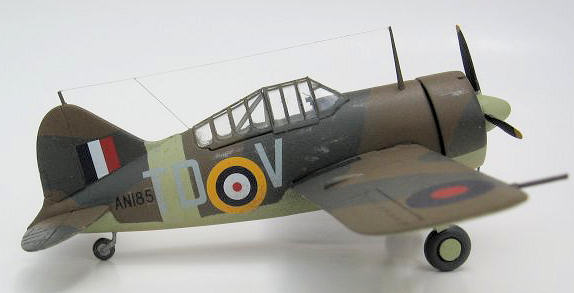
Decals are provided for two
aircraft:
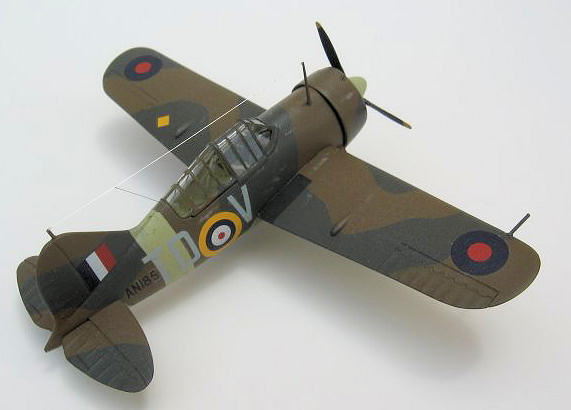
Brewster 339E, TD-V, AN185, RAAF, at
Brewster F2A-2, BuNo. 1412,
2-F-7 of VF-2, USS Lexington, Pacific Fleet, 1941.
The decals are very thin and
in good register.
The colors are
right on, and these decals go on without the need for trimming.
I used the kit decals for my model, and was very satisfied with them.
Dutch Decal has produced
some decals for some of the Dutch, Australian, and
| CONSTRUCTION |
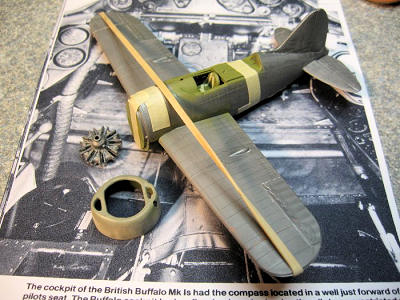
I began by sanding off the
rivets, but first I masked off the control surfaces, as I wanted to save the
fabric detail.
I then detailed the
cockpit by adding
plastic strips to
simulate the fuselage side structure and three instrument panels and the side
detail 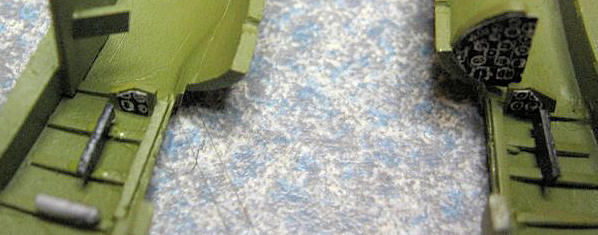 equipment. I mounted the seat on the base provided for it, drilling a
hole under the seat for the control stick, which I build from plastic rod.
The small set of windows in the belly need to be inserted into their
position from the inside before the cockpit floor, such as it is, in glued to
the lower wing assembly.
Be sure to
paint everything
in the cockpit
with interior green, as you can see everything from the outside.
I added rudder pedals and referred to some interior photos for instrument
panel arrangement.
After adding
four ribs in the gear strut wells, I assembled the wings, adding some filler in
the gaps.
After the fuselage halves
were joined, I attached the wing unit, gluing the front and back attachment
parts but leaving the wing root assemblies unglued. When dry, I used a rubber
band to get the proper dihedral angle, and then glued the wing roots to the
fuselage sides.
The tailplanes fit
right into place, but they do have tops and bottoms, so make sure they are
installed right side up.
At this
point, I added the tail cone and filled in the tail hook hole.
I then built up the roll bar assembly aft of the pilot’s seat and added
an RAF style reflector gunsight. The Navy versions had a telescopic sight, and
this is included in the kit, along with a different windshield. After attaching
the canopy sections, which fit perfectly, I masked them off and did the basic
painting. The masking was tedious, but not as difficult as I had anticipated.
equipment. I mounted the seat on the base provided for it, drilling a
hole under the seat for the control stick, which I build from plastic rod.
The small set of windows in the belly need to be inserted into their
position from the inside before the cockpit floor, such as it is, in glued to
the lower wing assembly.
Be sure to
paint everything
in the cockpit
with interior green, as you can see everything from the outside.
I added rudder pedals and referred to some interior photos for instrument
panel arrangement.
After adding
four ribs in the gear strut wells, I assembled the wings, adding some filler in
the gaps.
After the fuselage halves
were joined, I attached the wing unit, gluing the front and back attachment
parts but leaving the wing root assemblies unglued. When dry, I used a rubber
band to get the proper dihedral angle, and then glued the wing roots to the
fuselage sides.
The tailplanes fit
right into place, but they do have tops and bottoms, so make sure they are
installed right side up.
At this
point, I added the tail cone and filled in the tail hook hole.
I then built up the roll bar assembly aft of the pilot’s seat and added
an RAF style reflector gunsight. The Navy versions had a telescopic sight, and
this is included in the kit, along with a different windshield. After attaching
the canopy sections, which fit perfectly, I masked them off and did the basic
painting. The masking was tedious, but not as difficult as I had anticipated.
| COLORS & MARKINGS |
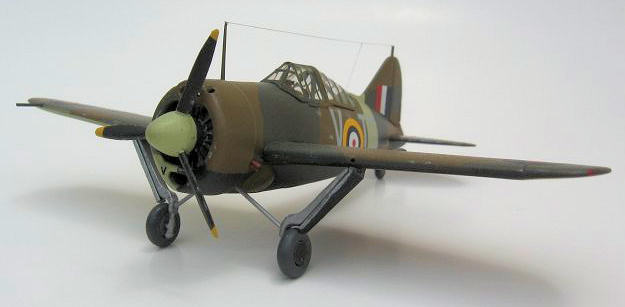
I used the Airfix kit decals
for the RAAF version, which was “sand and spinach” on top and “sky and black’
underneath.
The decals were a snap,
and didn’t require any solutions.
I
did add some black wingwalks, as some photos of RAF Buffalos show them, and some
don’t.
These planes would have been
heavily weathered and worn, so mine is pretty grungy looking, but then, it
certainly hadn’t been in the factory or overhaul depot for a long time at that
stage of the game.
Conversions
 With the Revell cowling and
prop, any of the British, Belgian, and Dutch aircraft (339B, C, D, & E) can be
modeled, as well as the F2A-2.
Major differences involve the
propeller, tailwheel,
and tailcone. I have done an F2A-3 from this kit, and intend to do
several more.
On this conversion,
you need to add some length to the firewall before mounting a Revell
cowling.
I suppose that the cowling from a Matchbox kit would also work, but it is
slightly shorter, and I think the Revell
unit is best.
The F2A-3 didn’t use a spinner in most cases, and since it had a cuffed
prop, finding a good prop might be a problem.
However, I recently built a Hobby Boss FM-2, which provides just such a
prop, and which is wrong for the FM-2.
I’m
saving that prop for my next F2A-3 or 339-23. The prop from an Airfix Grumman
FM-2 will also work for the
uncuffed props used on the export models.
With the Revell cowling and
prop, any of the British, Belgian, and Dutch aircraft (339B, C, D, & E) can be
modeled, as well as the F2A-2.
Major differences involve the
propeller, tailwheel,
and tailcone. I have done an F2A-3 from this kit, and intend to do
several more.
On this conversion,
you need to add some length to the firewall before mounting a Revell
cowling.
I suppose that the cowling from a Matchbox kit would also work, but it is
slightly shorter, and I think the Revell
unit is best.
The F2A-3 didn’t use a spinner in most cases, and since it had a cuffed
prop, finding a good prop might be a problem.
However, I recently built a Hobby Boss FM-2, which provides just such a
prop, and which is wrong for the FM-2.
I’m
saving that prop for my next F2A-3 or 339-23. The prop from an Airfix Grumman
FM-2 will also work for the
uncuffed props used on the export models.
XF2A-1
Prototype.
Different rudder.
Radio mast on left side. Detail differences.
F2A-1
First Navy version with short cowling.
239
Export model for
F2A-2
Second Navy version.
Longer
cowling.
339B/C/D/E
Export models.
Long tailcone,
larger tailwheel. Otherwise similar to F2A-2.
F2A-3
Longer fuselage, short tailcone.
Small Navy-type tailwheel. Revised canopy. No spinner.
339-23
As F2A-3 except for long tailcone, large tailwheel, and earlier canopy.
| CONCLUSIONS |
Highly recommended for
experienced modelers with a hefty spares box.
This kit is a challenge, but it was a lot of fun for me.
Try one.
Your entertainment
will probably only
run about 10
cents an hour, if that much.
| REFERENCES |
Squadron-Signal F2A
William Green & Gordon
Swanborough.
WW2 Aircraft Fact
Files:
Profile Publications No. 217
The Brewster Buffalo
Kari Stenman and Andrew
Thomas.
Osprey Aces Series No. 91.
Brewster F2A
Gerard Casius & Luuk Boerman.
Brewster B-339C/D/-23
History: Camouflage and Markings.
Jarmo Nikkonen.
Brewster 339E
Brian Baker
August 2010 If you would like your product reviewed fairly and quickly, please
contact
me or see other details in the
Note to
Contributors.