| KIT #: | 1388 |
| PRICE: | $7 from a show vendor |
| DECALS: | One option |
| REVIEWER: | Joel Hamm |
| NOTES: |
| HISTORY |
Non-combatant aircraft have a peculiar attraction,
particularly civilian models drafted into military service. A while ago I build
and reviewed two 1/72 Be-18’s from PM (Turkish Models); the UC-45 transport and
the glass nosed AT-11 bombardier trainer. Both suffered grievous flaws,
especially the AT-11 which keeps its place on the display shelf only as an
example of how not to muddle a 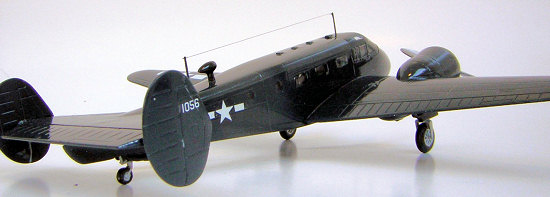 model.
The Hobbycraft version was rumored to be not much better, but when I spotted it
at a vendor’s table for only a few zlotys, I decided to see what the Canadian
company had to offer. It’s definitely a better build straight out of the box. I
made a few changes, as usual, not all of which turned out to be improvements.
model.
The Hobbycraft version was rumored to be not much better, but when I spotted it
at a vendor’s table for only a few zlotys, I decided to see what the Canadian
company had to offer. It’s definitely a better build straight out of the box. I
made a few changes, as usual, not all of which turned out to be improvements.
AIRCRAFT HISTORY
Not much to be said in this department. The Be-18 was developed as a civilian transport along the lines of, and smaller than, the Lockheed Electras. When war came (you know what war) all the services bought them for transports, hacks, assorted utility duties, and in modified versions as bombing, gunnery, navigation, and multi-engine trainers.
| THE KIT |
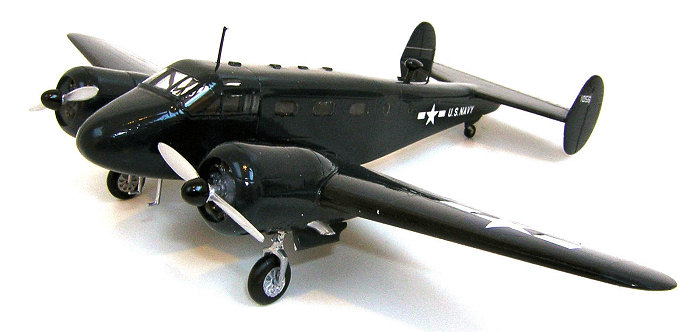
#1388 confirmed Hobbycraft’s reputation for turning out well molded, easily assembled, but somewhat simplistic models that often exhibit an obvious lacking in the accuracy department. The JRB series of US Navy transports included variants with slight differences in the shape of the nose, nacelles, and perhaps other parts. I won’t swear they got everything right on this kit. Comparison with photos suggests the nose is a tad short; but as someone whose own nose is more than a tad too long, I won’t kick up a fuss. The area they boogered was the decals. They are entirely the wrong size and color. Since even if they were the correct size and color they still wouldn’t be worth a darn, and since the plane’s minimal markings are easily scrounged from most spares bins, the failing is not fatal.
 The area in which
Hobbycraft’s kit outshines PM’s offering is the flight deck transparencies. PM
molded the windshield as a separate strip, thick, rough, cloudy, and ill
fitting. They completely forgot, or ignored, the overhead side windows. HC cast
the entire cockpit roof as a clear bubble, with all panes, including the
“eyebrow” ports, clearly delineated by raised framing that facilitates masking
or freehand painting. This causes a bit of a problem in sanding the fuselage top
seam. Minimal plastic must be removed to avoid a prominent “step” when the
canopy is attached. The alternative is to smooth the seams after the
transparency is glued on; but that risks sanding through the thin plastic of the
clear part.
The area in which
Hobbycraft’s kit outshines PM’s offering is the flight deck transparencies. PM
molded the windshield as a separate strip, thick, rough, cloudy, and ill
fitting. They completely forgot, or ignored, the overhead side windows. HC cast
the entire cockpit roof as a clear bubble, with all panes, including the
“eyebrow” ports, clearly delineated by raised framing that facilitates masking
or freehand painting. This causes a bit of a problem in sanding the fuselage top
seam. Minimal plastic must be removed to avoid a prominent “step” when the
canopy is attached. The alternative is to smooth the seams after the
transparency is glued on; but that risks sanding through the thin plastic of the
clear part.
The cabin transparencies are another story. About on par with PM’s and early Airfix – thick and dimpled on both sides. Since I do a fair amount of ac with cabin windows, and they’re often of this ilk, I’ve experimented with ways to improve them. None so far is satisfactory but for this build I settled on the least unsatisfactory. That involves grinding both sides to remove the depressions, then polishing to clarity. Care is required to keep the surfaces flat and parallel. Sanding leaves the window thinner so it no longer sits flush with the fuselage exterior. Sometimes the mounting flanges can be ground down to reposition the pane outward, but in this case they had been sanded down too tin already. The resultant depressions were somewhat fortuitous in facilitating masking with liquid masking medium (white glue diluted with dish detergent if you don’t have any store-bought stuff).
 Once the painting is
down and the mask is diggled out the windows have to be filled out to the
fuselage surface. Clear epoxy is about the best medium, because it does not
shrink as it sets. It has its foibles, though. Strong capillarity draws it into
any gaps in the glue seal around the window. Just when you think you’ve filled
it properly it oozes off into Never-never Land. Patience is the key. Let the
first application harden, then SLOWLY build up the level with additional drops.
Speaking of drops, lay down some masking adjacent to the window so anything that
drips off the applicator pin won’t ruin the paint job. Vinegar is rumored to
remove unset epoxy, but it hasn’t worked for me.
Once the painting is
down and the mask is diggled out the windows have to be filled out to the
fuselage surface. Clear epoxy is about the best medium, because it does not
shrink as it sets. It has its foibles, though. Strong capillarity draws it into
any gaps in the glue seal around the window. Just when you think you’ve filled
it properly it oozes off into Never-never Land. Patience is the key. Let the
first application harden, then SLOWLY build up the level with additional drops.
Speaking of drops, lay down some masking adjacent to the window so anything that
drips off the applicator pin won’t ruin the paint job. Vinegar is rumored to
remove unset epoxy, but it hasn’t worked for me.
Epoxy’s corollary trick is its tendency to form a pronounced convex or concave meniscus. Slightly overfull to a bulge is more realistic than a caved in appearance. A flat pane is out of the question unless you’re willing to sand, polish and repaint; but that leaves the problem of accurate masking. Whichever variation in the technique is used, epoxy still has high refraction, so the few inner details that may be seen will be distorted. The effect is acceptable from normal viewing distance, but up close there’s little resemblance to a scale plexiglass panel. When I find a better way to make, or fix windows, I’ll duly report.
| CONSTRUCTION |
Well, I already covered the important stuff. The kit includes a cabin floor, but no seats. Even though nothing can bee seen inside, I used card stock to make a half dozen just for my own sense of well-being.
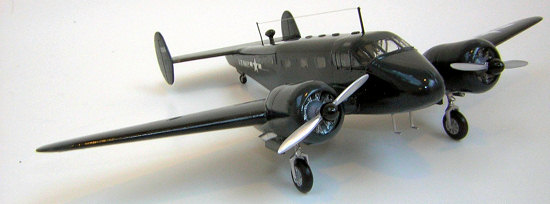
Everything else went together well without filling, filing, or fiddling. The stick-on exhaust stacks looked terrible, so I drilled the nacelles and fashioned pipes out of aluminum tube. Lead solder bends easier, but I’d used up all my large diameter stuff re-sweating some leaky plumbing fittings. The only other enhancement was snipping off the triangles that represent torque scissors on the gear legs, and replacing them with proper links form a spare PEB fret.
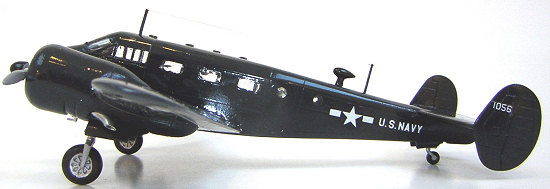
| COLORS & MARKINGS |
 I couldn’t find any
gloss sea blue in the paint locker but an ancient tinlet of Humbrol semi-gloss
dark blue appeared. It looked OK until it dried to a pukey purple. Fearful that
Rev. Jerry Falwell would come stomping up from not-too-far-off Lynchburg and
denounce my model as a less than masculine Beechcraft (as he did with the purple
Teletubbies), I hoofed it down to Hobbytown for some of the Right Stuff and
re-sprayed the plane with correct Model Master enamel.
I couldn’t find any
gloss sea blue in the paint locker but an ancient tinlet of Humbrol semi-gloss
dark blue appeared. It looked OK until it dried to a pukey purple. Fearful that
Rev. Jerry Falwell would come stomping up from not-too-far-off Lynchburg and
denounce my model as a less than masculine Beechcraft (as he did with the purple
Teletubbies), I hoofed it down to Hobbytown for some of the Right Stuff and
re-sprayed the plane with correct Model Master enamel.
When I pulled off the windshield masking I had perfect framing – except it was still purple. See, I taped over it and forgot to re-mask and re-spray. That’s where Hobbycraft’s heavy-handed framing lines came in handy, allowing me to do a fair-to-middlin’ free-hand job, using the old sharpened toothpick trick to fix any boo-boos.
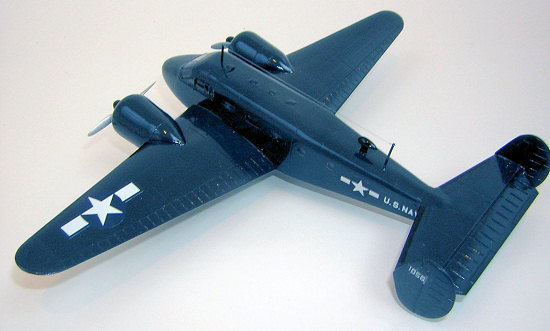
Markings, as I mentioned, came from the spares box. I’m pretty sure I got the correct size wing insignia, but based that only on side-view photos that seemed to show the roundels extending from leading edge to aileron cut-out. Finding correct height white “U.S. NAVY” lettering was a stroke of luck. The tail codes are bogus – the first string of proper sized white numeral I came across. Everything was sealed in beneath multiple coats of Future.
| FINAL CONSTRUCTION |
Stuck on the wheels, props, pitot tubes, masts. Strung a length of “wire”, and sunnuvabeech, it was done.
| CONCLUSIONS |
A definite improvement over the PM kit.
September 2007
Copyright ModelingMadness.com. All rights reserved. No reproduction in part or in whole without express permission from the editor.
If you would like your product reviewed fairly and fairly quickly, please contact the editor or see other details in the Note to Contributors.