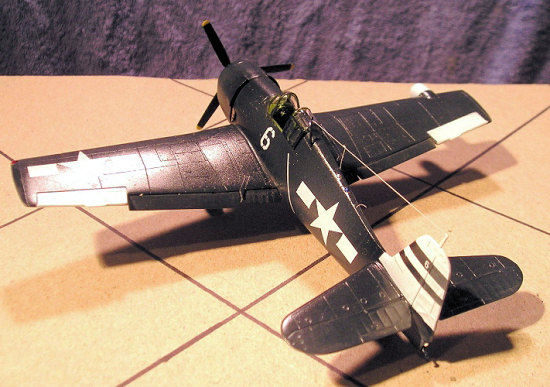
Italeri 1/72 F6F-5N Hellcat
| KIT #: | 1228 |
| PRICE: | Mine was marked $20.00. A Father’s Day present from my wife in 2006. |
| DECALS: | Two options |
| REVIEWER: | Pete L'Heureaux |
| NOTES: | Built mostly out-of-box with Minimecca tubes used for kit machine gun replacement; wine bottle foil used for seat belts. |
| HISTORY |
The Grumman Iron Works…. The name of this manufacturer conjures up images of
industry from World War II showing molten steel and aluminum being rolled into
thick slabs, then shaped into forms used in the instruments of war. Before the
time that Grumman’s F4F Wildcats were first blooded, the concept of the Hellcat
was on the drawing board. New engineers working at Grumman were introduced to
two key concepts, drummed into their heads by the chief engineer, William
Schwendler. The first, actually Roy Grumman’s dicta, was that the cockpit area
should be the last part of the airplane to fail…. The pilot’s safety was
paramount. The second was: “Make it simple, make it strong, and make it work.”
Thus it was that the “Schwendler Factor” came into being: if an airplane
component was deemed strong enough according to specifications, it was made
triple strong. In that 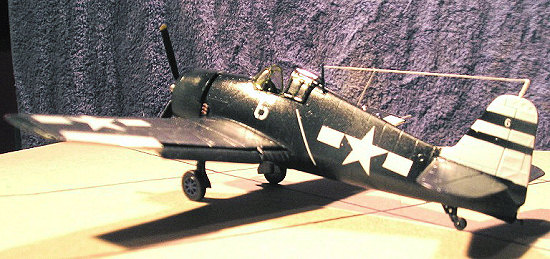 way,
all Grumman fighter aircraft components easily met U.S. Navy specifications.
The Hellcat incorporated some of the design of the Wildcat in its construction,
using the square-tipped main wings, but there the similarity stopped. Whereas
the Wildcat was a mid-wing design, the Hellcat’s main wings were mounted at the
bottom of the fuselage, and it was wider in cross section to accommodate a much
bigger engine than could fit in the Wildcat. The main landing gear were beefed
up to accommodate the increased weight of the aircraft.
way,
all Grumman fighter aircraft components easily met U.S. Navy specifications.
The Hellcat incorporated some of the design of the Wildcat in its construction,
using the square-tipped main wings, but there the similarity stopped. Whereas
the Wildcat was a mid-wing design, the Hellcat’s main wings were mounted at the
bottom of the fuselage, and it was wider in cross section to accommodate a much
bigger engine than could fit in the Wildcat. The main landing gear were beefed
up to accommodate the increased weight of the aircraft.
During this time of 1941-42, Pratt and Whitney was static testing what was to ultimately to prove the biggest and best radial engine of the war for the United States…. The mighty R-2800 series. Possessed with torque and horsepower higher than any other engine then available to the U.S. military, it was an engine in search of an airframe strong enough to employ it. When the engineers and designers at Grumman mated this engine to the Hellcat design, they knew they had a winner. The first flight of the Hellcat occurred on June 26, 1942, with Robert Hall at the controls, with the plane powered by a Wright R-2600-16. Although the plane flew well, Hall knew it needed more power to meet Navy requirements. Julie Hotpit and his craftsmen were able to install the new Pratt and Whitney engine and by the end of July, Bob Hall took to the air again with the Pratt powered Hellcat. Power made all the difference.
The -5N nightfighter incorporated a Westinghouse APS-6 radar unit, and deliveries of the aircraft began in February, 1944, but the early radar units were noted as being unreliable. Ultimately, only eight Navy and five Marine squadrons were the only nightfighter units to see combat during WW II, and they produced some aces, but their scores were not of a par with such pilots as McCampbell or Vraciu.
| THE KIT |
The Italeri Hellcat nightfighter model comes sturdily boxed with two sprues in dark blue plastic and one sprue of canopy parts. Instructions are for the most part clear, with exploded drawings, and printed on fanfold paper. This model is part of Italeri’s 1/72 Classic Aircraft series. There was no flash present on any of the parts of my model. Panel lines were recessed throughout, and appeared crisp, not trench-like. Paint colors are given with Model Master numbers.
| CONSTRUCTION |
 I started by
washing all the parts in dishwashing liquid and warm water, followed by drying
on paper towels. I was mostly interested in checking the overall fit of this
model first, so I cut the main airframe components from their sprues and taped
them together. The fit was overall very good, with just a little gap showing
where the horizontal stabilizers joined the fuselage. Removing all the tape, I
started construction on the cockpit area. The cockpit consisted of a plastic
floor, seat, control column, and molded-in rudder pedals. I assembled these and
painted the assembly with Model Master Interior Green enamel, with Testor’s flat
black for the instrument panel and side consoles. Instrument panel and console
dials and knobs are represented by decals in this model, and I used them in my
model, sealing them with Future. I installed the wine foil seat belts, painting
on representations of buckles with silver paint, then dry brushed the assembly
with a lightened Interior Green shade. I also painted the interiors of the two
halves of the fuselage with Interior Green, then glued the cockpit assembly in
place, then glued the two fuselage halves together with Ambroid cement. Taking
the bottom of the main wing, which was in one piece, I drilled out and shaped
the shell ejector chutes. I had the intention of drilling holes into the kit
supplied guns, but when trying to drill into the representations of the 20 mm
cannons, I snapped one in half between my thumb and forefinger. Lesson is:
Don’t attempt to drill these out unless you have a drill fine enough.
Apparently, mine wasn’t. So, the kit cannon were unusable, and I had to resort
to building the earlier -5N with the 50 cal machine guns. The main wing
assembly went together with Ambroid with no problems encountered, then glued to
the fuselage, followed by the horizontal stabilizers. The fuselage has the tail
antennae molded to it. During handling, I managed to snap this off as well. I
fashioned a replacement from Squadron plasticard, and put it aside for later
glueing. The stabilizer-to-fuselage gap I sealed up using Squadron White putty,
followed with a swipe of an acetone-dipped Q-tip, so that I wouldn’t have to
sand the joints.
I started by
washing all the parts in dishwashing liquid and warm water, followed by drying
on paper towels. I was mostly interested in checking the overall fit of this
model first, so I cut the main airframe components from their sprues and taped
them together. The fit was overall very good, with just a little gap showing
where the horizontal stabilizers joined the fuselage. Removing all the tape, I
started construction on the cockpit area. The cockpit consisted of a plastic
floor, seat, control column, and molded-in rudder pedals. I assembled these and
painted the assembly with Model Master Interior Green enamel, with Testor’s flat
black for the instrument panel and side consoles. Instrument panel and console
dials and knobs are represented by decals in this model, and I used them in my
model, sealing them with Future. I installed the wine foil seat belts, painting
on representations of buckles with silver paint, then dry brushed the assembly
with a lightened Interior Green shade. I also painted the interiors of the two
halves of the fuselage with Interior Green, then glued the cockpit assembly in
place, then glued the two fuselage halves together with Ambroid cement. Taking
the bottom of the main wing, which was in one piece, I drilled out and shaped
the shell ejector chutes. I had the intention of drilling holes into the kit
supplied guns, but when trying to drill into the representations of the 20 mm
cannons, I snapped one in half between my thumb and forefinger. Lesson is:
Don’t attempt to drill these out unless you have a drill fine enough.
Apparently, mine wasn’t. So, the kit cannon were unusable, and I had to resort
to building the earlier -5N with the 50 cal machine guns. The main wing
assembly went together with Ambroid with no problems encountered, then glued to
the fuselage, followed by the horizontal stabilizers. The fuselage has the tail
antennae molded to it. During handling, I managed to snap this off as well. I
fashioned a replacement from Squadron plasticard, and put it aside for later
glueing. The stabilizer-to-fuselage gap I sealed up using Squadron White putty,
followed with a swipe of an acetone-dipped Q-tip, so that I wouldn’t have to
sand the joints.
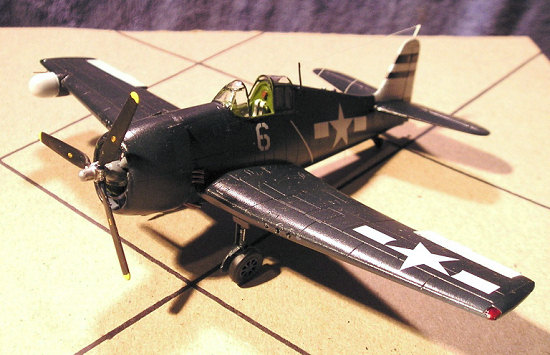 The engine is molded in two pieces, but the way it joins together would have
both banks of cylinders with their rocker arms facing each other. I solved this
problem by using stretched sprue for the rocker arms, then drilling holes in
each cylinder to accommodate spark plug wiring from very thin telephone copper
wire. The engine was painted with SnJ Aluminizer, with the engine firewall
painted in zinc yellow chromate. The interior of the engine cowl was painted in
the same color. When these subassemblies were dry, I added the exhaust pipes
representations to the indentations just behind the firewall, then glued the
engine on, followed by the cowl. I sanded out all the fuselage seams with
sanding sticks of varying grit, then rescribed any worn panel lines with the
reverse tip of an X-Acto knife. I inserted and superglued the Minnimecca gun
barrel replacements into the representative 50 cal holes in the main wings, but
the glue didn’t hold strong enough to stagger the guns, so they ended up being
flush to the leading edge… another faux pas on my part. The instructions give
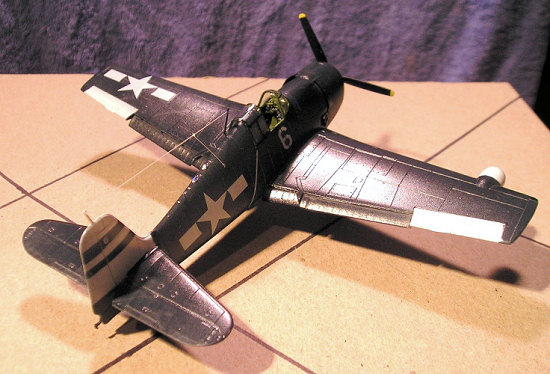
you the option of posing the main wing flaps either up or down. I elected to
pose them down. While all this was going on, the canopy parts were dipped in
Future and allowed to dry. I gave the airframe a wash in warm water and
dishwasher liquid, and it was ready for priming.
The engine is molded in two pieces, but the way it joins together would have
both banks of cylinders with their rocker arms facing each other. I solved this
problem by using stretched sprue for the rocker arms, then drilling holes in
each cylinder to accommodate spark plug wiring from very thin telephone copper
wire. The engine was painted with SnJ Aluminizer, with the engine firewall
painted in zinc yellow chromate. The interior of the engine cowl was painted in
the same color. When these subassemblies were dry, I added the exhaust pipes
representations to the indentations just behind the firewall, then glued the
engine on, followed by the cowl. I sanded out all the fuselage seams with
sanding sticks of varying grit, then rescribed any worn panel lines with the
reverse tip of an X-Acto knife. I inserted and superglued the Minnimecca gun
barrel replacements into the representative 50 cal holes in the main wings, but
the glue didn’t hold strong enough to stagger the guns, so they ended up being
flush to the leading edge… another faux pas on my part. The instructions give
you the option of posing the main wing flaps either up or down. I elected to
pose them down. While all this was going on, the canopy parts were dipped in
Future and allowed to dry. I gave the airframe a wash in warm water and
dishwasher liquid, and it was ready for priming.
| COLORS & MARKINGS |
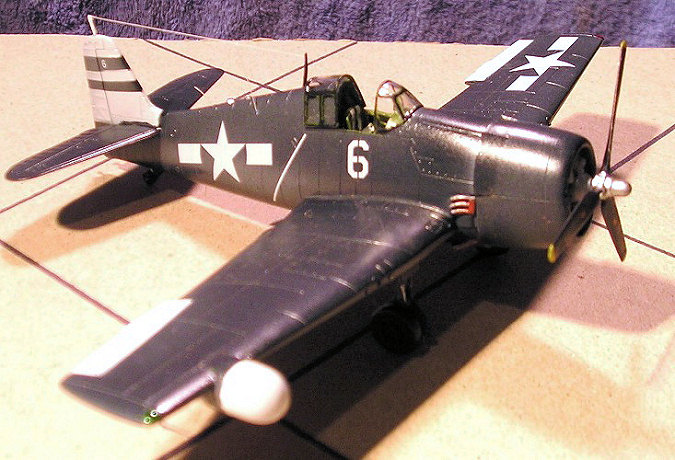
The paint scheme for Navy Hellcat nightfighters is simple… it is all Navy dark blue. After priming the airframe, I shot a 50/50 mix of Testor’s Dark Navy Blue and Flat Black. Attracted to the scheme of the aircraft flying from the decks of the USS Randolph from late 1944, I first shot a coat of white for the vertical tail, aileron surfaces, and the front of the radome, then masked these off with Tamiya tape. The model was then given a coat of Future for decaling, and I mixed and matched the decals to make a Randolph bird.
| FINAL CONSTRUCTION |
 After the aircraft was
painted, I attached the landing gear, including some thin copper wire painted
black for brake lines, a pitot tube made from thin solder wire (I lost the kit
pitot to the carpet gnomes), and the arresting hook. The canopy framework was
painted, and the canopy plus the glass armor piece was glued with white glue to
the model, with the sliding canopy portion left in the open position. I painted
formation lights on both the dorsal spine and bottom of the fuselage using a
combination of silver and clear Tamiya paints, fashioned antennas out of
stretched sprue, and model was complete.
After the aircraft was
painted, I attached the landing gear, including some thin copper wire painted
black for brake lines, a pitot tube made from thin solder wire (I lost the kit
pitot to the carpet gnomes), and the arresting hook. The canopy framework was
painted, and the canopy plus the glass armor piece was glued with white glue to
the model, with the sliding canopy portion left in the open position. I painted
formation lights on both the dorsal spine and bottom of the fuselage using a
combination of silver and clear Tamiya paints, fashioned antennas out of
stretched sprue, and model was complete.
| CONCLUSIONS |
The name of this game is fun, and that is what this kit provides you. It will relieve your AMS syndrome with no major headaches and with a good fit. Just watch out for the engine assembly and be careful with the delicate parts, and a fine little Hellcat can be yours. I highly recommend it for all levels of modelers, if you can find it, for it is out of production. Some people say that the Hasegawa Hellcats are better representations, with the main landing gear depicted beefy as they should be, but I believe this is a good model of a Hellcat nightfighter.
| REFERENCES |
Anderton, David A., Hellcat Fighter, in The Great Book of World War II Airplanes. 1996, Zokeisha Publications, Ltd.
September 2007
Copyright ModelingMadness.com. All rights reserved. No reproduction in part or in whole without express permission.
If you would like your product reviewed fairly and fairly quickly, please contact the editor or see other details in the Note to Contributors.