| KIT #: | 61034 |
| PRICE: | $29.00 MSRP |
| DECALS: | Three options |
| REVIEWER: | Michael Stanley |
| NOTES: | Eagle Strike 48016 Grumman Martlets 1941 - 1944 Pt. 1 |
| HISTORY |
 "The fuselage is short and fat,
the plank-like wings are square and flat.
While out behind in foul or fair,
the Martlet's tail stands fair and square."
- Wartime verse
On Christmas Day 1940, almost a full year before Pearl Harbor, two Martlets
based at the British Home Fleet base of Scapa Flow shot down a Ju-88 bomber.
This was just the beginning of the successful use of the Grumman G-36, known in
the
The British ordered 100 Martlets equivalent to the
| THE KIT |
This kit by Tamiya is very close
to the elusive "perfect" model. The only criticism that I have heard of it is
that the cockpit floor is not cut away as on the real Wildcat. This is quickly
resolved with some deft use of your sprue cutters.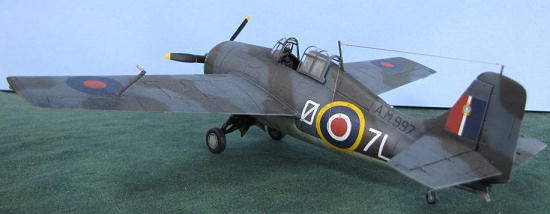
To build a Martlet II, I had to make the following changes to the basic kit:
1. Change to single cowl
flaps from the three per side of the kit.
2. Remove front air scoop and intercooler intakes from cowling.
3. Remove engine magnetos. The magnetos on the P&W engine were moved to the rear
on this version.
4. Change to overwing pitot tube.
5. Add frame on windscreen
6. Modify prop to Curtiss type with rounded hub.
| CONSTRUCTION |
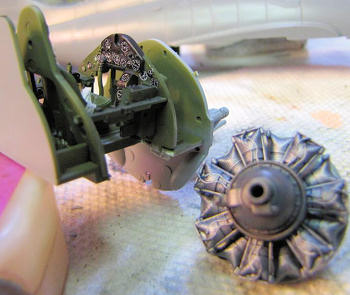 Construction begins with the
cockpit. As noted above the floor needs to be trimmed away to represent the
floorless cockpit of the Wildcat / Martlet. I also used Mike Grant instrument
panel decals to dress up the cockpit. The cockpit was painted Model Master Dark
Green FS 34079 which is close to the Bronze Green of the original.
Construction begins with the
cockpit. As noted above the floor needs to be trimmed away to represent the
floorless cockpit of the Wildcat / Martlet. I also used Mike Grant instrument
panel decals to dress up the cockpit. The cockpit was painted Model Master Dark
Green FS 34079 which is close to the Bronze Green of the original.
I had a cowling from an Hobby Boss
1/48th Wildcat that had the correct flap configuration so I just sanded off the
air scoop and carefully removed the intercooler scoops --- wrong! The Hobby Boss
kit is not a copy of the Tamiya kit as I have read on the always correct
Internet. The Hobby Boss cowling was too small to fit the Tamiya kit. I then
modified the Tamiya cowling by sanding down the air scoop, removing the
intercooler scoops and filling the cowl flaps. At this time you will also need
to fi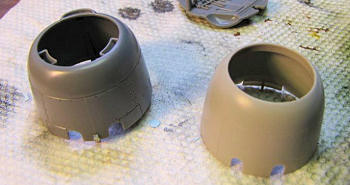 ll the holes in the wing for the Wildcat -4 wing tanks and the pitot tube
mounting on the lower left wing.
ll the holes in the wing for the Wildcat -4 wing tanks and the pitot tube
mounting on the lower left wing.
If you are careful with further
construction you can probably get the rest of the kit assembled so well that you
will not need filler. My trick to this is using MEK as liquid glue. This glue is
fairly "hot" but with some practice you can apply just the right amount, wait a
few seconds and then squeeze to get a nice ridge of melted plastic which you can
later trim or sand to eliminate seams without filling.
I removed the front magnetos from the engine and then painted it Floquil
gunmetal with a black wash to bring out the cooling fins.
I fashioned the pitot tube by trimming off the kit pitot and gluing it to a suitable piece of streamline strut from my spares box. I used the few pictures I could find to guesstimate the mounting angle.
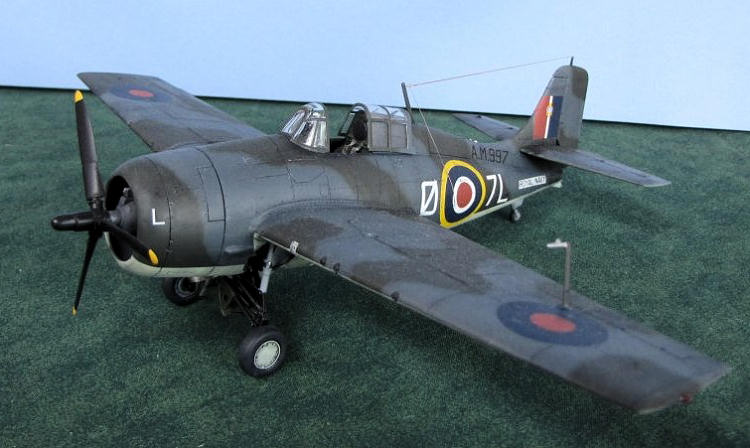
| COLORS & MARKINGS |
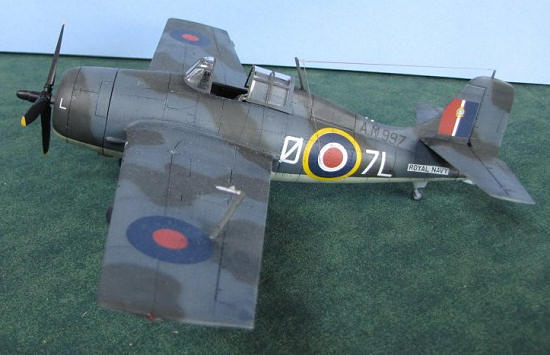
With most of the assembly done, I
preshaded with dark gray. The undersides were sprayed with Model Master enamel
Sky. Once this was dry I masked off the Sky and painted the to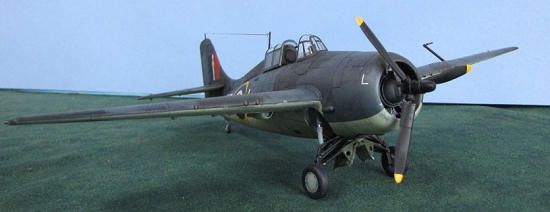 psides a dark gray
from some very old Pactra International enamels that I still have around. Then I
marked out the camouflage pattern with a pencil. At this point I always do a
very thorough cleaning of my Iwata HP-B airbrush with the optional .020 tip and
needle. Then, holding my tonque in just the right position, I free handed the
greenish olive drab that I had chosen to replicate the Dk. Slate Gray. The
canopy was masked using Scotch magic tape trimmed with a new scalpel blade.
After the coat of Future had set overnight I applied the Eagle Strike decals.
psides a dark gray
from some very old Pactra International enamels that I still have around. Then I
marked out the camouflage pattern with a pencil. At this point I always do a
very thorough cleaning of my Iwata HP-B airbrush with the optional .020 tip and
needle. Then, holding my tonque in just the right position, I free handed the
greenish olive drab that I had chosen to replicate the Dk. Slate Gray. The
canopy was masked using Scotch magic tape trimmed with a new scalpel blade.
After the coat of Future had set overnight I applied the Eagle Strike decals.
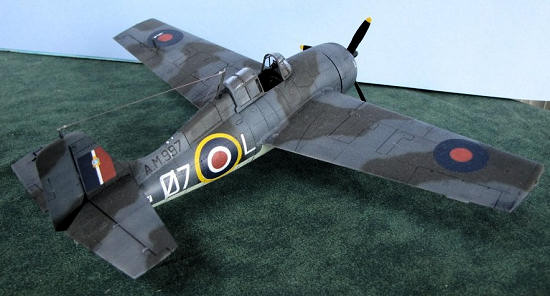
The landing gear and other bits were added. The Tamiya canopy will sit in the open position very realistically, so you don't need to resort to a vac canopy.
| CONCLUSIONS |
I have
been a fan of the Wildcat ever since I was very young and read of the exploits
of Butch Ohare, the Marines on Wake and the Cactus air force on Guadalcanal. I
have built many Wildcats since that time beginning with the old Monogram kit
with folding wings. I enjoyed researching and building this Wildcat in different
clothes.
| REFERENCES |
 1. The Wildcat in WWII, Barrett
Tillman, ISBN: 0-933852-32-0
1. The Wildcat in WWII, Barrett
Tillman, ISBN: 0-933852-32-0
2. The Grumman Wildcat in FAA Service, Bruce Archer
If you would like your product reviewed fairly and quickly, please contact the editor or see other details in the Note to Contributors.
February 2010
Copyright ModelingMadness.com. All rights reserved. No reproduction in part or in whole without express permission from the editor.