| KIT #: | 72171 |
| PRICE: | |
| DECALS: | Two options |
| REVIEWER: | Carmel J. Attard |
| NOTES: | Short run kit |
| HISTORY |
The Yak company first produced the Yak-200
in the twin engine series trainer aircraft. This was built in March 1953 and
factory tests were completed in July 1953. Following tests the prototype was
transferred to Soviet Air Force National Flight Test Centre. Further test
flig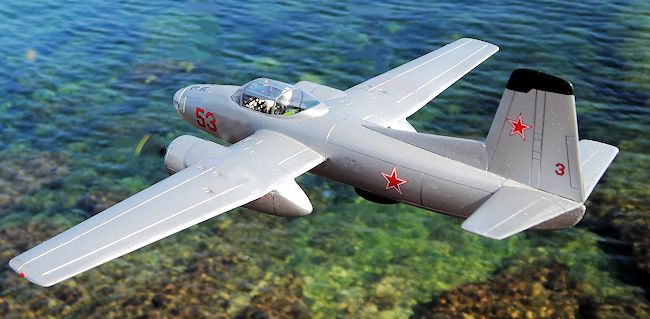 hts revealed many disadvantages and the aircraft was returned to the
Design Bureau during which construction enhancement were undertaken.
hts revealed many disadvantages and the aircraft was returned to the
Design Bureau during which construction enhancement were undertaken.
Four months which followed the flight tests of the Yak-200 a special version had evolved that was adopted for Navigator training named Yak-210. The new type received additional equipment in the Navigator's compartment such as PSBN-M radar sight and AFA-BA-40 camera. Both the Yak-200 and Yak-210 however never entered into serial production as the Soviet Air Force gave preference to the Ilyushin Il-28U jet as training aircraft for its fleet of Il-28 medium bombers.
| THE KIT |
 This is a kit of a somewhat rare type which had hardly been heard of in
view of its short history. Injection molded in medium gray plastic the kit
has 48 parts., has a 6 page instruction containing brief history, plan view
of 6 frets of parts to use, two of which are not to be used and probably go
with another kit of its predecessor Yak-200. The small decal sheet also
caters for both types as it is adopted for Kit No 72171 and 72162 for the
Yak-210 and Yak-200 respectively. There are 9 stages of construction and the
back page with 4 view drawing showing color detail and decal placement.
This is a kit of a somewhat rare type which had hardly been heard of in
view of its short history. Injection molded in medium gray plastic the kit
has 48 parts., has a 6 page instruction containing brief history, plan view
of 6 frets of parts to use, two of which are not to be used and probably go
with another kit of its predecessor Yak-200. The small decal sheet also
caters for both types as it is adopted for Kit No 72171 and 72162 for the
Yak-210 and Yak-200 respectively. There are 9 stages of construction and the
back page with 4 view drawing showing color detail and decal placement.
| CONSTRUCTION |
Construction
starts with assembling the cockpit office which has 9 parts. The rear deck
needs to cut the rear oval part in order to fit in the fuselage space. I
added detail to side consoles and also two scale crew figures to both c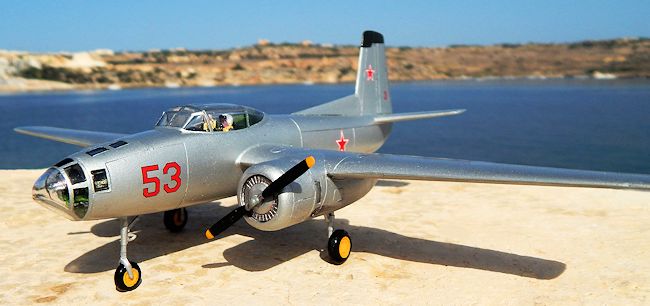 rew
seats which also contained some flash that needed careful removal with a
pointed blade. The whole assembly then was inserted and glued to one half of
fuselage part. The pre-painted instrument panel and front wheel well were
also fixed in place. Being a tricycle undercarriage that have heavy rear
fuselage I had to decide where to ad weight as there was no indication
concerning this in the instructions. So I added a flat piece of lead ahead
of cockpit and also flat pieces to front portion of both engine cowlings. At
this stage I also added a crew seat to nose space and some side panel
instruments to augment the detail in the kit.
rew
seats which also contained some flash that needed careful removal with a
pointed blade. The whole assembly then was inserted and glued to one half of
fuselage part. The pre-painted instrument panel and front wheel well were
also fixed in place. Being a tricycle undercarriage that have heavy rear
fuselage I had to decide where to ad weight as there was no indication
concerning this in the instructions. So I added a flat piece of lead ahead
of cockpit and also flat pieces to front portion of both engine cowlings. At
this stage I also added a crew seat to nose space and some side panel
instruments to augment the detail in the kit.
Instructions indicate that the kit is
intended for experienced modeler but this may be due to the lack of locating
pins that will normally be present in injected kits to facilitate aligning
parts together. So I added intermittent tab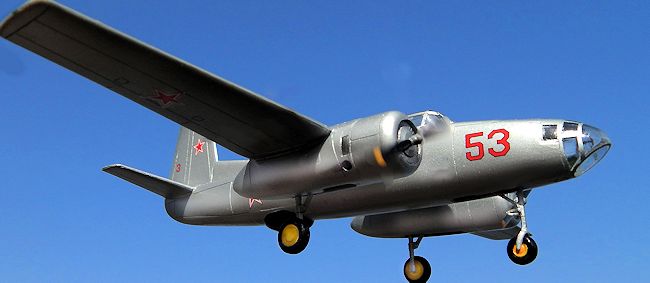 s along the parting line which
will serve as guides. Same applied to both engine nacelles and all parts
went together well. Main wings and tail planes also lacked pins and care was
taken when fixing them together.. The belly radome fitted snugly in its
place and finally the undercarriage legs were fixed in place which quickly
indicated that I had placed the right amount of lead weight to make kit
balance on the nose wheel.
s along the parting line which
will serve as guides. Same applied to both engine nacelles and all parts
went together well. Main wings and tail planes also lacked pins and care was
taken when fixing them together.. The belly radome fitted snugly in its
place and finally the undercarriage legs were fixed in place which quickly
indicated that I had placed the right amount of lead weight to make kit
balance on the nose wheel.
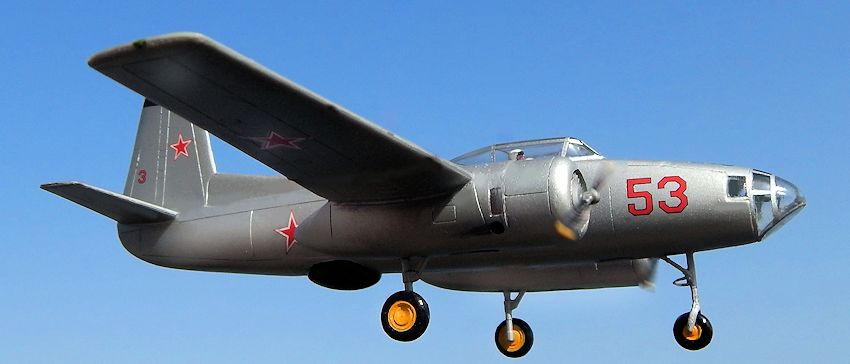
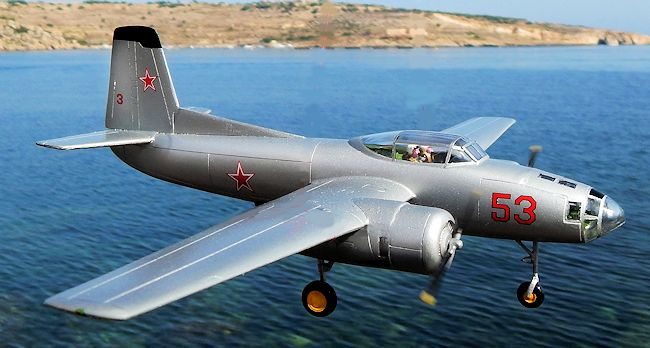
I painted the interior cockpit green as there was no indication on the instructions to do it otherwise. The kit was silver overall and I added coats of Future to make it shiny and in preparation for decal application. There were 10 decal items to go on the model and the decals were of good quality
| CONCLUSIONS |
Although this is not an impressive model it still added another kit of the Soviet era which falls among the types that remained unknown for many years. It is well worth adding it to any collection that deals with Soviet aircraft types.
September 2015
If you would like your product reviewed fairly and fairly quickly, please contact the editor or see other details in the Note to Contributors.