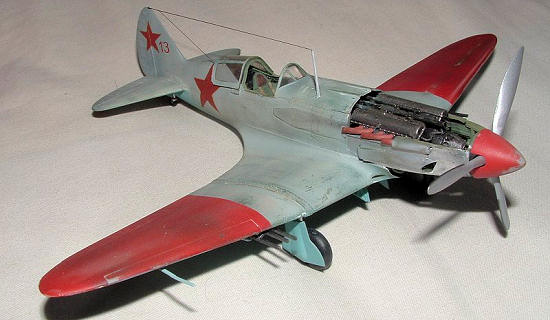
ICM 1/48 MiG-3
| KIT: | ICM 1/48 MiG-3 |
| KIT #: | ? |
| PRICE: | $? |
| DECALS: | I'm sure there are several options |
| REVIEWER: | Mark Fordham |
| NOTES: | This boxing comes with pilot and ground crew set |
| HISTORY |
Much has been written and posted about the Mig 3 on the www. Googling (or whatever is your favorite search engine) will provide a huge amount of information on the subject, suffice to say The Mig 3 when introduced was one of the VVS newest and advanced fighters, with exceptional performance at high levels but lacked maneuverability and performance at lower levels.
| THE KIT |
| CONSTRUCTION |
Construction as usually the case with Aircraft models started
with the cockpit, now I’ve only switched to 1/48th scale models in
the last 6 months or so and this is my second or third ever 1/48th
scale model, coming from 1/72nd scale where I cost get away with
slapping everything to gather and painting it green wasn’t going to cut it on
this one so more care and attention was needed
 with
washes and detail, considering I don’t have the patience to normally spend too
much time in the ‘pit’ I think for an OOB typ
with
washes and detail, considering I don’t have the patience to normally spend too
much time in the ‘pit’ I think for an OOB typ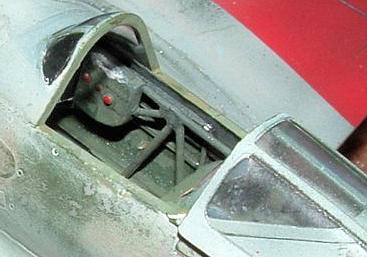 e
model the detail supplied by ICM is enough, the only thing I added was some
homemade belts and buckles in the cockpit and a few bits of detail on the
fuselage walls.
e
model the detail supplied by ICM is enough, the only thing I added was some
homemade belts and buckles in the cockpit and a few bits of detail on the
fuselage walls.
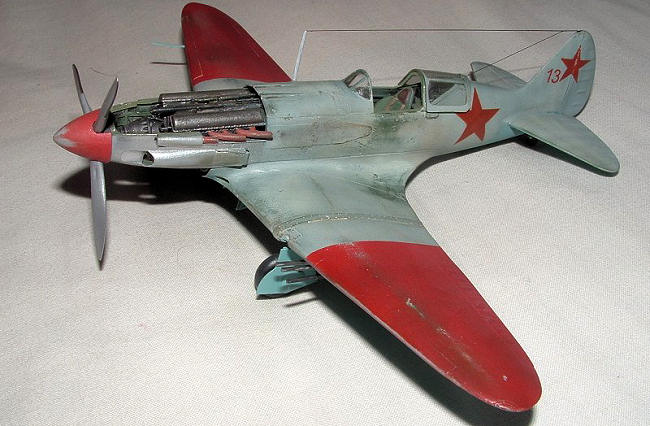
I had decided from the beginning of construction to install
the engine on this one so it was assembled and carefully painted and drybrushed
to highlight the details, trying to get the mounts installed and in the right
place called for a degree in patience, yoga and 16 fingers.
Once everything was painted the fuselage was closed up and
then I moved onto the wings, boy talk about making thing complicated, it looks
like ICM wanted to make it almost
impossible to assemble the 13 piece wings without filler and lots and lots of
naughty words, however if you take it slow and glue, tweak, bend, scrape. Glue,
tweak, bend rinse, repeat you might be able to get it all together without
destroying the fuselage detail in the process.
With the main construction now completed I could reward myself with some of the easier bits like the huge drag inducing radiator box under the fuselage and assembling the props and undercarriage.
| COLORS & MARKINGS |
The ICM decals are pretty much useless as I had discovered
from building the ICM Yak 7, however I did try once or two of the decals just in
case …. Yup sure enough they touched water and went “poof”, 16 million shards of
decal slowly float to the side of the dish.
‘Sigh’
. Now that the kit decals where off the menu and my stash of 1/72nd
scale decals where not going to be much help I needed a simple generic scheme
for the Mig.
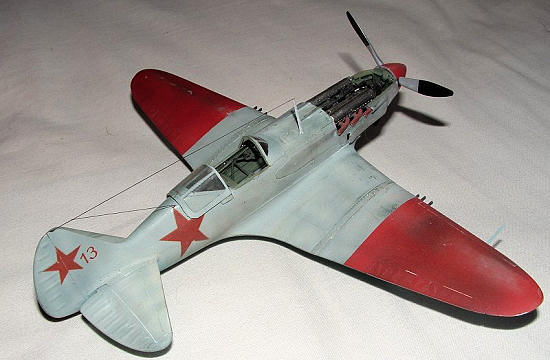
 Many
years ago I had built a Mig3 in the white winter distemper and red wings but
wasn’t happy with the overall effect in the smaller scale so I decided to try it
in the larger scale, after searching the Interweb thingy I discovered the
original photo showing a lineup of ½ doz Migs painted this way, towards the back
of the photo one of the Migs had a no13 on the tail, stars and that was it..
nice and simple,
Many
years ago I had built a Mig3 in the white winter distemper and red wings but
wasn’t happy with the overall effect in the smaller scale so I decided to try it
in the larger scale, after searching the Interweb thingy I discovered the
original photo showing a lineup of ½ doz Migs painted this way, towards the back
of the photo one of the Migs had a no13 on the tail, stars and that was it..
nice and simple,
I first sprayed the upper surfaces with a generic green as a
base for the distemper, filling my airbrush with thick undiluted
tamiya white I randomly sprayed a thick white coat in areas of LEAST
wear, once that was dry I emptied half the paint out and added the same amount
of thinner and proceeded to spry the rest of the upper surfaces until I
reasonably even coat was achieved. The Red was masked off and spayed the same
way, IE the trailing edge of the wings where treated to a thick coat and the
leading edge a thinner coat.
I left everything to harden up for a couple of days then broke
out the toothpaste to do the weathering. I used a gritty type of toothpaste and
added a dab onto the pad of my finger and proceeded to carefully wear my way
through the white and red, paying careful attention to areas of high wear and
leading edges, carefully wearing the white away until the underlying green
primer started to show though the white and red and in some places right the way
down to the aluminum.
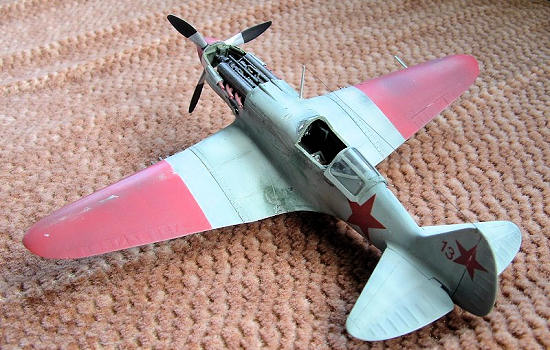
Once I was happy with the effect I used the home inkjet
printed decals that my good mate Jim in OZ had printed up for me on his printer,
being inkjet printed they where thin and slightly “washed out” in colour, once
applied though they looked just like faded paint! A most excellent effect,
Thanks Jim
| CONCLUSIONS |
 Well apart
from the jigsaw puzzle, migraine and naughty word inducing wings the ICM Mig was
a excellent build, I was really happy with the final outcome and for personally
it turned out to be one of my better builds, Ok the marking aren’t quite
historically accurate and I’ve used a lot of artistic license in where the red
on the wings finish and the weathering as I didn’t have access to a huge amount
of information etc I’m still happy with it.
Well apart
from the jigsaw puzzle, migraine and naughty word inducing wings the ICM Mig was
a excellent build, I was really happy with the final outcome and for personally
it turned out to be one of my better builds, Ok the marking aren’t quite
historically accurate and I’ve used a lot of artistic license in where the red
on the wings finish and the weathering as I didn’t have access to a huge amount
of information etc I’m still happy with it.
Thanks to Mike Horrell for the ICM kit.
| REFERENCES |
Interweb
thingie
If you would like your product reviewed fairly and quickly, please contact me or see other details in the Note to Contributors.