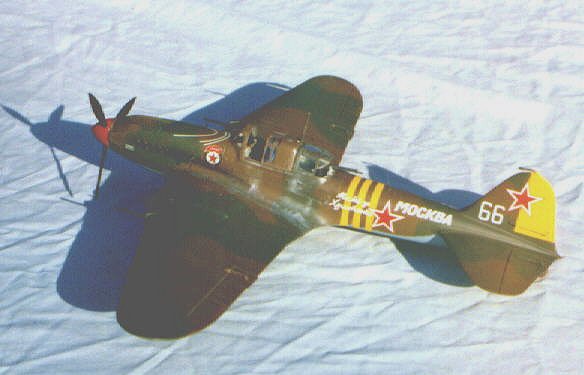
Kit : ILYUSHIN IL-2m3 SHTURMOVIK
Scale: 1/48
Manufacturer: Accurate Miniatures
Price: MSRP: $28.95
Media: injection-molded plastic
Decals: one well-publicized aircraft seen on the Leningrad front.
Accuracy: They aren't called Accurate Miniatures for nothing.
Overall A-
Date of Review: October 26 1997
Reviewed By: Thomas McKelvey Cleaver (THE AERONUT)
Until recently, the only model one could do of the airplane that meant as
much to the people of the Soviet Union during the Second World War as the
Spitfire did to the British and the Zero to the Japanese was a
completely-inaccurate and very primitive 1/72 Airfix kit. Thus, I was really
interested when Accurate Miniatures announced they would do Shturmoviks last
year, and was particularly happy that the first "Ilyusha" released would
be the definitive "IL-2 Modified (Type 3)." When I walked in my local hobby
shop last week and Tony gave me the first one to arrive to "build for the
shop," I took it home and got right to work.
Opening the box, it's Accurate Miniatures, all right: clean, crisp moldings,
the clear parts and decals not only separately bagged but separated from
the other bag by a cardboard shelf. I took out the instructions and
read them, having learned the hard way that - with an Accurate Miniatures
kit - it is essential to read the instructions and follow them point for
point to avoid difficulties down the line. It looked straightforward, and
a lot easier than the SBD.
It was easy to do the interior painting and assemble the sub-assemblies in
one night because the airplane is the essence of simplicity internally. My
only addition to the kit was a photo-etch brass seat belt and shoulder straps
for the pilot. One thing to watch out for is that the canvas strap that is
the gunner's seat should be curled a little bit more before putting it in
the rear cockpit, since it has to squeeze into position and is thin enough
to break easily. (I learned this the hard way.) The instrument panel is designed
for easier painting to leave the instrument faces clear, and the decal for
the instrument decal goes on well, creating a very realistic panel.
The next day I began the assembly of the sub-assemblies, and discovered that
following the instructions was not as painless as expected. The cockpit assembly,
glued the night before to the lower center wing section as instructed, fits
tightly: get everything in position and don't be afraid to give a little
push - it will click into position. Still following instructions, glue the
engine cowling subassembly to the main fuselage. Now the wings...
At this point, if you have glued the upper and lower outer wings together
per the instructions, you will experience major difficulty with the tight
fit. No matter how hard I tried, I could not get the left wing to fit into
position without leaving a 1/32" gap in the attachment area of the wing fillet.
The right wing was also hard to get into position, but it did go without
the gap. Putty and a file solved the problem, but it shouldn't be required.
My solution is: before the fuselage halves are glued together, set in the
upper wing to its mating position and glue it there. Let it dry overnight
with the rest of the subassemblies. Then snap in the cockpit and mate the
lower center wing section to the inner upper wings and glue them together.
Attach the cowling and fit it onto the section of upper wing that touches
it. This will aid alignment of the cowling to the fuselage. Finally, attach
the lower outer wing sections. It will fit like a dream (I tried this with
a kit a friend bought).
The canopy glass is thin and clear, and fits well if you slide back the pilot's
canopy. There is so much armor and so little glass that if you don't open
it, no one will be able to see that great instrument panel.
I ended up not doing the kit decals, but only because I managed to spill
a drop of Easy Lift Off on one of the "For Leningrad" markings, which melted
it. Fortunately I have a lot of World War II Red Air Force decals in the
decal box, and a couple of sources of photos, so my "Ilyusha" is a 6th Guards
Regiment bird on the Polish Front, summer 1944.
A note when weathering this model: "Ilyusha" was ridden hard and hung up
wet thoughout its career, so mud splatters on the lower wing and footwalk
weathering is going to do nothing but make it look real. However, IL-2m3's
up until the summer of 1944 had wooden rear fuselages, tail surfaces and
outer wings, with the only metal part of the airplane being the armored forward
fuselage and cowling, and the center section of the wing. In summer 1944,
the outer wings were made of aluminum, but the rear fuselage and tail surfaces
were wood throughout its production of 40,000 airframes. So...don't put aluminum
nicks on wooden surfaces.
The only reason I give this model an A- instead of an A+ is the difficulty
of assembling the wings. But then, if some part of the assembly didn't drive
you nuts (the tunnel gun and radioman's seat in the TBF, the rudder pedal
foot guides in the SBD, the floor in the Allison P-51s) it wouldn't be an
Accurate Miniatures kit, would it?
Back to Main Page
Back to Reviews Page