
Octopus 1/72 I.M.A.M. Ro-44
| KIT #: | 72054 |
| PRICE: | $33.98 MSRP when new |
| DECALS: | Three options |
| REVIEWER: | Carmel J. Attard |
| NOTES: | Short run multimedia kit. |
| HISTORY |
 The
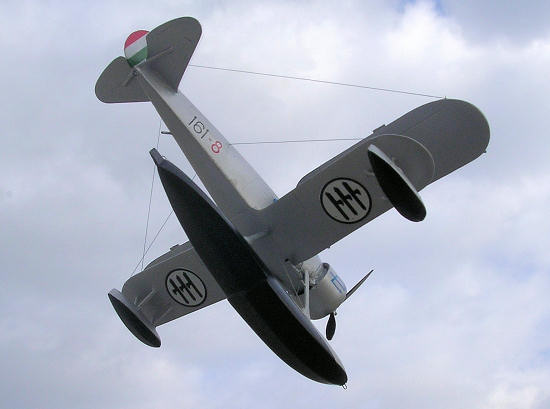
IMAM Ro44 was a single seat floatplane version of its predecessor Ro-43
Reconnaissance aircraft both of which carry a single central float, aided by two
smaller outrigger floats to keep the aircraft buoyant once it lands on the sea.
Unlike the Ro-43, the Ro-44 was a single seater with the back cockpit and aft
gun position being faired over and a twin Breda Sefat 12.7 Cal Machine guns
mounted in the nose cowling. A 9-cylinder Piaggio 700HP P-XR radial engine
provided the Ro-44 with a speed close to 200 mph at 8200 Ft, and a range of 746
miles which was quite substantial for a patrol plane in those days prior to the
2nd world war. Regia Marina ordered 35 of these floatplanes back in
1937. These were attached to the 88 GruppoAutonomo da Caccia Marina.
This group was assigned to protect the entire Italian Navy and for patrol duties
over the
The
IMAM Ro44 was a single seat floatplane version of its predecessor Ro-43
Reconnaissance aircraft both of which carry a single central float, aided by two
smaller outrigger floats to keep the aircraft buoyant once it lands on the sea.
Unlike the Ro-43, the Ro-44 was a single seater with the back cockpit and aft
gun position being faired over and a twin Breda Sefat 12.7 Cal Machine guns
mounted in the nose cowling. A 9-cylinder Piaggio 700HP P-XR radial engine
provided the Ro-44 with a speed close to 200 mph at 8200 Ft, and a range of 746
miles which was quite substantial for a patrol plane in those days prior to the
2nd world war. Regia Marina ordered 35 of these floatplanes back in
1937. These were attached to the 88 GruppoAutonomo da Caccia Marina.
This group was assigned to protect the entire Italian Navy and for patrol duties
over the
| THE KIT |
This is a good modelling
subject for those like-minded scale modellers who consider floatplanes a thrill
or would enjoy expanding the Italian models section. The kit is injection
moulded medium grey plastic with the addition of resin parts and a vacform
canopy. A nice quality decal sheet with items for a prewar or a wartime exa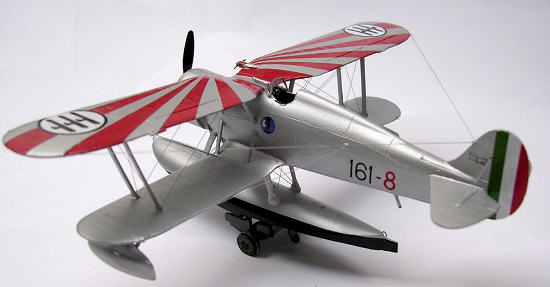 mple
can be produced. The surface detailing of parts is very good especially the
fabric skin portion which is well represented in fine texture and includes wings
with sharp trailing edges. Other smaller injection moulded parts have a small
amount of fuzzy flash and require some cleaning up. The main parts have
beautiful fine detail and well to scale.
mple
can be produced. The surface detailing of parts is very good especially the
fabric skin portion which is well represented in fine texture and includes wings
with sharp trailing edges. Other smaller injection moulded parts have a small
amount of fuzzy flash and require some cleaning up. The main parts have
beautiful fine detail and well to scale.
Being a limited run kit it lacks locating pins on parts and therefore care is required upon joining the halves together. A ten-page instruction sheet that is quite comprehensive simplifies the sequence of construction and is easy to follow. The upper wing which is a pure gull and the lower one an inverted gull allow a normal wing gap to be achieved when these are attached to the fuselage and simplifies the construction of the biplane. The lower wing comes in one piece and care should be taken when fixing the integral fuselage centre section to produce perfect alignment.
For a look at the sprues, please visit the preview.
| CONSTRUCTION |
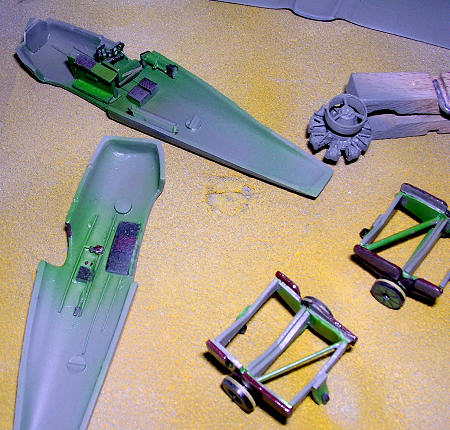
Other items that needed some trimming were the resin cast radial engine. and it was gently cleaned with a modeling knife around the periphery to remove the finning. The instruction sheet also mentions that one should drill a central hole to take the propeller shaft. As I was doing so I also drilled the outlet of the "U" shaped resin exhaust pipe to a depth of 3 mm from each exit. I also noticed that the float to fuselage forward struts carry a step fitting. These are at different place on different struts and are well indicated on the instruction sheet. I had to add these from two stretch sprue pieces of plastic as in my example these were missing.
The kit also provides
parts for an accurate trolley. Fortunately this was
 easy
to copy and scratch built another one for my vacform and resins ‘Airmodel kit’
of the Ro-43 that came without it. Supplying a beaching trolley is a very wise
idea for Pavla/Octopus as it is difficult to display a single floatplane without
one. Finally there are the propeller blades which are individually moulded and
can be tricky when fitting these to the shaft assembly. The acetate windscreen
only one of which was supplied in my example was carefully trimmed to fitting
size and set in place with PVA glue.
easy
to copy and scratch built another one for my vacform and resins ‘Airmodel kit’
of the Ro-43 that came without it. Supplying a beaching trolley is a very wise
idea for Pavla/Octopus as it is difficult to display a single floatplane without
one. Finally there are the propeller blades which are individually moulded and
can be tricky when fitting these to the shaft assembly. The acetate windscreen
only one of which was supplied in my example was carefully trimmed to fitting
size and set in place with PVA glue.
| COLORS & MARKINGS |
Decals provide for three aircraft and
all are finished in aluminium, which I presume is an anodized type as it
operated over the Mediterranean waters. The paint mix could be obtained by
adding a few drops of white paint and drops of semi matt varnish to the silver
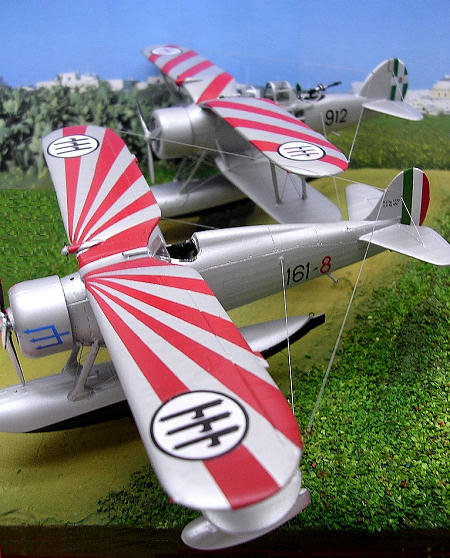
paint and mix together prior to airbrushing. One decal option represents an
R0-44 from 161 Squadriglia circa 1940, which also carry a large bright red
sunburst on the upper wing that needs to be carefully drawn, as there is no
decal issued for it. There is a choice of either an early or later rudder
markings for which detail is shown on the box-art view. Another choice is for an
aircraft from 162 Squadriglia in 1941 that was attached to the Pola seaplane
school and is also depicted on the box-art.. This latter aircraft can be altered
with one from 161 Squadriglia with only a different number.
| CONCLUSIONS |

Certainly a must kit for
the Reggie Aeronautica aircraft modelers
June 2008
If you would like your product reviewed fairly and fairly quickly, please contact the editor or see other details in the Note to Contributors.