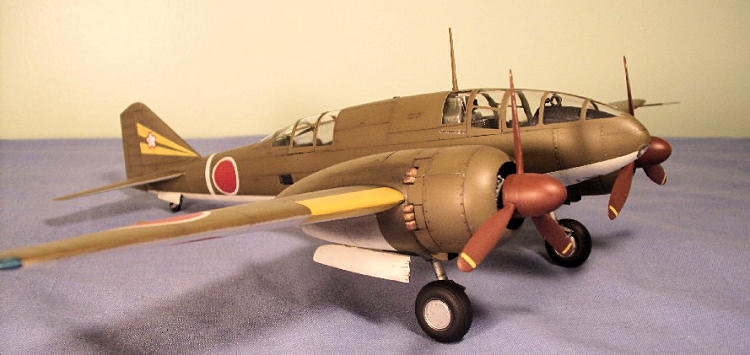
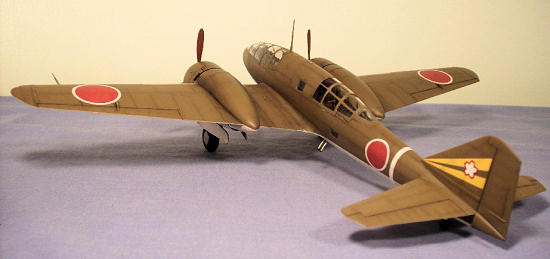
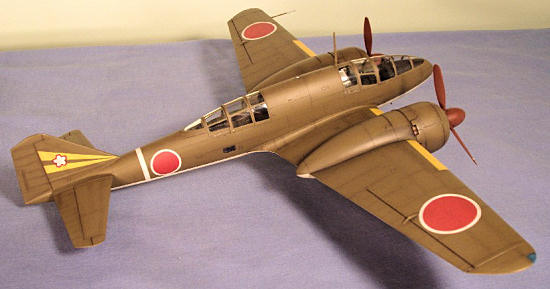
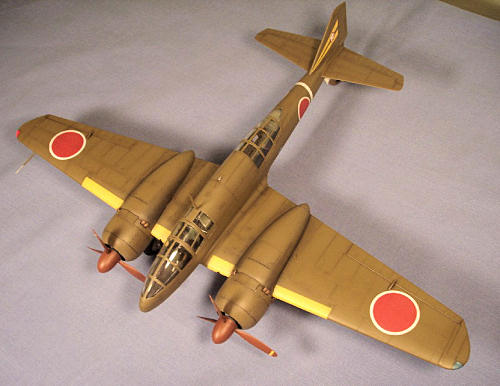
Tamiya 1/48 Ki-46-III 'Dinah'
| KIT #: | 61045 |
| PRICE: | $39.98 purchase price |
| DECALS: | Three options |
| REVIEWER: | Jonathan Prestidge |
| NOTES: | Eduard photo etched seat belts |
| HISTORY |
During the Sino-Japanese conflict, prior to the
onset of WWII, it became obvious to Japanese Army leaders that a new
reconnaissance aircraft would be required to cover the vast distances then being
encountered in China. Specifications for a high speed, long-range reconnaissance
aircraft were submitted to the Mitsubishi Corporation in 1937 with a speed and
range priority.
 Completed in 1939, the prototype had few
teething problems; however, speed was some 10% less than hoped for, but still
faster than allied fighter aircraft and even their own A6M2 Zero. Mitsubishi was
working on an advanced version of their Ha-26 engine (Ha-102), so the Ki-46 was
put into production as the Army Type 100 Model 1 Command Reconnaissance Plane.
Completed in 1939, the prototype had few
teething problems; however, speed was some 10% less than hoped for, but still
faster than allied fighter aircraft and even their own A6M2 Zero. Mitsubishi was
working on an advanced version of their Ha-26 engine (Ha-102), so the Ki-46 was
put into production as the Army Type 100 Model 1 Command Reconnaissance Plane.
In March 1941 the 1,080hp Ha-102 engine became
available and the Ki-46 II went into production, and was assigned the allied
code name “ Dinah” in 1942. The P-38F “Lightning” and F4U-1 “Corsair” were
expected soon in the Pacific, and to counter this threat, Mitsubishi was told to
increase performance by using two 1,500hp Ha-112-II engines. Ki-46
| THE KIT |
 Released in 1996, Tamiya’s Ki-46
The kit is molded in light gray plastic with finely engraved panel lines. Two seated figures are included. For a twin-engine plane there are relatively few parts. To be honest, the level of detail OOB is not up to today’s wonder kit standards. Instructions are excellent and even the paint callouts have the actual colors listed as well as the Tamiya brand paint numbers.
| CONSTRUCTION |
Given the asking price, I was a little
surprised that the kit did not assemble itself when I opened the box and emptied
the contents on the workbench! Joking aside, I started construction by painting
the interior parts, wheel wells and inner fuselage parts in a light shade of
interior green. Other bits in the interior were painted and assembled, given a
wash to bring out detail, and dry
 brushed with Testors silver. I added two sets
of Eduard’s pre-painted IJA seatbelts at this time. The ample greenhouse on this
plane means that any time spent on detailing the interior pays off. The fit of
the interior parts was great.
brushed with Testors silver. I added two sets
of Eduard’s pre-painted IJA seatbelts at this time. The ample greenhouse on this
plane means that any time spent on detailing the interior pays off. The fit of
the interior parts was great.
The only problem area I encountered with the
kit was the main landing gear. The main gear had a prominent mold shift seam
that was a pain to clean up without flat-siding the round legs. Also, the
two-part gear bays have a prominent seam down the center that is impossible to
get rid of. You see, the gear bay halves trap the main landing gear in place
when glued together. The landing gear then blocks any attempt at seam cleanup
(at least it is not readily visible). On the plus side, the gear is very sturdy.
Next, I assembled, painted and detailed the
engines. They are simple three-piece affairs (one of which is a nylon prop
retainer) but they turned out nicely. It is a shame that they are nearly
invisible on the finished model due to the design of the engine cowling. I did
not glue the engines or exhausts on at this time since they are easier to
install after the airframe is painted.
At this time I assembled the fuselage and the
wing as separate assemblies. When each was dry, I test fit them. The fit of the
wing to the fuselage was a little tight so I sanded the fuselage a bit at the
wing roots and glued them together. The tail planes were added next and they fit
perfectly. Finally, I used white glue to attach all the clear bits which fit
nicely I might add. I only noticed one flaw on the exterior of the airframe -
the upper right wing of my kit had some sink areas on the leading edge near the
wingtip.
On a plane with this many windows one might expect that masking them off was a pain. It was! On the real plane, it was not uncommon for the crew to suffer from anoxia (lack of oxygen) due to the extreme altitude at which they operated. While masking this beastie I suffered from anoxia due to the fact that I hold my breath while making each cut to trim the windows! Tamiya tape and several new #11 exacto blades later I was ready for paint.
| COLORS & MARKINGS |
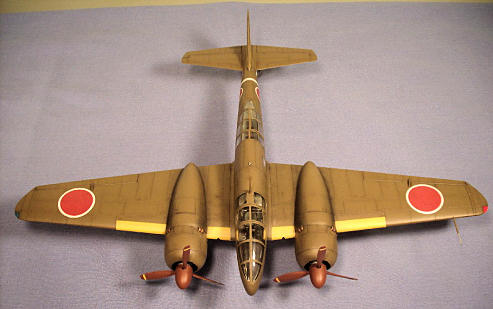
 I chose to use the kit markings for a plane
flown by the Dokuritsu Hikotai, 55th Chutai. The upper color calls for Imperial
Japanese Army green but I used IJA brown instead as it better matched the box
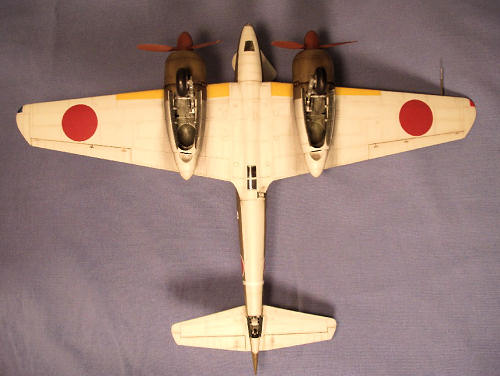
art. I air brushed Poly Scale acrylics, first spraying interior color on the
window framing, then spraying a lightened IJA gray on the underside of the
plane. I masked of the underside and shot the upper side of the plane IJA brown
as previously mentioned.
I chose to use the kit markings for a plane
flown by the Dokuritsu Hikotai, 55th Chutai. The upper color calls for Imperial
Japanese Army green but I used IJA brown instead as it better matched the box
art. I air brushed Poly Scale acrylics, first spraying interior color on the
window framing, then spraying a lightened IJA gray on the underside of the
plane. I masked of the underside and shot the upper side of the plane IJA brown
as previously mentioned.
I then highlighted panel lines and exhaust
stains using artists pastels applied with a closely cropped, dry paintbrush. I
remove any excess pastel with a kneadable eraser. This tones down the effect to
a more realistic level. I then clear coated the model with future floor polish
and added the decals. Being lazy, I used the kit-supplied yellow wing ID decals.
They did not completely conform to the wing and left a few wrinkles – Doh! The
rest of the decals went down OK, being a little on the thick side.
Once the decals were dry, I gave my Ki-46 a
final coat of almost flat clear. I used an oil based wash to further pick out
detail and to add some surface staining to the airframe.
The landing gear wheels, engines, exhausts and
other final bits were added at this time. I used Testors silver (oil-based) to
simulate chipping around maintenance panels & scuffing on areas walked on by
pilots and ground crew.
| CONCLUSIONS |
| REFERENCES |
 Kit instructions
January 2010
Copyright Modeling Madness.com. All rights reserved. No reproduction in part or in whole without express permission.
If you would like your product reviewed fairly and quickly, please contact the editor or see other details in the Note to Contributors.
Back to the Review Index Page 2023