| KIT #: | ? |
| PRICE: | $ |
| DECALS: | Two options |
| REVIEWER: | Carmel J. Attard |
| NOTES: | Short run with etched and vacuformed parts |
| HISTORY |
Following the initial successes by
the Japanese Navy and its air power during the last war, the Allies in the South
 materials from conquered areas. To
eliminate the treat of Submarines the Japanese in 1942 used a 17-Shi
specification to develop a three seat all metal monoplane designated Q1W1. This
was assigned to KK Watanabe Tekkosho (later
materials from conquered areas. To
eliminate the treat of Submarines the Japanese in 1942 used a 17-Shi
specification to develop a three seat all metal monoplane designated Q1W1. This
was assigned to KK Watanabe Tekkosho (later
The aircraft was to be powered by
two low consumption GK2C Amakaze engines, which gave maximum endurance at the
cost of low cruising speed. For this mission radar and also a magnetic anomaly
detector were essential and an armament consisted of up to 500Kg of depth
charges and a 7.7mm machine gun plus provision for a 20mm cannon in the nose.
Initial tests conducted during autumn 1943 proved satisfactory, with the plane
given combat name Tokai (
| THE KIT |
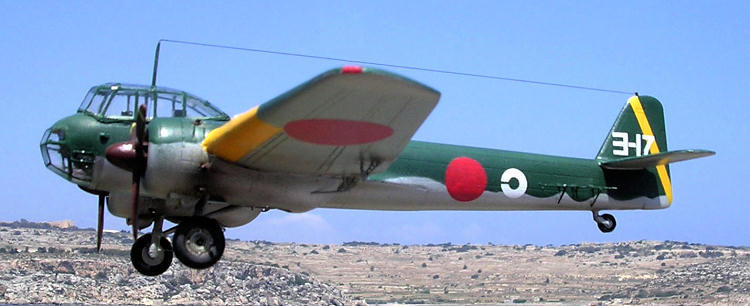
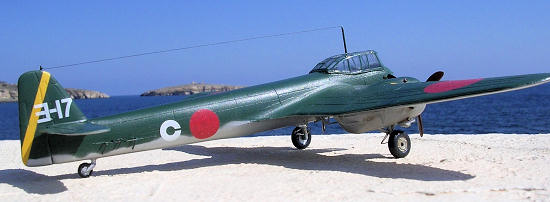
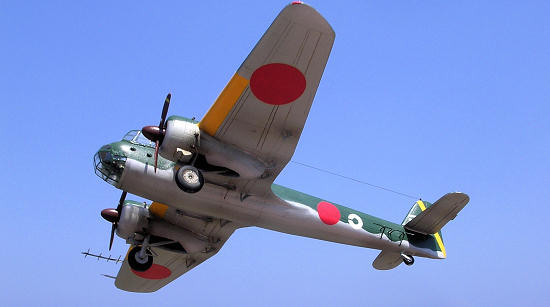
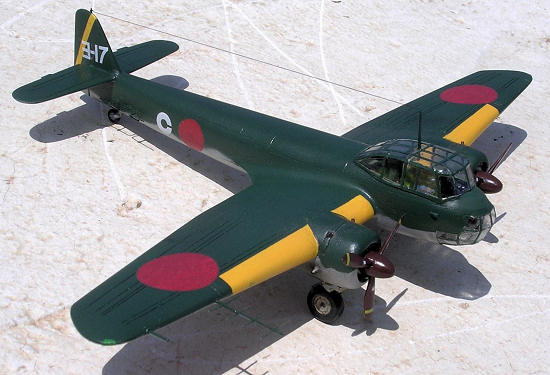
Moulded in medium grey styrene the kit consists of 35 injected parts; some 50 brass etch detail parts, and two vacform canopies. A comprehensive instruction booklet is easy to follow stage by stage. Complete sets of decals are issued for two aircraft. A Q1W1 of 901.,Kokutai, Jokosuka, that had green upper surfaces and silver lower, or a Q1W1 finished in overall light grey and which was based in Formosa in 1945.
| CONSTRUCTION |
Apparently this is one of the
early releases of Pavla models with lots of heavy runners and fining at edges of
parts requiring cleaning up before set to start assembling the kit. This is done
with a sharp Exacto razor saw and a sharp blade and a flat file for
 cleaning the
parts.
cleaning the
parts.
There are no dowel pins to assist in aligning parts together and unless short tabs are added to assist mating parts together one needs care when fixing the kit fuselage parts and wing parts. The Radial engine part item 21 has to be inserted in the cowling but to do so needs to remove a 1mm all round in order to fit. A star shaped detail goes in front which is therefore inserted first to the front of the radial engine item. Reference material indicated that the two air intakes scopes under the cowling are fixed off centre to each side., A complete cockpit to house 3 or 4 seats is decorated with brass etch metal items consisting of instruments to side consoles, foot pedals, control stick, and instruments panel. Other brass etch detail are also given for the undercarriage and wing flaps actuators. I added a hydraulic oil pipe to front of main wheel legs. Six exhaust pipes made from stretch sprue drawn to 2mm diameter and cut to lengths of 2mm are fitted around the rear of engine cowling. Their position is indicated on the colour side view on the box cover. Two small intake fairings are added to port side forward fuselage area beneath the cabin. Filler was needed to wing root joints. Radar array antennae were fixed to rear fuselage and to starboard wig tip as the final stage of assembly.
| COLORS & MARKINGS |
 I painted the interior cockpit
green and all instruments in black. Seats were brown with medium blue cushions
while seat straps were light tan. For the upper camouflage I used Compucolor
CA3, which matched the Japanese dark green. Under surfaces being a mix of
commercial grade silver, few drops of Model Master clear varnish and one or two
drops of white. The kit was given an overall coat of Johnsons Klear and the
decals fixed in place. Propeller blades and front cover were brown and yellow
decal strips attached to the blades. Kit was finally given an overall coat of
semi gloss finish.
I painted the interior cockpit
green and all instruments in black. Seats were brown with medium blue cushions
while seat straps were light tan. For the upper camouflage I used Compucolor
CA3, which matched the Japanese dark green. Under surfaces being a mix of
commercial grade silver, few drops of Model Master clear varnish and one or two
drops of white. The kit was given an overall coat of Johnsons Klear and the
decals fixed in place. Propeller blades and front cover were brown and yellow
decal strips attached to the blades. Kit was finally given an overall coat of
semi gloss finish.
| CONCLUSIONS |
M
Copyright ModelingMadness.com. All rights reserved. No reproduction without express permission from the editor.
If you would like your product reviewed fairly and quickly, please contact the editor or see other details in the Note to Contributors.
Back to the Review Index Page2025