| KIT #: | JT 89 |
| PRICE: | $ 31.95 MSRP |
| DECALS: | Three options |
| REVIEWER: | Dan Lee |
| NOTES: | Built straight from the box. |
| HISTORY |
The Shiden was a radial engine
equipped land based fighter based on the Kyofu seaplane fighter. It had
excellent maneuverability 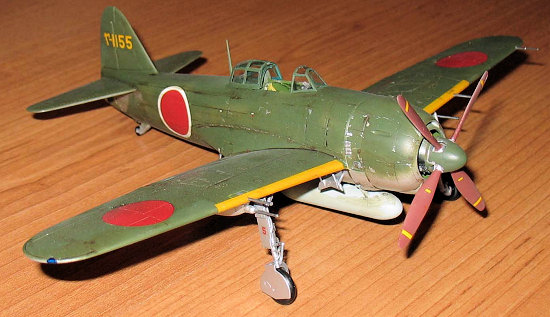 based on an automatic maneuvering flap system and had
a powerful yet unreliable engine as well as robust construction. The N1K1-Ja
was similar to the N1K1-J except it carried four 20mm cannons (two in underwing
blisters) and deleted the 7.7mm machine guns in the engine cowling (although the
gun ports remained.)
based on an automatic maneuvering flap system and had
a powerful yet unreliable engine as well as robust construction. The N1K1-Ja
was similar to the N1K1-J except it carried four 20mm cannons (two in underwing
blisters) and deleted the 7.7mm machine guns in the engine cowling (although the
gun ports remained.)
It would prove to be a matter of too little too late as the USAAF Strategic Bombing Campaign, submarine attacks on merchant shipping and fuel shortages would slow down production so that the George would be a compliment to the Zero rather than replace it in the Imperial Japanese Navy Air Force. Like all Japanese planes in the final desperate days of the war, the Shidens were often used as Kamikazes. After the war, most of the surviving Shidens and other Japanese aircraft were melted down as per MacArthur’s orders with only a few planes surviving in museums (mostly captured evaluation birds or recovered wrecks.)
| THE KIT |
This is a fairly new kit that was issued just last year. The kit comes in the typical grey Hasegawa plastic. There are 10 sprues of grey plastic parts, one clear sprue and one sprue of polycaps which are relatively flash free except for the props which needed some clean up.
| CONSTRUCTION |
I started with the cockpit first. It
is a typical 21st century Hasegawa cockpit made up of fourteen pieces
that makes a decent detailed cockpit but there is still some room for
improvement which I didn’t do. I studied photos from j-aircraft.com to get an
idea of what color they used (Japanese interior colors varied as much as their
exterior colors.) The instruction calls for a mix of Gunze
 Mitsubishi and
Nakajima Interior Colors which I did not have. I ended up using a mix of Medium
Green and US Interior Green which was close enough for mediocrity. Various
interior bits were highlighted with Citadel black, red and steel. To finish off
the cockpit, I added strips of Tamiya tape painted with silver to represent the
seatbelts.
Mitsubishi and
Nakajima Interior Colors which I did not have. I ended up using a mix of Medium
Green and US Interior Green which was close enough for mediocrity. Various
interior bits were highlighted with Citadel black, red and steel. To finish off
the cockpit, I added strips of Tamiya tape painted with silver to represent the
seatbelts.
The fuselage went together without a problem which is unusual for Hasegawa models as they tend to have a hitch that makes assembly of an otherwise easy build frustrating. The seams were filled with CA glue and Mr Surfacer, proved to be a bit more painful to deal with because the underside is a bare metal finish so it required the use of several finer grits of sandpaper.
I added the gun pods to the wings. These were the parts that had the worst fit and seams of the entire kit, but due to the small size these seams were dealt with quickly.
I added some detail to the landing gear with some 30 gauge wire to them to represent the brake lines.
Finally, I decided to spruce up the engine for a change. The engine was “super detailed” using 30 gauge wire to represent the ignition wires. I was really proud of what I did till I inserted the engine into the cowling and put the prop hub in which covered up most of my hard work. Drat.
| COLORS & MARKINGS |
Painting
 The cockpit and engine compartments
were stuffed with wet tissue paper and Tamiya tape prior to painting. The
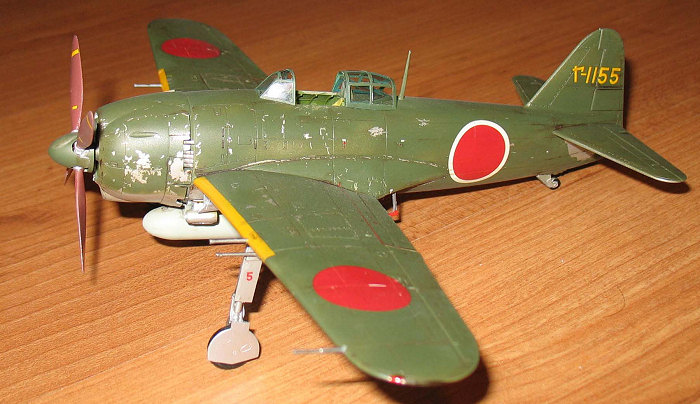
Shiden was a combination of Kawanishi Green and aluminum. For the aluminum
base, I sprayed a couple of thin coats of Tamiya TS-30 Old Silver Leaf all over
the model and various underside bits. It wasn’t mirror smooth as the surface of
a true NMF plane, but it was good enough for my purposes.
The cockpit and engine compartments
were stuffed with wet tissue paper and Tamiya tape prior to painting. The
Shiden was a combination of Kawanishi Green and aluminum. For the aluminum
base, I sprayed a couple of thin coats of Tamiya TS-30 Old Silver Leaf all over
the model and various underside bits. It wasn’t mirror smooth as the surface of
a true NMF plane, but it was good enough for my purposes.
I let the model sit for a week to allow the lacquer paint to dry. I used my time to work on other things, pretend to have a life and figure out what Kawanishi Green really was. I went on j-aircraft.com to see what the experts found and learned that Kawanishi Green was really close to FS34102. I did not have FS34102 and rushed to my favorite hobby store to find some. I ended up running around to various Toronto Area stores in a vain attempt to get FS34102. Turns out that the Italieri 1/35 PT boat had shown up a couple of weeks earlier and the paint scheme required the use of lots of FS34102. I managed to find one last bottle of Poly S FS34102.
Turns out the Poly S was my best choice. One of my complaints with all Testors Acrylics is that they don’t stick very well. However, it was perfect for what I wanted to do which was to do a chipped paint Japanese plane.
I masked off a few areas with 3M Blue tape (in particular the underside of the stabs) and then sprayed the FS34102. I didn’t care about leaving a consistent coat based on the photos I saw of late war Japanese planes. I let it sit for about an hour before I took some reduced tack 3M Blue (the tack or stickiness was reduced by rubbing it on the palm of my hand) and proceeded to remove paint. For once the weakness of Testors Acrylics worked to my benefit as the paint was removed while leaving the Tamiya Silver behind to produce the chipped paint effect.
For smaller chips, I took a sharp tooth pick and scratched off more paint. I didn’t try to over do it and stopped when I felt it was enough.
The canopy was masked off and the interior color was sprayed with Gunze Aotake and the exterior was painted with FS34102. I used Aotake based on a photo I saw in j-aircraft of a Shiden relic which had an interior green cockpit with what appears to be Aotake interior paint for the canopy frame.
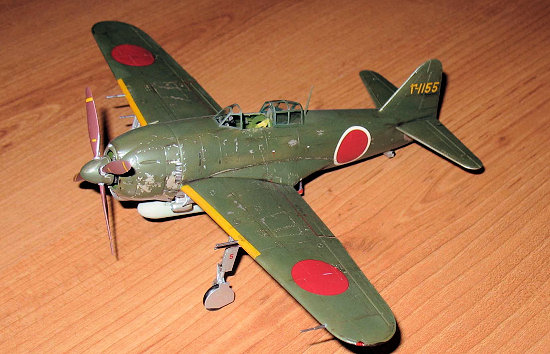 The orange yellow ID strips were
masked off and sprayed with Gunze H24 Orange Yellow.
The orange yellow ID strips were
masked off and sprayed with Gunze H24 Orange Yellow.
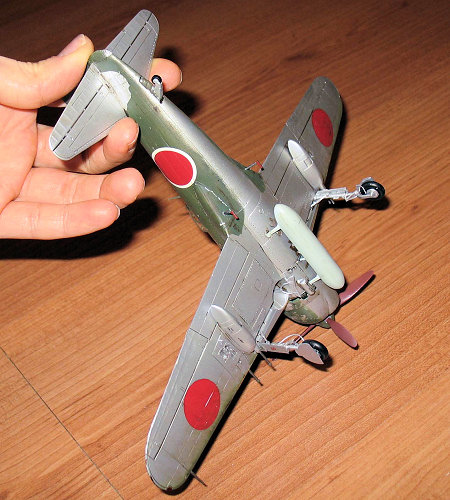
The underside fuel tank was supposed to be painted Mitsubishi grey, but I used Tamiya XF-12 IJN Naval Grey (apparently closer to Nakajima Grey) instead (close enough.)
The propeller blades were painted with Red Brown mixed with a few drops of black to represent the Tea Brown color.
Decals and Wash
When it was dry, I sprayed on Future for the gloss coat in preparation for the decals. I used the decals for the Yatabe Flying Group (one of three schemes provided with the kit) and there were no issues. However, I should note that these are typical Hase decals with ivory replacing white.
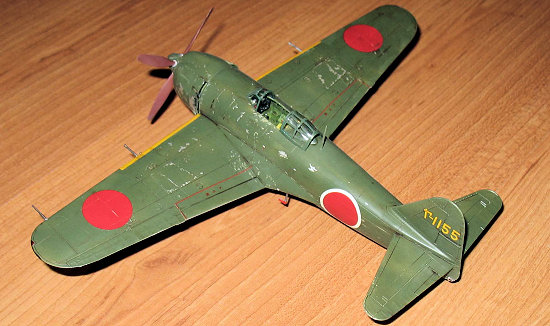
After the decals dried, I used my watercolor wash of black, raw umber and burnt sienna to highlight the panel lines and bring out the detail. When I removed most of the excess wash, I sprayed on Gunze Flat for the final coat.
| FINAL CONSTRUCTION |
The landing gear of the Shiden kit is
apparently as fiddly as the real thing. One would think that all one
needed to do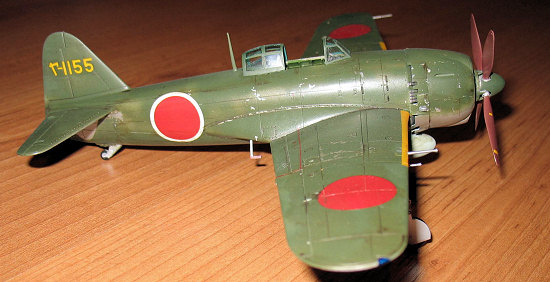 was put the damn
things in. I had to spend a 1/2 hour fooling around with the parts till
they finally went into place (and I don’t understand why that happened so I’ll
just put this down to my own stupidity.)
was put the damn
things in. I had to spend a 1/2 hour fooling around with the parts till
they finally went into place (and I don’t understand why that happened so I’ll
just put this down to my own stupidity.)
The gun barrels, props, prop hub, footsteps, landing gear, gun sight, canopy and pitot tube were added to the model. I added some detail by drilling out the 20mm cannon barrels. Just a note, it is easier to write than to actually do. I don’t know about anyone else, but I find that the small bits take quite a while to install out of proportion to their size.
The final touch was to brush paint the wingtip lights with silver then clear red and blue. Hasegawa gives the modeler the option of using clear plastic or painting them. For the tail light I cut away the grey plastic and replaced it with the clear piece. It does not fit very well and required a bit of trimming.
| CONCLUSIONS |
The Hasegawa N1K1-Ja was one of the easiest Hasegawa models I’ve ever built as it lacks the typical Hasegawa assembly surprise which makes an otherwise easy model a painful build. It makes a nice fun OOB model.
April 2007
Copyright ModelingMadness.com
If you would like your product reviewed fairly and fairly quickly, please contact the editor or see other details in the Note to Contributors.