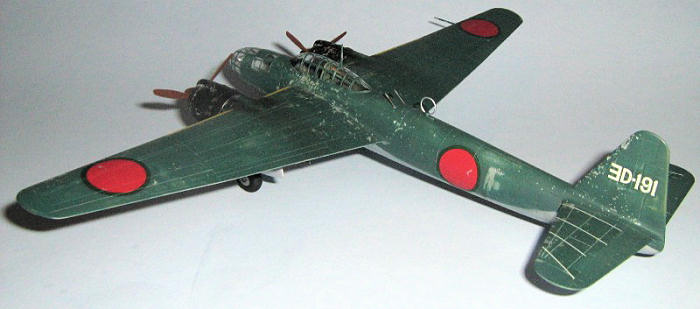
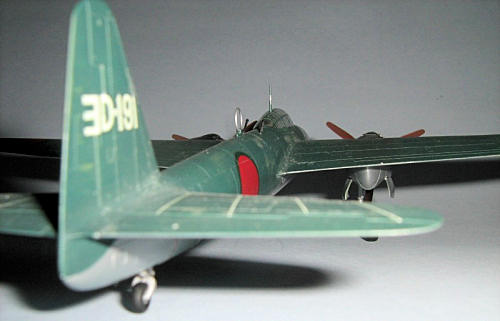
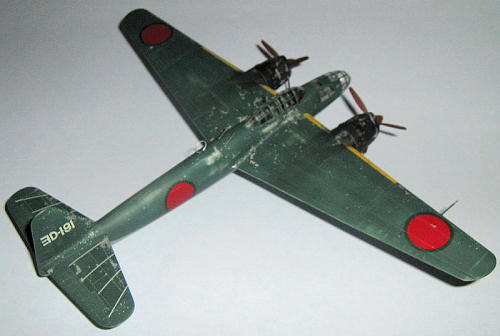
Hasegawa 1/72 P1Y1-S Ginga
“Frances” Type 11
| KIT #: | CP 101 (51261) |
| PRICE: | $ |
| DECALS: | Two options |
| REVIEWER: | Nathan Stevens |
| NOTES: |
| HISTORY |
Early in World War 2, the Japanese Navy wanted
a dive bomber with a top speed greater than the Zero fighter (A6M), a cruising
range greater than the existing type 1 bomber, and able to carry a ton of bombs,
delivering them horizontally or by dive bombing.
 These
desires exceeded the state of the art of aircraft production for the times, so
the Japanese Naval Air Technical section decided to go with the Kugisho Y-20,
already planned for and on the drawing boards of the Kugisho Co.
Completed in June 1942 the prototype Y-20 had a top speed of 556km/h and
a range of 5370km, which met Naval requirements.
With these favorable test results the “Ginga” (code named Francis by the
allies) was put into mass production as the Kugisho P1Y1 dive bomber.
These
desires exceeded the state of the art of aircraft production for the times, so
the Japanese Naval Air Technical section decided to go with the Kugisho Y-20,
already planned for and on the drawing boards of the Kugisho Co.
Completed in June 1942 the prototype Y-20 had a top speed of 556km/h and
a range of 5370km, which met Naval requirements.
With these favorable test results the “Ginga” (code named Francis by the
allies) was put into mass production as the Kugisho P1Y1 dive bomber.
Because of the high degree of engineering, very close tolerances were required during manufacturing. This, plus problems with the Homare engines, delayed production of the twin engined P1Y1 attack bomber. It was not until October 1944 that the Ginga began coming off production lines and a few were modified for night fighting by installing exhaust flash hiders and two 20mm cannons. These were mounted behind the cockpit and angled upwards about 30 degrees, to fire into the pursued aircraft. The Japanese Imperial Navy’s 302 squadron received these modified aircraft and were used successfully throughout the remainder of the conflict.
| THE KIT |
This is a fine example of the Hasegawa thought
process from a few years back: “Is there a kit of this aircraft available that’s
up to our standards? No.
Then make one!” The fully
engraved panel lines are fine and crisp, the surface is smooth and free of
defects,
 the
molding is virtually devoid of flash and there are ejector pin marks everywhere
you don’t want them, particularly the inner gear doors and gear legs.
Typical of mid-90’s Hasegawa.
the
molding is virtually devoid of flash and there are ejector pin marks everywhere
you don’t want them, particularly the inner gear doors and gear legs.
Typical of mid-90’s Hasegawa.
In the box are 7 sprues of shiny gray plastic,
2 clear, and one of 4 poly plugs to slide the prop shafts into during final
assembly. The clear sprues contain
a 1 piece canopy, a 2 piece nose assembly and the bulkhead behind the pilot
(meaning careful hand painting is sure to follow.)
The instructions are laid out in 8 clear
steps. You must use caution to make
sure any necessary holes in the fuselage are opened up prior to joining the
fuselage halves. I’m terrible about
this myself. Options are limited to
a DF loop antenna for one version and there a number of goodies to top off the
spare parts bin. Color callouts are
for Gunze Sangyo Aqueous and Mr. Color with semi-appropriate descriptions.
There are 2 decals choices, both in the uninspired IJN green over light gray scheme and both of the 2nd Squadron of the 302nd Naval Flying Group.
| CONSTRUCTION |
The cockpit consists of 10 parts: floor, pilots tub, 3 seats, 2 piece bulkhead,
radio panel, control column and instrument panel.
There’s no sidewall detail whatsoever but there is an included array of 6
decals for all the necessary buttons, gauges, and gizmos scattered throughout
the cockpit. I painted the whole
interior, wheel wells and inner gear doors in my version of “Nakajima cockpit
color”, this time it’s Model Master Italian Olive.
Perhaps, the wells the doors should have been unpainted aluminum.
Perhaps not. I don’t know so
I defaulted to what the instructions suggested.
The main wheel wells are separate pieces that
fit beautifully between the main wings.
The tail well is molded into each fuselage half but on this particular
version, the tail wheel didn’t retract so there’s no seeing inside anyway.
The wings all fit to the fuselage with a
minimum of fuss and very little filler was needed.
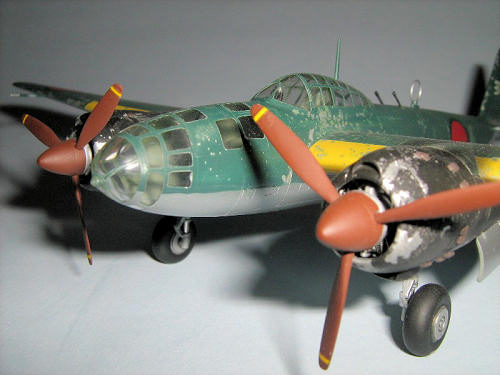
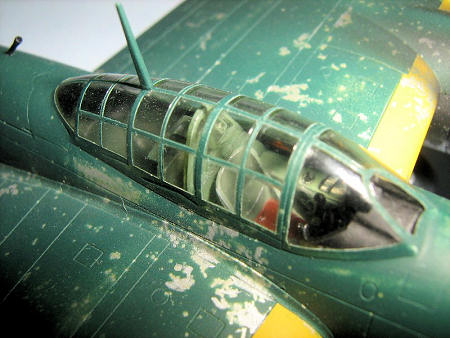
The nose glazing was a very different story.
This is the kit’s weak spot.
The two pieces fit together just fine and perfectly meet the mating edges of the
fuselage. The problem is they’re
far too wide. I had no desire to
file down the otherwise flawless clear parts so out came the filler.
The difference in width was such that I had to apply filler well below
the seam just to retain the graceful rounded shape of the aircraft’s cross
section. I’ll admit I did use a
touch of profanity to help get things in order here.
At this point the instructions suggest
assembling and installing the landing gear.
I saved that until after paint and everything worked out just fine.
The main gear is 3 pieces and fit is adequate.
The wheels are molded in half but they fit well enough that a little
sanding took care of the seam with no need for filler.
For whatever reason, the instructions suggest that now’s the time to cap off the bomb bay. Personally, I highly suggest fitting the clear parts, the bomb bay doors, and the tail well cover before adding any wings, as that’s where all the filling and sanding takes place. The bay doors were a tad too wide but a little careful sanding solves this with just a touch of filler being required around the seam. The tail well cover is undersize so a little shimming is suggested prior to applying the putty.
| COLORS & MARKINGS |
Paint started with a very light coat light
green I had left in my airbrush from a different project.
This was my primer for the Alclad which followed.
Through a lot of experimenting I’ve found that Alclad requires very
little base to stick to but has relatively poor adhesion to raw plastic.
The color of the base matters little, if it shows through then the Alclad
isn’t on thick enough anyway. One
light coat of enamel makes a world of difference and further coats just end up
adding a texture which detracts from the final look anyway.
The undersides of the control surfaces were
sprayed in MM IJN gray and masked off then the Alclad Aluminum went down over
the entire surface as well as the gear legs, wheel hubs and other remaining bits
and pieces. Once dry, I masked off
the lower surfaces to work on the yellow ID markings.
I dusted the leading
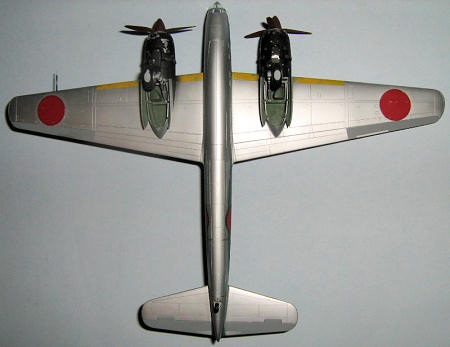 edges
with water through my airbrush and sprinkled on the salt.
I used a wet toothpick to move the salt around as I saw fit and then
sprayed several coats of MM deep yellow.
When that was dry, I chipped away the salt, masked off the yellow leading
edges and rolled up some silly putty for the demarcation line in preparation for
the green uppers. I used the same
salting process on the uppers but I didn’t get it thick enough.
To make the salt chipping really look its best, you need to ‘chunk up’
the salt more than one layer thick.
If you don’t, you end up with what I had.
Little silver circles tightly grouped together.
The paint can get in between the salt grains and it ends up looking
ridiculous. Anyway, I sprayed MM
IJN green in light, uneven coats and kept it as thin as possible.
The Japanese weren’t wasting a lot of time on painting at this stage of
the war so bad looks best. The
cowlings received the same treatment, with even heavier chipping and sprayed
with straight flat black.
edges
with water through my airbrush and sprinkled on the salt.
I used a wet toothpick to move the salt around as I saw fit and then
sprayed several coats of MM deep yellow.
When that was dry, I chipped away the salt, masked off the yellow leading
edges and rolled up some silly putty for the demarcation line in preparation for
the green uppers. I used the same
salting process on the uppers but I didn’t get it thick enough.
To make the salt chipping really look its best, you need to ‘chunk up’
the salt more than one layer thick.
If you don’t, you end up with what I had.
Little silver circles tightly grouped together.
The paint can get in between the salt grains and it ends up looking
ridiculous. Anyway, I sprayed MM
IJN green in light, uneven coats and kept it as thin as possible.
The Japanese weren’t wasting a lot of time on painting at this stage of
the war so bad looks best. The
cowlings received the same treatment, with even heavier chipping and sprayed
with straight flat black.
Here I took my chances again.
The Model Master IJN green is pretty glossy by itself so I decided to
skip the coat of Future. The decals
were cracked and all but ruined upon opening the box.
A couple of coats of Testors decal film in the rattle can managed to save
them though it involved a lot more trimming around the markings.
The decals settled in wonderfully against the raw paint and I even
managed to get the white stripes on the tail wings to set down without incident.
Detailing involved spraying the props in old
Testors brown, the tires in a dirty black and then thinning down the tire mix to
spray the exhaust stains lightly around the cowling.
| FINAL CONSTRUCTION |
| CONCLUSIONS |
This is a fine example of why Hasegawa has the
lead of the industry. It has it’s
shortcomings to be sure but they’re easily overcome by anyone with at least some
experience in putty and sanding.
Highly recommended to anyone willing to spend their hard earned cash!
| REFERENCES |
Kit Instructions
June 2011
If you would like your product reviewed fairly and fairly quickly, please contact the editor or see other details in the Note to Contributors.