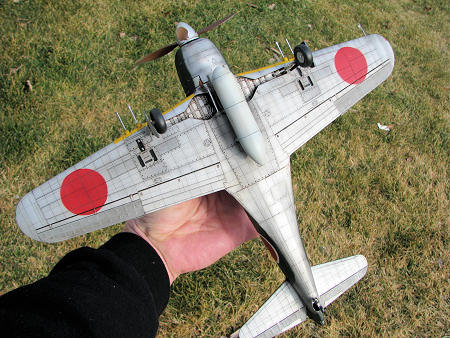
Tomy 1/32 N1K2 Shiden-Kai
“George”
|
KIT #: |
? |
|
PRICE: |
? |
|
DECALS: |
Yes |
|
REVIEWER: |
Scott Weir |
|
NOTES: |
Last released by Doyushu |
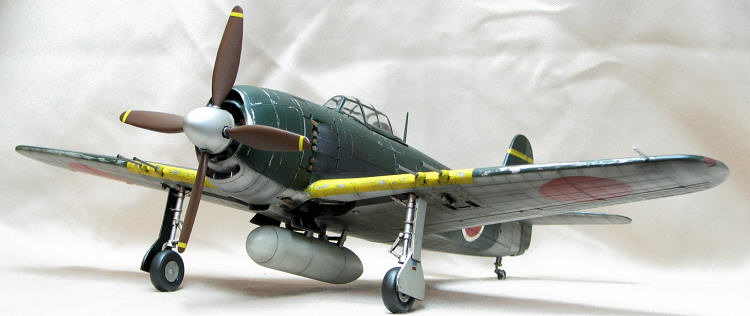
Arguably the best fighter fielded by the Imperial
Japanese Navy during WWII. Beyond that I will digress to the history of the
N1K2 previously posted here at MM.
This kit was released by the toy company Tomy some 40 odd years ago. Also
released along with the George were a KI-84 Hayate and an A6M2 Zero. They
have since been resurrected by Swallow a little over 20 years ago and more
recently in the past few years by Doyushu. Being the products of a toy
company in the 70’s these kits were engineered to be toys as much as they
were models. The prominent toy like feature was an electric motor and
internal AA battery pack to power the prop. In turn the battery housing
pushes the cockpit floor up considerably as to where the pilot would
probably need to be no more than 3.5 scale feet tall to function in this
confined space. The other toyesque feature is the rather wide and deep
tracks for the sliding canopy which I didn’t really notice until the build
was almost complete. To me these were the biggest issues this model
possessed.
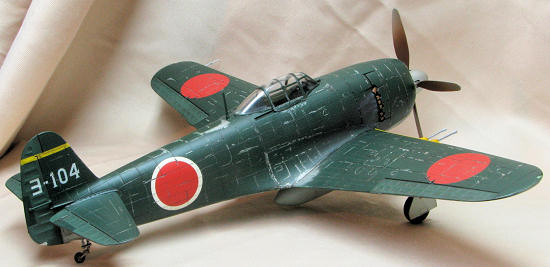 For the finer attributes one has to
take in to consideration that this kit was tooled long ago in the days when
raised panel lines, rivets and details were pretty much the industry norm.
For the time, these three stable mates were seemingly light years ahead of a
lot of what was being offered back then. The external appointments are
really quite well done. I’ve seen some kits of late where the scribing isn’t
as good as this golden oldie. I’m not sure how exactly it scales out but it
looks like a George and is the only game in town for an injection N1K2 in
1/32nd that I’m aware of. The
Ki-84 has since been eclipsed by the Hasegawa and the A6M2 by Tamiya. Revell
released a superb N1K1 in this scale in the 70’s only to have the tooling
lost at sea along with some other classics. The only other large scale
offering I know of is Bandai’s 1/24th
N1K2, another toy company.
For the finer attributes one has to
take in to consideration that this kit was tooled long ago in the days when
raised panel lines, rivets and details were pretty much the industry norm.
For the time, these three stable mates were seemingly light years ahead of a
lot of what was being offered back then. The external appointments are
really quite well done. I’ve seen some kits of late where the scribing isn’t
as good as this golden oldie. I’m not sure how exactly it scales out but it
looks like a George and is the only game in town for an injection N1K2 in
1/32nd that I’m aware of. The
Ki-84 has since been eclipsed by the Hasegawa and the A6M2 by Tamiya. Revell
released a superb N1K1 in this scale in the 70’s only to have the tooling
lost at sea along with some other classics. The only other large scale
offering I know of is Bandai’s 1/24th
N1K2, another toy company.
This kit comes molded in a green styrene with
instructions and a very nice color chart all printed in Japanese. The parts
count is fairly low due in part to the sparse cockpit and engine. There are
some extra parts that appear to be for other kits. It comes with another
longer set of landing gear that looks like they may be for an N1K1 along
with two styles of tail wheels and a smaller prop that appears like it might
fit a Ki-84. The instructions give plans to use these different parts. One
of the main reasons for the lowering of the wing on the -2 was to alleviate
the problems that were incurred with the -1’s rather lengthy landing gear.
Once I figured out which ones to use it was time to get on with the build.
First I start with the engine and cockpit subassemblies. The engine itself
is comprised of two main pieces. The engine assembly was painted aluminum
and given a black wash. The cockpit is as equally void of detail as is the
engine so, if you’re not going to scratch bu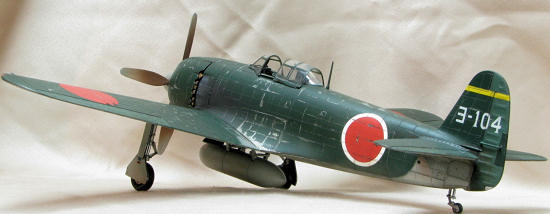 ild a new cockpit and super
detail the engine getting through these is quite simple.
ild a new cockpit and super
detail the engine getting through these is quite simple.
The airframe is where most of the work is needed.
Just about every seam on the fuselage and wings require sanding and or
filler. A lot of the recessed detail gets sandblasted away on the fuselage
trying to get the two halves to blend together. A nice thing about engraved
details is that it is much easier to reestablish then raised detail if lost.
After the cowling ring was glued down it needs to be sanded and filed to get
it to conform to the shape of the front end. There is a large rectangular
hole {opening for the power switch} on the bottom just aft where the fuel
tank hangs that gets filled along with another one in the bottom of the oil
cooler. When all the work in the body shop is complete it’s time to head for
the paint barn.
In lieu of writing
paragraphs to describe the paint process I’ll list each step instead. Do note
that most of the paint and clear coats were applied fairly thin as to not bury
the surface details.
1.
Primer the entire kit.
2.
Covered
the aircraft with decanted Plasticote Aluminum.
3.
Pre-shaded panel lines.
4.
Lightly painted over pre-shaded undersurfaces with aluminum to desired
effect.
5.
Clear c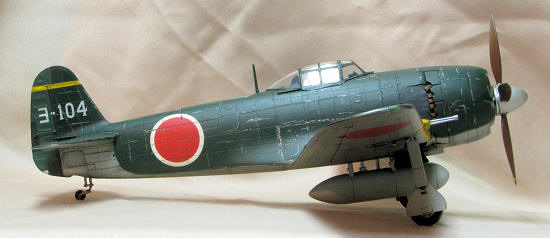 oated to protect aluminum undersurface in the paint chipping process.
6.
Painted
upper surface with ‘’Floquil’’ Imperial Japanese Navy Green. Painted the
fuel tank ‘’Floquil’’ Imperial Japanese Navy Gray.
7.
Clear coated.
8.
Masked
and painted leading edge i.d. and tail bands. Recommend using a low tack
tape as not to peel the paint from a very slick glossed metallic surface.
9.
Gently chipped away upper green shade to desired weathered effect.
10.
Clear coated
11.
Applied
decals and Solvaset.
12.
Chipped up decals.
13.
Sealed
up decals with clearcoat.
14.
Raw Umber oil paint wash over all external surfaces.
15.
Dull coated.
16.
Sprayed on exhaust stains. Oil stains are hand painted with a mix of Raw
Umber and Black oil paints.
Light at the end of the tunnel! Most of what’s left is attaching the landing
gear, gun barrels, fuel tank, antenna mast, canopy and pitot tube.
 This was a fun build of a classic kit you
just don’t see every day. Japanese aircraft don’t seem to have the popularity of
their German or American counterparts After doing several Wunder kits this old
gal was just what was needed to get back into and brush off some basic modeling
skills. I’m sure a new super-kit may be in the pipeline that will one day
eclipse this George too someday. But as I mentioned before it’s still currently
the only game in town for an injection 1/32nd
N1K2 Shiden-Kai. Recommended!!!!
This was a fun build of a classic kit you
just don’t see every day. Japanese aircraft don’t seem to have the popularity of
their German or American counterparts After doing several Wunder kits this old
gal was just what was needed to get back into and brush off some basic modeling
skills. I’m sure a new super-kit may be in the pipeline that will one day
eclipse this George too someday. But as I mentioned before it’s still currently
the only game in town for an injection 1/32nd
N1K2 Shiden-Kai. Recommended!!!!
Kit sample courtesy of the friend and brother who introduced me to
the airbrush 30 years ago.
Richard L. Shank 1957-2011
Scott Weir
April 2012
Copyright ModelingMadness.com. All rights reserved. No reproduction in part or in whole without express permission from the editor.
If you would like your product reviewed fairly and fairly quickly, please contact the editor or see other details in the
Note to
Contributors.
Back to the Main Page
Back to the Review Index Page 2024